


A group that shows Baseline Work for tasks in descending order, for example, would list tasks in order from the greatest number of work hours required to the least number required. Other settings you can specify for groups control the format of the group's appearance, such as its font and font color.
Follow these steps to create a custom group:
Choose View→Group→More Groups.
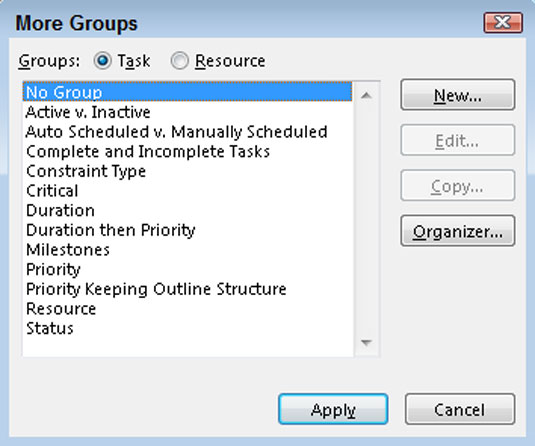
The More Groups dialog box appears.
Select either Task or Resource to specify in which list of groups you want to place the new group.
Click the New button.
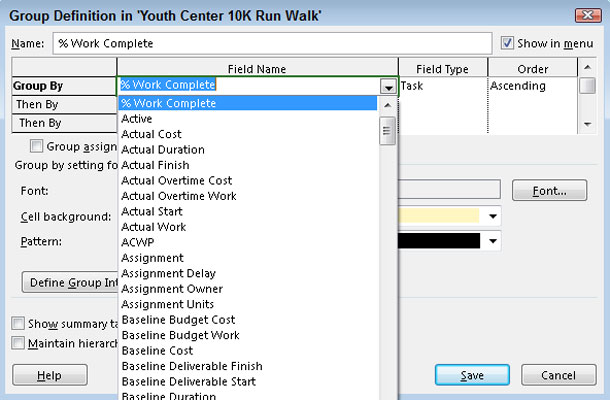
The Group Definition dialog box appears.
In the Name field, type a name for the group.
Click the first line of the Field Name column, click the down arrow that appears to display the list of choices, and then click a field name to choose it.
Repeat for the Field Type and Order columns.
Note that if you want the Field Type option of grouping by assignment rather than by resource or task, you must first select the Group Assignments, Not Tasks check box to make that field available to you. Otherwise, the field type of Task or Resource appears by default.
If you want to add another sorting criteria, click a Then By row and make choices for the Field Name, Field Type, and Order columns.
If you want the new group to be shown in the list when you click the Group box on the Formatting toolbar, select the Show in Menu check box.
Depending on the field name you’ve chosen, you can make settings for the font, cell background, and pattern to format the group.
If you want to define intervals in which to organize the groups, click the Define Group Intervals button.
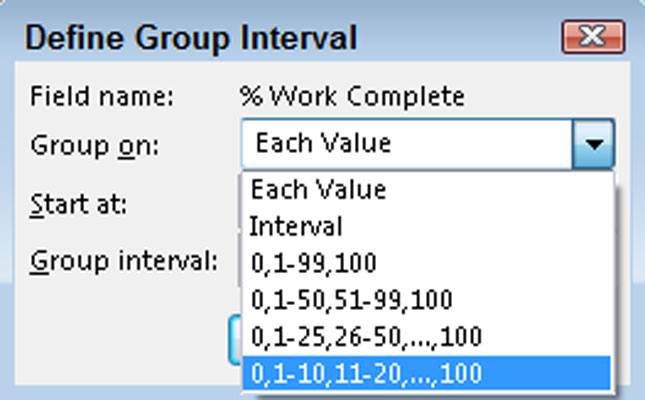
This step displays the Define Group Interval dialog box. Use these settings to specify a starting time and an interval. For example, if the Group By criterion is % Work Complete, and you select Interval as the Group On setting and then enter a group interval of 10.00, groupings are in 10 percent intervals (those between 0 and 10 percent in one grouping and those between 11 to 20 percent in another, and so on).
Click the Save button to save the new group and then click Apply in the More Groups dialog box to apply the group to your plan.
If you want to make changes to an existing predefined group, choose View→Group By→More Groups. In the More Groups dialog box, make sure that the group is selected and then click the Edit button. The Group Definition dialog box then appears so that you can edit all those settings for an existing group.
