
Swipe from right to left in the row of thumbnail images to view all 23 filters, from Clarendon to Nashville. (Normal is the default image, without a filter.) Tap a filter thumbnail image, and the photo in the viewer changes to show you the photo with that filter applied.
To return to the original photo, tap the Normal thumbnail. To continue processing the photo with a filter, either tap Edit at the bottom-right corner of the screen to edit your photo further, or tap Next in the upper-right corner of the screen to add a description to your photo.
What happens when a filter is not quite to your liking and you'd like to tweak it? You can change the intensity of any filter (except Normal) by tapping the filter thumbnail image again. A slider appears; move it to the left and right to change the intensity. The photo in the viewer changes to reflect the selected intensity. The default intensity for each filter is 100. When you've set the intensity to just the right amount, tap Done. If you're still not satisfied and want to return the photo to its original intensity, tap Cancel.Keep in mind that any filter settings will revert to the default after you leave this screen.
If you want to see how the photo with a filter compares to the original photo, tap and hold down on the viewer to view the original photo. Release your finger to see the photo with the applied filter.
Changing the order of filters
Too many filters or your favorite ones are too far down in the list? No problem. Swipe to the end of the filter list, and you’ll see a Manage icon. Tap the icon to open the Manage Filters screen, where you can perform three tasks: change the order of filters in the row, add filters, and disable filters.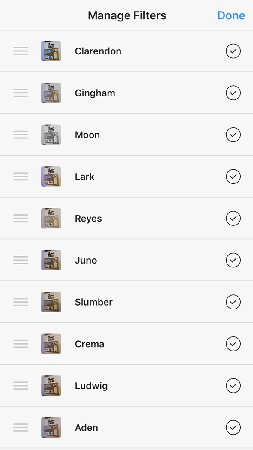 Swipe up and down in the Manage Filters screen to view the entire list of filters.
The filters on the Manage Filters screen appear in the same order as they do in the Filter screen. You can change the order of filters as follows:
- Tap and hold down on a filter name in the list. The filter name gets larger after you hold down on the name for about a second.
- Move the name in the list. As you move the filter name, other filter names helpfully move out of the way so you can see where your selected filter will appear in the list.
- When the filter is where you want it, release your finger. The filter name appears in your desired location in the list.
Adding an Instagram filter
When you swipe up and down in the list of filters on the Manage Filters screen, you’ll see several filter names that appear dimmed. These filters are disabled, but it’s easy to add any of them to the Filter screen.Simply tap a dimmed filter name. The name turns black, which means the filter is active, and you see a check mark to the right of your newly activated filter name. Tap Done, and you return to the Filter screen, where you see your new filter in the row of filters.
Disabling an Instagram filter
If you decide that you don’t want to include one or more filters in the Filter screen, you can disable it by tapping the filter name in the list on the Manage Filters screen. The check mark to the right of the name disappears and the filter name is gray. (To add it back, just tap the disabled filter name again.)When you're finished, tap Done.