


Microsoft Outlook is one of the most popular e-mail programs. These steps show you how to import your Microsoft Outlook contacts list into LinkedIn. To do so, follow these steps:
On the main Outlook screen, click Contacts to bring up your contacts list.

Your contact list will appear.
Choose File->Import and Export.
The Import and Export window appears.
Select the Export to a File option, click the Next button, and then select a file type in the Export to a File window.
You see a list of options, including Comma Separated Values (DOS), Comma Separated Values (Windows), Microsoft Access, and so on.
Select the Comma Separated Values ( Windows) option and then click Next.
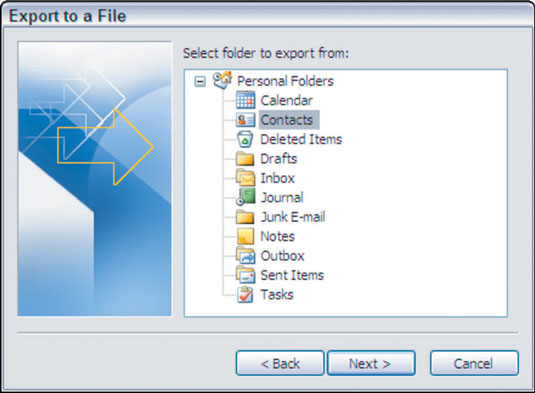
The Export to a File window appears. Here, you’re asked to pick a folder that you want to export. Look for the contacts folder, which contains your list of contacts through Microsoft Outlook.
Select the contacts folder to export and then click Next.
If you created categories within your Outlook contacts list, you can select one of those subcategories under the main contacts folder and export just those contacts.
In the next Export to a File window that appears, enter a suitable filename, click the Browse button to locate a folder for storing the new (exported) file, and then click Next.
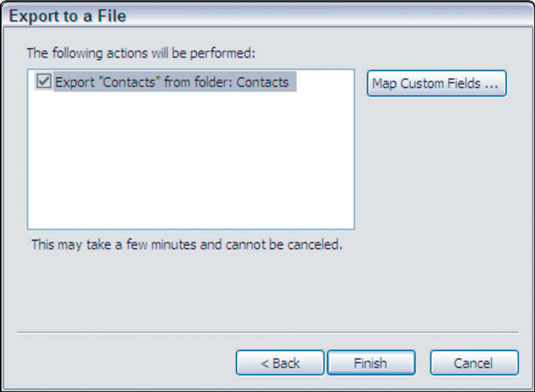
In the Export to a File window, Outlook displays the action it’s about to take.
Note the filename and location of your exported contacts file because you need this information in a few steps. Pick a memorable name and save the file to a commonly used folder on your computer.
Click Finish to start the export of your Outlook contacts file.
Depending on the size of your contacts list, the export process might take a few minutes. When the export is complete, the status indicator disappears, and you’re ready to go to the next step.
Using your web browser, go to LinkedIn and log in to your account.
On the top of the page, click the Network link, and then click the Add Connections link that appears from the drop-down list.
On the new page that appears, click the Any Mail button. When that page appears, look for the More Ways to Connect header and click the Upload Contacts File link.
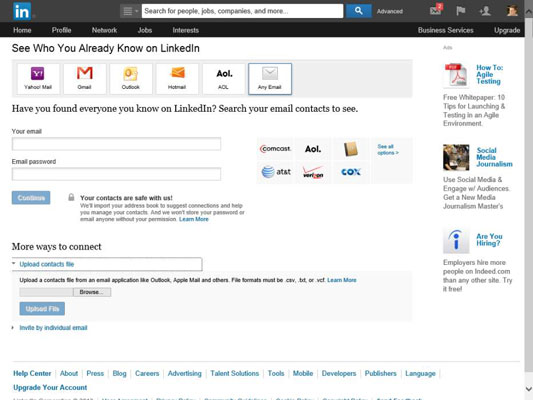
The upload contacts instructions appears onscreen.
Click the Browse button to locate the contacts file you just exported from Microsoft Outlook. When you locate that file, click the Upload File button to start the process.
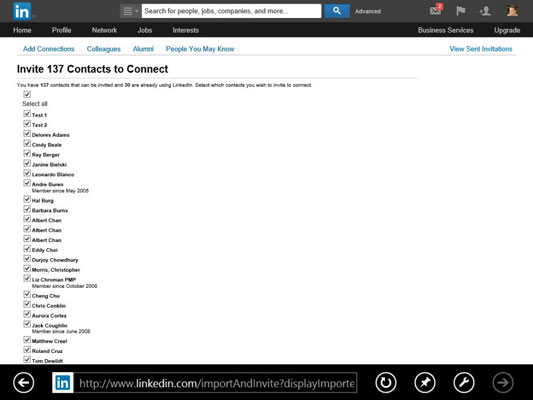
After LinkedIn reads your entire contacts list, it displays the names of contacts from your list; and then, below those names where the person is already on LinkedIn, it shows how long they’ve been a member of LinkedIn.
When LinkedIn imports the list, it usually drops the middle name from each person’s full name when creating the imported contacts. You might need to edit your contacts to add the appropriate information.
Review the names, deselect any check box for someone you don't wish to invite, and then click the Send Invitations button to complete the process.
If the names you see on the screen aren’t correct (perhaps LinkedIn did not read the file properly and everyone’s first and last names are reversed, for example), you can click Cancel to abandon the process.
