


Using the wi-fi transfer feature on your Nikon D5300, you have several options for viewing, capturing and transferring photos using whichever device you choose. Here are some ways you can use this feature.
How to view photos on the smart device
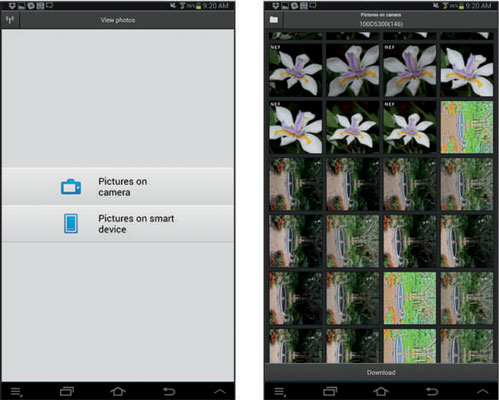
After connecting your camera with the device and firing up the WMU app, tap View Photos on the smart device. Tap the option labeled Pictures on Camera. After a few seconds, thumbnails of your images appear, and you can view your pictures using the same techniques you use to view photos that you take with your smart device.
For example, you usually tap a thumbnail to display it in full-screen view and then swipe across the screen from left to right to view the next image.
How to transfer photos to the device
While you're viewing your photos on the device, you can use options built into the WMU app to tag photos for transfer to the device. You can also set the size of the file you want to download. But an easier option is to use a camera feature that enables you to tag all photos you want to transfer.
To try it out, open the Playback menu and choose Select to Send to Smart Device, and press OK. You see thumbnails of your images.

To tag a photo for transfer, press the Zoom Out button. Press OK after choosing all your photos. Now when you select the option on the smart device that transfers photos, your tagged files are automatically downloaded.
During playback mode, you can tag an individual photo for transfer by pressing the i button, which displays the mini-menu. Select the Select to Send to Smart Device/Deselect option to add the tag. (Choosing the option once adds the transfer tag; choosing it again removes the tag.)
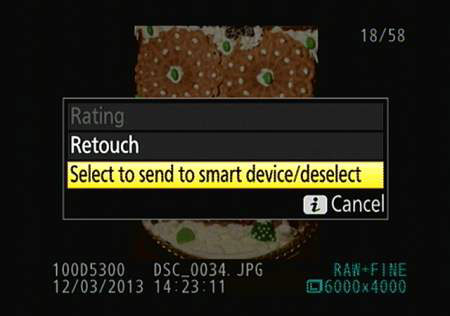
If you shot the picture in the Raw (NEF) format, it is automatically converted to the JPEG format during the transfer process so that it's ready for online sharing.
How to take pictures via the smart device
To use your smart device as a remote shutter release, connect the devices, launch the WMU app, and then tap the Take Photos button. The camera automatically shifts to Live View mode, and the live preview appears on the smart device screen, along with some shooting data, such as the shutter speed and f-stop.
A focus box appears on the preview; tap your subject to place the focus box over it and set focus. (The exact focusing procedure depends on the current Live View autofocusing settings.) The focus box turns green when focus is achieved.
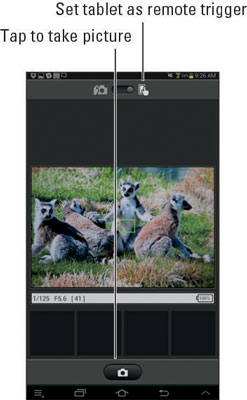
Make sure that the option at the top of the screen is set to the icon that shows a finger on the tablet; this tells the app that you want to use the tablet to trigger the shutter. Then tap the camera icon at the bottom of the screen to trigger the shutter release.
Through the app options, you can specify whether you want the picture to be automatically downloaded after it's captured. You also can delay the shutter release by enabling the app's self-timer option.
Again, you must set all picture options before connecting the camera to the device; you can't change settings after the two devices are paired. Neither can you record movies this way; this function is for still photos only.
