


For most situations, this approach works great, resulting in the right settings for the light that's striking your subject when you capture the image. But on occasion, you may want to lock in a certain combination of exposure settings. For example, perhaps you want your subject to appear at the far edge of the frame. If you were to use the normal shooting technique, you would place the subject under a focus point, press the shutter button halfway to lock focus and set the initial exposure, and then reframe to your desired composition to take the shot. The problem is that exposure is then recalculated based on the new framing, which can leave your subject under‐ or overexposed.
The easiest way to get around this issue is to switch to M (manual exposure) mode and select the exposure settings that work best for your subject, regardless of composition. But if you prefer to use autoexposure, you can use AE Lock (autoexposure lock), which prevents the camera from adjusting exposure when you reframe your shot. To put it another way, you can interrupt the normal continuous exposure adjustment at any point before you take the picture. This option is available only for the P, Tv, and Av exposure modes.
To use AE Lock successfully, you need to know that the camera establishes and locks exposure differently depending on the metering mode, the focusing mode (automatic or manual), and on an autofocusing setting called AF Point Selection. Here's the scoop:
- Evaluative metering and automatic AF Point Selection: Exposure is based on the focusing point that achieved focus.
- Evaluative metering and manual AF Point Selection: Exposure is locked on the autofocus point you select.
- All other metering modes: Exposure is based on the center autofocus point, regardless of the AF Point Selection mode.
- Manual focusing: Exposure is based on the center autofocus point.
If you can keep those details in mind, using AE Lock is easy. After framing your shot according to the guidelines just presented, press and hold the shutter button halfway to initiate exposure metering and autofocusing. Then, keeping the shutter button pressed halfway, press the AE Lock button. Exposure is now locked and remains locked for 4 seconds, even if you release the AE Lock button. Reframe to your desired composition and then press the shutter button the rest of the way to take the picture.
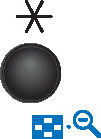
To remind you that AE Lock is in force, the camera displays an asterisk at the left end of the viewfinder or, in Live View mode, in the lower‐left corner of the display.
Note: If your goal is to use the same exposure settings for multiple shots, you must keep the AE Lock button pressed during the entire series of pictures. Every time you let up on the button and press it again, you lock exposure anew based on the light that's in the frame. (Really, switching to manual exposure is much easier in this situation.)


