


For example, consider the case of Mother Goose Enterprises with its different companies: Jack Sprat Diet Centers; Jack and Jill Trauma Center;, Mother Hubbard Dog Goodies; Rub-a-Dub-Dub Hot Tubs and Spas; Georgie Porgie Pudding Pies; Hickory, Dickory, Dock Clock Repair; Little Bo Peep Pet Detectives; Simple Simon Pie Shoppes; and Jack Be Nimble Candlesticks. To keep track of the annual sales for all these companies, you could create an Excel workbook containing a worksheet for each of the nine different companies.
By keeping the sales figures for each company in a different sheet of the same Excel workbook, you gain all the following benefits:
- You can enter the stuff that’s needed in all the sales worksheets (if you select those sheet tabs) just by typing it once into the first worksheet.
- In order to help you build the worksheet for the first company’s sales, you can attach macros to the current workbook so that they are readily available when you create the worksheets for the other companies. (A macro is a sequence of frequently performed, repetitive tasks and calculations that you record for easy playback.)
- You can quickly compare the sales of one company with the sales of another.
- You can print all the sales information for each company as a single report in one printing operation.
- You can easily create charts that compare certain sales data from different worksheets.
- You can easily set up a summary worksheet with formulas that total the quarterly and annual sales for all nine companies.
Working with new Excel sheets in a workbook
Each blank Excel workbook that you open contains a single worksheet given the prosaic name, Sheet1. To add more sheets to your workbook, you simply click the New Sheet button on the Status bar (the one with plus sign in a circle). Each worksheet you add with the New Sheet command button is assigned a generic Sheet name with the next available number appended to it, so if you click this button twice in a new workbook containing only Sheet1, Excel adds Sheet2 and Sheet3. These worksheet names appear on tabs at the bottom of the Workbook window.To go from one Excel worksheet to another, you simply click the tab that contains the name of the sheet you want to see. Excel then brings that worksheet to the top of the stack, displaying its information in the current Workbook window. You can always tell which worksheet is current because its name is in bold type on the tab and its tab appears as an extension of the current worksheet with a bold line appearing along the bottom edge.
The only problem with moving to a new Excel sheet by clicking its sheet tab occurs when you add so many worksheets to a workbook that not all the sheet tabs are visible at any one time, and the sheet tab you want to click is not visible in the workbook indicated on the Status bar by an ellipsis (three periods in a row) that appears immediately after the last visible sheet tab.
To deal with the problem of not having all the sheet tabs visible, Excel provides two tab scrolling buttons on the Status bar before the first sheet tab that you can use to bring new sheet tabs into view:
- Click the Next tab scroll button (with the triangle pointing right) to bring the next unseen tab of the sheet on the right into view. Hold down the Shift key while you click this button to scroll several tabs at a time. Hold down the Ctrl key while you click this button to bring the last group of sheets, including the last sheet tab, into view.
- Click the Previous tab scroll button (with the triangle pointing left) to bring the next unseen tab of the sheet on the left into view. Hold down the Shift key while you click this button to scroll several tabs at a time. Hold down the Ctrl key when you click this button to bring the first group of sheet tabs, including the very first tab, into view.
- Right-click either tab scroll button to open the Activate dialog box showing a list of all the worksheets. To activate a worksheet in this list, select it, followed by OK.
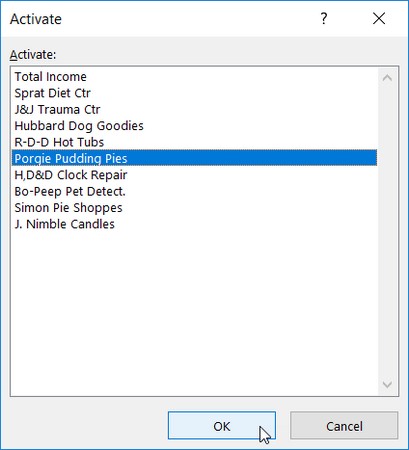 Right-click a tab scroll button to display the Activate dialog box with a list of all the worksheets in your workbook.
Just don’t forget that scrolling the sheet tab into view is not the same thing as selecting it: You still need to click the tab for the desired sheet to bring it to the front of the stack (or select it in the Activate dialog box).
To make it easier to find the sheet tab you want to select without having to do an inordinate amount of tab scrolling, drag the tab split bar (the three vertical dots that immediately follow the New Sheet button) to the right. Doing this reveals more sheet tabs on the Status bar, consequently making the horizontal scroll bar shorter. If you don’t care at all about using the horizontal scroll bar, you can maximize the number of sheet tabs in view by actually getting rid of this scroll bar. To do this, drag the tab split bar to the right until it’s smack up against the vertical split bar.
When you want to restore the horizontal scroll bar to its normal length, you can either manually drag the tab split bar to the left or simply double-click it.Going from one Excel sheet to another using the keyboard
You can forget all about the tab scrolling buttons and sheet tabs and just go back and forth through the sheets in a workbook with your keyboard. To move to the next worksheet in a workbook, press Ctrl+PgDn. To move to the previous worksheet in a workbook, press Ctrl+PgUp. The nice thing about using the keyboard shortcuts Ctrl+PgDn and Ctrl+PgUp is that they work whether or not the next or previous sheet tab is displayed in the Workbook window!Editing Excel sheets en masse
Each time you click a sheet tab, you select that worksheet and make it active, enabling you to make whatever changes are necessary to its cells. You may encounter times, however, when you want to select bunches of worksheets so that you can make the same editing changes to all of them simultaneously. When you select multiple worksheets, any editing change that you make to the current worksheet — such as entering information in cells or deleting stuff from them — affects the same cells in all the selected sheets in exactly the same way.Suppose you need to set up a new workbook with three worksheets that contain the names of the months across row 3 beginning in column B. Prior to entering January in cell B3 and using the AutoFill handle to fill in the 11 months across row 3, you select all three worksheets (Sheet1, Sheet2, and Sheet3, for argument’s sake). When you enter the names of the months in the third row of the first sheet, Excel will insert the names of the months in row 3 of all three selected worksheets. (Pretty slick, huh?)
Likewise, suppose you have another workbook in which you need to get rid of Sheet2 and Sheet3. Instead of clicking Sheet2, clicking Home → Delete → Delete Sheet on the Ribbon or pressing Alt+HDS, and then clicking Sheet3 and repeating the Delete Sheet command, select both worksheets and then zap them out of existence in one fell swoop by clicking Home → Delete → Delete Sheet on the Ribbon or pressing Alt+HDS.
To select a bunch of worksheets in an Excel workbook, you have the following choices:
- To select a group of neighboring worksheets, click the first sheet tab and then scroll the sheet tabs until you see the tab of the last worksheet you want to select. Hold the Shift key while you click the last sheet tab to select all the tabs in between — the old Shift-click method applied to worksheet tabs.
- To select a group of non-neighboring worksheets, click the first sheet tab and then hold down the Ctrl key while you click the tabs of the other sheets you want to select.
- To select all the sheets in the workbook, right-click the tab of the worksheet that you want active and choose Select All Sheets from the shortcut menu that appears.
To deselect the group of worksheets when you finish your group editing, you simply click a nonselected (that is, grayed out) worksheet tab. You can also deselect all the selected worksheets other than the one you want active by right-clicking the tab of the sheet you want displayed in the Workbook window and then clicking Ungroup Sheets on its shortcut menu.
