


To be able to omit the filename from the custom functions that you create in Excel 2013 when you enter them directly into a cell, you need to save the workbook file that contains them as a special add-in file.
The only limitation to the user-defined functions that you save as part of a regular workbook file or the Personal Macro Workbook file is that when you enter them directly into a cell (without the use of the Insert Function dialog box), you must preface their function names with their filenames.
To convert a workbook containing the user-defined functions that you want to be able to enter into worksheets without their filenames, follow these steps:
Click the Unhide button on the View tab and then selecting PERSONAL followed by OK.
This action unhides the PERSONAL workbook in which you’ve saved your user-defined functions in Excel.
Press Alt+F11 or click the Visual Basic command button on the Developer tab or press Alt+LV.
This action opens the Visual Basic Editor window with the workbook file containing the user-defined functions selected in the Project Explorer window. Now you want to set up protection for this workbook so that no one but you can modify its contents.
Choose Tools→VBAProject Properties from the Visual Basic Editor’s menu bar.
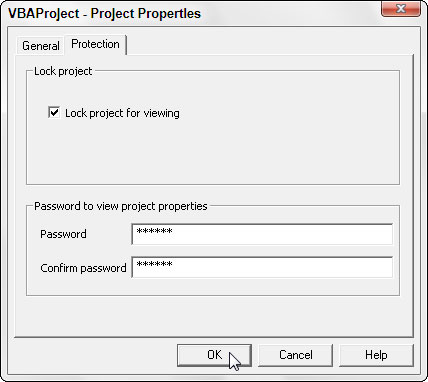
This action opens the VBAProject — Project Properties dialog box with a General and a Protection tab.
Click the Protection tab and then select the Lock Project for Viewing check box.
Putting a check mark in this check box prevents other users from viewing the custom functions so that they can’t make any changes to them. Next, you add a password that prevents them from removing the view protection status.
Click the Password text box, enter the password there, and then click the Confirm Password text box and re-enter the password exactly as you entered it in the text box above before you click OK.
Now you’re ready to return to the worksheet where you need to add a title and description for the new add-in file.
Click the View Microsoft Excel button at the beginning of the Standard toolbar.
This action returns you to the worksheet in Excel. Before saving the workbook as an add-in, you should add a title for the user-defined functions that it contains. (This information then appears in the Add-Ins dialog box whenever you select the add-in file.)
Choose File→Info.
Excel 2013 displays the Info screen about the workbook in the Backstage view. Here you enter a brief name for the add-in in the Title field and a longer description of its custom functions.
Click the Title text box and enter a descriptive title for the add-in, and then click the Save As option on the menu in the Backstage view.
This action opens the Save As screen where the XLSTART folder is currently selected.
Click XSTART under Current Folder in the right-hand panel.
Excel opens the Save As dialog box, where you need to change the file type to Excel Add-In (*.xlam) and then specify the filename (to which Excel automatically appends the .xlam filename extension) under which to save it.
Click the Save as Type pop-up button and then select Excel Add-In as the type.
Click the File Name combo box and make any necessary changes to the filename (without changing the .xlam filename extension) before you click the Save button.
After saving your workbook as an add-in file, you’re ready to activate the add-in so that you can enter its user-defined functions in any worksheet.
Choose File→Options→Add-Ins or press Alt+FTAA.
Click the Go button near the bottom of the Add-Ins tab after checking to make sure that Excel Add-Ins is displayed on the Manage drop-down list button.
This action opens the Add-Ins dialog box showing the names of all the available add-ins. You must now add the name of your new add-in to this list.
Click the name of your new add-in file in the Browse list box and then click OK.
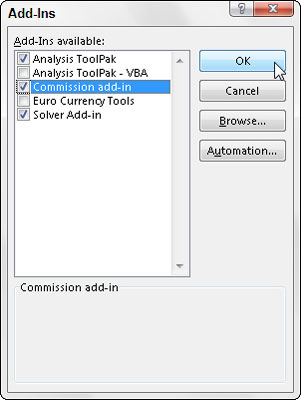
This action closes the Browse dialog box and returns you to the Add-Ins dialog box that now lists your new add-in file. Now all you have to do is make sure that the check box in front of the name of the new add-in (which displays the title and description you gave the add-in at the bottom of the Add-Ins dialog box) is selected before you click OK.
Select the check box in front of the name of the new add-in and then click OK.
As soon as you click OK, Excel closes the Add-Ins dialog box and returns you to the VBA Editor window. You can then select the Save button (Ctrl+S) followed by the View Microsoft Excel button (Alt+F11) on the VBA standard toolbar. When you’re back in the PERSONAL workbook, you can then hide it again by clicking the Hide button on the View tab (Alt+WH)
