


Excel provides a powerful method for retrieving information from external databases. You aren't limited to simply grabbing all the information from a specified table. You can, alternatively, query a database.
By querying a database, you retrieve only information from a table that matches your criteria. You can also use a query to combine information from two or more tables. Therefore, use a query to massage and filter the data before it's actually placed in your Excel workbook.
Querying is often the best approach when you want to combine data before importing it and when you need to filter the data before importing it.
To run a database query and import query results, follow these steps:
From the Data tab, choose From Other Sources→From Microsoft Query.
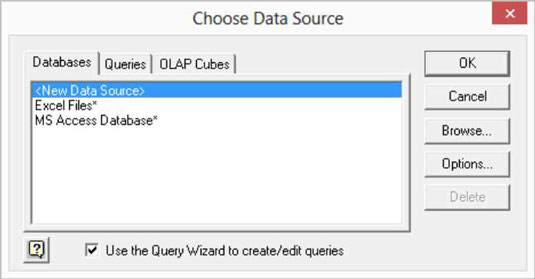
Excel displays the Choose Data Source dialog box.
Using the Databases tab, identify the type of database that you want to query.
For example, to query a Microsoft Access database, click the MS Access Database entry and then OK.
You can query the results of a query by clicking the Queries tab and then selecting one of the items listed there.
You can also query an OLAP cube and grab information from that. If you want to query a query or an OLAP cube, consult with the database administrator. The database administrator can tell you what query or OLAP cube you want to grab data from.
Select the database.
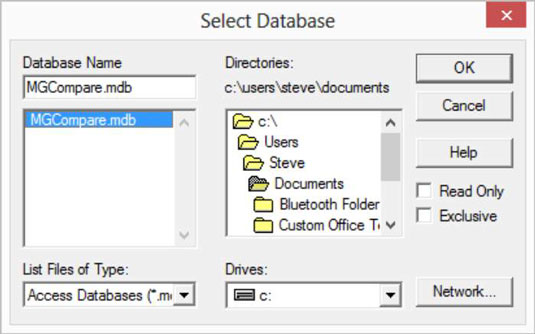
Excel displays the Select Database dialog box. Use this dialog box to identify both the location and the name of the database that you want to query.
Select the database that you want to query from the directories list and then click OK.
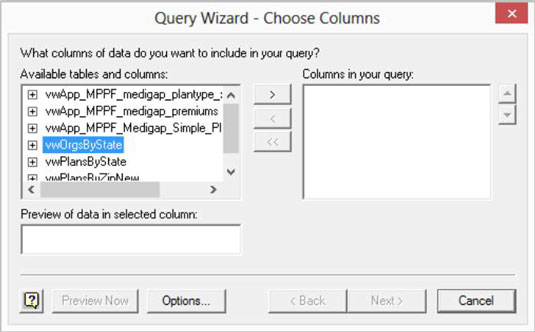
Excel displays the Query Wizard – Choose Columns dialog box.
You use the Query Wizard – Choose Columns dialog box to pick which tables and which table fields you want to appear in your query results. In the Available Tables and Columns box, Excel lists tables and fields. Initially, this list shows only tables, but you can see the fields within a table by clicking the + symbol next to the table.
When you see a field that you want as a column in your Excel list, click its field and then click the right-facing arrow button that points to the Columns in Your Query list box.
To add all the fields in a table to your list, click the table name and then click the right-facing arrow button that points to the Columns in Your Query list box.
To remove a field, select the field in the Columns in Your Query list box and then click the left-facing arrow button that points to the Available Tables and Columns list box.
This all sounds very complicated, but it really isn’t. Essentially, all you do is to identify the columns of information that you want in your Excel list.
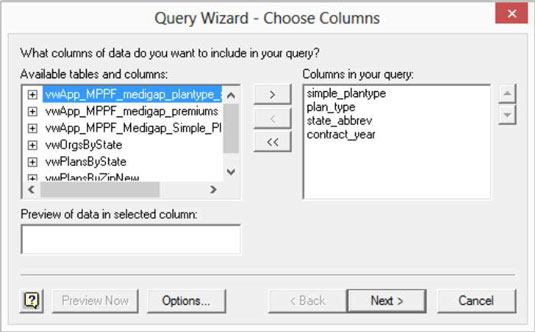
After you identify which columns you want in your query, click the Next button to filter the query data as needed.

Excel displays the Query Wizard – Filter Data dialog box.
You can filter the data returned as part of your query by using the Only Include Rows Where text boxes. For example, to include only rows in which the state abbreviation field shows CA, click the state_abbrev field in the Column to Filter list box. Then select the Equals filtering operation from the first drop-down list and enter or select the value CA into the second drop-down list.
The Query Wizard – Filter Data dialog box performs the same sorts of filtering that you can perform with the AutoFilter command and the Advanced Filter command.
Filter your data based on multiple filters by selecting the And or Or radio buttons.
And: Using And filters means that for a row to be included, it must meet each of the filter requirements.
Or: Using Or filters means that if a row meets any filtered condition, the row is included.
Click Next.
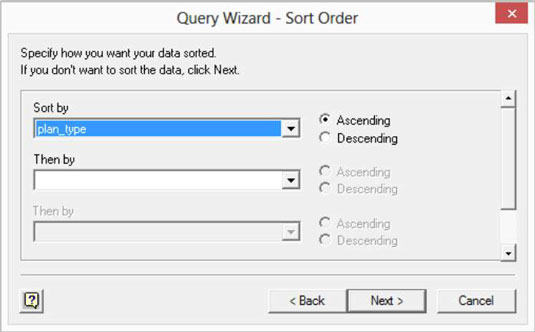
Excel displays the Query Wizard – Sort Order dialog box.
Choose a sort order for the query result data from the Query Wizard - Sort Order dialog box.
Select the field or column that you want to use for sorting from the Sort By drop-down list. By selecting either the Ascending or Descending radio button, choose whether the field should be arranged in an ascending or descending order, respectively.
You can also use additional sort keys by selecting fields in the first and second Then By drop-down lists.
You sort query results the same way that you sort rows in an Excel table. Sorting works the same whether you’re talking about query results or rows in a list.
Click Next.
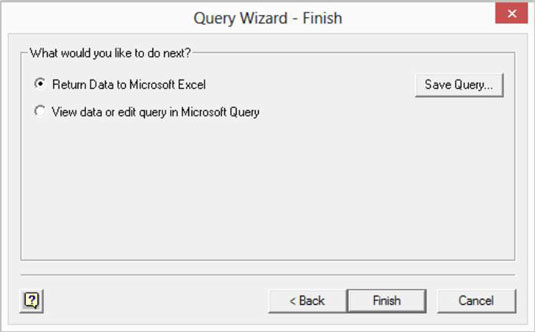
Excel displays the Query Wizard – Finish dialog box.
In the Query Wizard - Finish dialog box, specify where Excel should place the query results.
This dialog box provides radio buttons, from which you choose where you want to place your query result data: in Excel, in a Microsoft Query window that you can then review, or in an OLAP cube. Typically, you simply want to return the data to Microsoft Excel and place the data in a workbook. To make this choice, select the Return Data to Microsoft Office Excel radio button.
Click the Finish button.
After you click the Finish button to complete the Query Wizard, Excel displays the Import Data dialog box.
In the Import Data dialog box, choose the worksheet location for the query result data.
Use this dialog box to specify where query result data should be placed.
To place the query result data in an existing worksheet, select the Existing Worksheet radio button. Then identify the cell in the top-left corner of the worksheet range and enter this in the Existing Worksheet text box.
Alternatively, to place the data into a new worksheet, select the New Worksheet radio button.
Click OK.
Excel places the data at the location that you chose.
