

Apple’s Time Capsule device (which has been discontinued) is designed as a wireless storage drive for your Time Machine backup files. If you’re interested in a single Time Machine backup location for multiple Macs across your wireless network, a Time Capsule is a great addition to your home or office.
Before you can use Time Machine, you must have it enabled within the Time Machine pane in System Preferences. You’ll also need an external drive that provides considerably more storage capacity than the drive you’re backing up. I recommend that your external Time Machine backup drive be at least twice the capacity of the drive you’re backing up. (To check on the size of a drive displayed on your desktop, right-click the drive and choose Get Info from the contextual menu.)
Here’s how you can turn back time, step by step, to restore a file that you deleted or replaced in a folder:- Open a Finder window and navigate to the folder that contained the file you want to restore.
- Click the Time Machine icon on the Finder menu bar (which bears a clock with a counterclockwise arrow) and then click Enter Time Machine. The oh-so-ultra-cool Time Machine background appears behind your folder, complete with its own set of buttons at the bottom of the screen (as shown). On the right, you see a timeline that corresponds to the different days and months included in the backups that macOS has made.
- Click within the timeline to jump directly to a date (displaying the folder’s contents on that date). Alternatively, use the Forward and Back arrows at the right to move through the folder’s contents through time. (You should see the faces of Windows users when you riffle through your folders to locate something you deleted several weeks ago!) Remember: The backup date of the items you’re viewing appears in the button bar at the bottom of the screen.
- After you locate the file you want to restore, click it to select it.
- Click the Restore button at the right side of the Time Machine button bar. If you want to restore all the contents of the current folder, click the Restore All button instead. Time Machine returns you to the Finder, with the newly restored file now appearing in the folder. Outstanding!
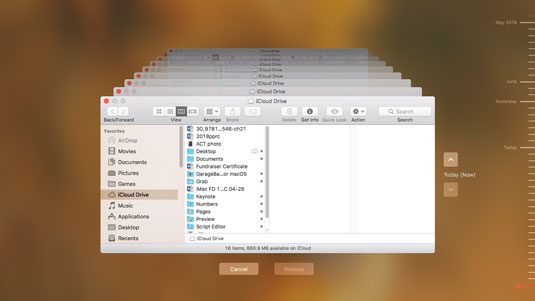 Yes, Time Machine really does look like this!
To restore specific data from your Contacts database, launch the Contacts application first and then launch Time Machine. Instead of riffling through a Finder window, you can move through time within the application window.
You can easily restore the entire contents of your iMac’s internal drive from your Time Machine backup, too. Reboot your iMac and hold down the Command +R startup key sequence to boot using the macOS Recovery HD volume, then use the Restore function.
For robust backup and restore protection, Time Machine is all that a typical Mac owner at home is likely to ever need. Therefore, a very easy Mark’s Maxim to predict:Get an external drive, connect it, and turn on Time Machine. Do it now. Don’t make a humongous mistake.
