After you turn on Class Tracking, using classes is really straightforward. You set up classes for the product lines or service lines for which you want to measure profitability. You classify transactions as fitting into a particular class either as they’re recorded (if you can) or after the fact (if you need to fiddle with the activity and cost driver math).
Set up your classes
You set up a class for each product or service for which you want to measure profitability. In the imaginary hot-dog-stand business, for example, you set up two classes: one for regular hot dogs and one for chili dogs.
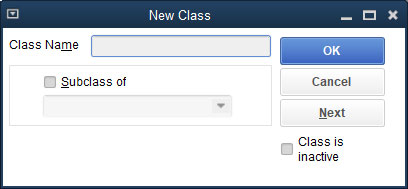
To set up a class, you can just enter the class name in the class box that appears in the window that you use to record invoices, write checks, and make journal entries. (These windows are shown later in this section.) Alternatively, you can choose Lists –> Class List. When QuickBooks displays the Class List window, click the Class button shown at the bottom of the window, and choose New from the menu that QuickBooks displays. Use the New Class window that appears, as shown, to describe the new class.
Classify revenue amounts
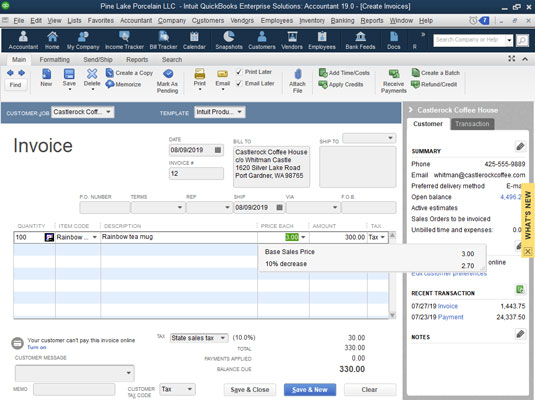
To classify revenue as fitting into a particular class, use the Class box that appears in the Create Invoices window and in the Enter Sales Receipt window. (These are the two windows that you use to record sales.) If an invoice records sales of a hot dog, for example, you may record the class as Regular Dog. If a sales receipt records sales of a chili dog, you may record the class as Chili Dog. This figure shows the Create Invoices window filled out to record the day’s chili dog sales.
The Class drop-down list is near the top of the window, next to the Customer:Job drop-down list.
Classify expense amounts
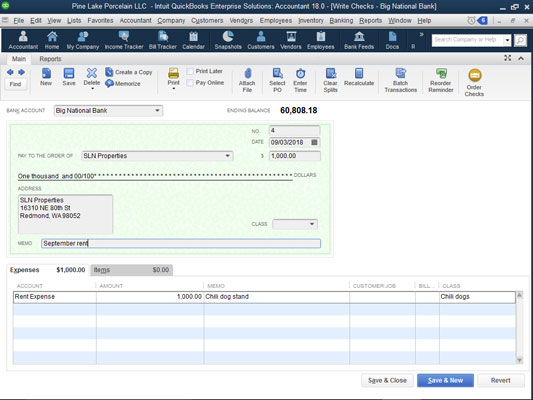
To record a check that pays some expense that fits into a particular activity, you also use the Class column — this appears on the Expenses tab, shown here — to identify the product line or service into which the expense fits. This figure shows how the Write Checks window may appear to record $1,000 of rent expense allocated to the chili dog product line.
The Class column is located along the right edge of the Expenses tab.
After-the-fact classifications
In some cases, you won’t be able to classify an expense or revenue amount at the time the initial transaction is recorded. In the hot-dog-stand example, you probably won’t be able to figure out how to split the wages expense between regular hot dogs and chili dogs until after you pay the employees. The same thing is true of the supplies expense. In both cases, you need to know how many regular hot dogs and how many chili dogs you sold before you can allocate, or trace, supplies and wages.
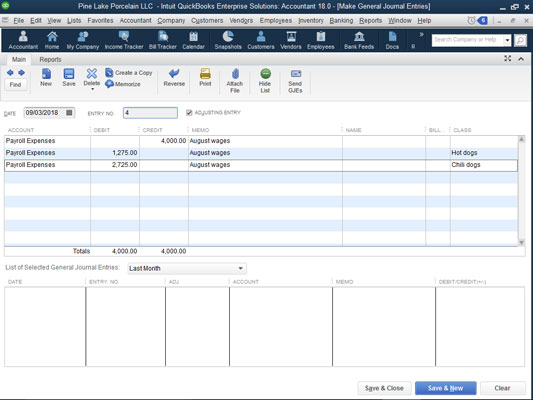
In these sorts of cases, you use the Make General Journal Entries window to classify previously unclassified expenses. This figure shows you how to take $4,000 of previously unclassified wages expense and allocate the amount to the regular and chili dog product lines.
The Class column is located along the right edge of the Make General Journal Entries window.