


Word’s Outline view presents a document in a unique way. It takes advantage of Word’s heading styles to help you group and organize thoughts, ideas, or plotlines in a hierarchical fashion. Outline tools make it easy to shuffle around topics, make subtopics, and mix in text to help organize your thoughts. Even if you’re not a writer, you can use Word’s Outline mode to create lists, work on projects, or look busy when the boss comes around.
Entering Outline view
To enter Outline view, click the View tab, and in the Views group, click the Outline button. The document’s presentation changes to show Outline view, and the Outlining tab appears on the Ribbon, as shown.
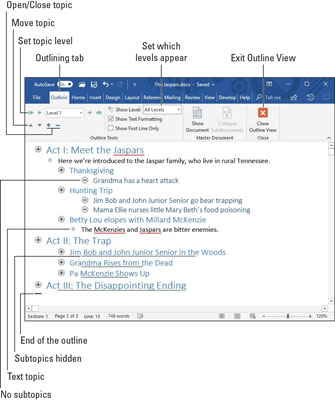 A typical outline.
To exit Outline view, click the View tab and choose another document view. You can also click the big, honkin’ Close Outline View button.
- A squat, horizontal bar marks the end of the outline. You cannot delete that bar.
- All basic Word commands work in Outline view. You can use the cursor keys, delete text, check spelling, save, insert oddball characters, print, and so on.
- Don't worry about the text format in Outline view; outlining is not about formatting.
- Word uses the Heading 1 through Heading 9 styles for the outline’s topics. Main topics are formatted in Heading 1, subtopics in Heading 2, and so on.
- Use the Body or Normal style to make notes or add text to the outline.
An outline isn’t a special type of document; it’s a different view. You can switch between Outline view and any other view and the document’s contents don’t change.
Typing topics in the Microsoft Word outline
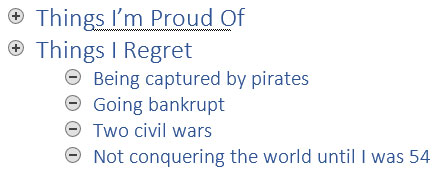
Outlines are composed of topics and subtopics. Topics are main ideas; subtopics describe the details. Subtopics can contain their own subtopics, going down to several levels of detail. The amount of detail you use depends on how organized you want to be.To create a topic, type the text. Word automatically formats the topic using a specific heading style based on the topic level, as shown.
 Topics in an outline.
Keep the main topic levels short and descriptive. Deeper topics can go into more detail. Press the Enter key when you’re done typing one topic and want to start another.
- Use the Enter key to split a topic. For example, to split the topic Pots and Pans, replace the word and with a press of the Enter key.
- To join two topics, press the End key to send the insertion pointer to the end of the first topic. Then press the Delete key. This method works just like joining two paragraphs in a regular document.
Don’t worry about organizing the outline when you first create it. In Word’s Outline view, you can rearrange topics as your ideas solidify. My advice is to start writing things down now and concentrate on organization later.
How to rearrange topics in Microsoft Word
Outlines are fluid. As you work, some topics may become more important and others less important. To these changes, you can move a topic up or down:- Click the Move Up button (or press Alt+Shift+↑) to move a topic up a line.

- Click the Move Down button (or press Alt+Shift+↓) to move a topic down a line.

You can also drag a topic up or down: Point the mouse pointer at the circle to the topic’s left. When the mouse is positioned just right, the mouse pointer changes to a 4-way arrow. I recommend using this trick only when you’re moving topics a short distance; dragging beyond the current screen can prove unwieldy.
If you need to move a topic and all its subtopics, first collapse the topic. When the topic is expanded, only the topic itself is moved.
How to demote and promote topics in Microsoft Word
Outline organization also includes demoting topics that are really subtopics and promoting subtopics to a higher level. Making such adjustments is a natural part of working in Outline view.- Click the Demote button (or press Alt+Shift+→) to demote a topic into a subtopic.

- Click the Promote button (or press Alt+Shift+←) to promote a topic.

New topics you type are created at the same level as the topic above (where you pressed the Enter key).
- To instantly make any topic a main-level topic, click the Promote to Heading 1 button.

- You can use the mouse to promote or demote topics: Drag the topic’s circle left or right. I admit that this move can be tricky, which is why I use the keyboard shortcuts or buttons on the Ribbon to promote or demote topics.
- You don’t really create subtopics in Word as much as you demote higher-level topics.
- Promoting or demoting a topic changes the paragraph format. For example, demoting a top-level topic changes the style from Heading 1 to Heading 2. The subtopic also appears indented on the screen.
- The Level menu in the Outlining tab’s Outline Tools group changes to reflect the current topic level. You can also use this item’s drop-down list to promote or demote the topic to any specific level in the outline.
Unlike with main topics, you can get wordy with subtopics. After all, the idea here is to expand on the main topic.
According to Those Who Know Such Things, you must have at least two subtopics for them to qualify as subtopics. When you have only one subtopic, either you have a second main topic or you’ve created a text topic.
How to expand and collapse topics in Microsoft Word
A detailed outline is wonderful, the perfect tool to help you write that novel, organize a meeting, or set priorities. To help you pull back from the detail and see the Big Picture, you can collapse all or part of an outline. Even when you’re organizing, sometimes it helps to collapse a topic to help keep it in perspective.Any topic with subtopics shows a plus sign (+) in its circle. To collapse the topic and temporarily hide its subtopics, you have several choices:
![]()
- Click the Collapse button on the Outlining toolbar.
- Press the Alt+Shift+_ (underline) keyboard shortcut.
- Double-click the plus sign to the topic’s left.

- Click the Expand button on the Outlining toolbar.
- Press Alt+Shift++ (plus sign).
- Click the topic’s plus sign.
The fastest way to display an outline at a specific topic level is to choose that level from the Show Level drop-down list. To find that command, look on the Outlining toolbar, in the Outline Tools group.
For example, to show only Level 1 and Level 2 topics, choose Level 2 from the Show Level button’s menu. Topics at Level 3 and higher remain collapsed.To see the entire outline, choose Show All Levels from the Show Level menu.
When some of the subtopics get wordy, place a check mark by the Show First Line Only option. (Look on the Outlining tab in the Outline Tools group for this setting.) When it’s active, Word displays only the first topic line of text in any topic.
How to add a text topic to a Microsoft Word outline
Creating an outline can potentially be about writing text. When the mood hits you, write! Rather than write prose as a topic, use the Demote to Body Text command. Here’s how:
- Press the Enter key to start a new topic.
- On the Outlining tab, in the Outline Tools group, click the Demote to Body Text button. The keyboard shortcut is Ctrl+Shift+N, which is also the keyboard shortcut for the Normal style.

These steps change the text style to Body Text. That way, you can write text for a speech, some instructions in a list, or a chunk of dialogue from your novel and not have it appear as a topic or subtopic.
How to print a Microsoft Word outline
Printing an outline works just like printing any other document in Word but with one big difference: Only visible topics are printed.To control visible topics, use the Show Level menu. For example, to print the entire outline, choose All Levels from the Show Level menu and then print.
To print only the first two levels of an outline, choose Level 2 from the Show Level drop-down list and then print. Word uses the heading styles when it prints the outline, although it does not indent topics.


