


Assuming that you use Microsoft Outlook as your e-mail program or contact manager and Word 2013, and assuming that it contains information you want to use in a mail merge, you can follow these steps to create a recipient list:
Open your Mail-Merge template. On the Mailings tab, in the Start Mail Merge group, choose Select Recipients→Choose from Outlook Contacts.
This will link to Outlook.
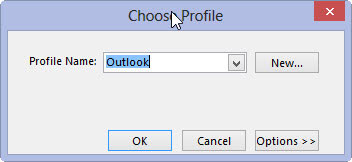
If necessary, select your profile from the Choose Profile dialog box and click OK.
This is an optional step.
In the Select Contacts dialog box, choose a contact folder.

Contact folders are created in Outlook, not in Word.
Click OK.
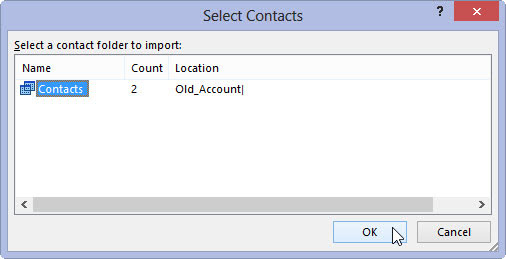
This saves your choice.
Use the Mail Merge Recipients dialog box to filter the recipient list.

The simplest way to do this, if the list isn’t too long, is simply to remove the check marks by the names of the individuals you don’t want in the list. You can also click the Filter link in the dialog box to do more advanced filtering.
Click OK when you’re done culling the recipient list.
The next step in the painful experience known as Word mail merge is to insert fields into the master document.

