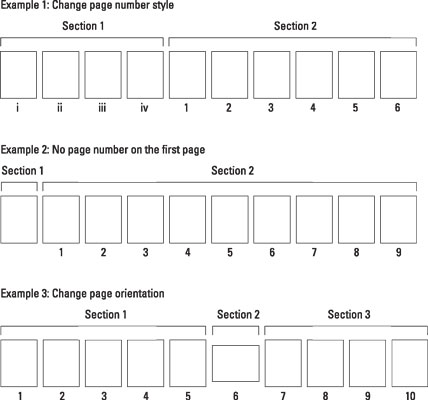
All Word 2016 documents have one section. If you plan on changing page numbers, page orientation, paper size, headers and footers, or similar page formats, the document needs more sections. If you're new to the concept of sections, think of a new section as similar to a page break. The difference is that the new page starts a new section.
The figure lists three examples of documents sliced up into sections.

To start a new section in your document, heed these steps:
Position the toothpick cursor where you want the new section to start.
Click the mouse where you need to begin a new section, similar to creating a new page break.
Click the Layout tab on the Ribbon.
In the Page Setup area, click the Breaks button.
A menu appears, listing several items. The last four items are various section breaks.
Choose Next Page from the Breaks button menu.
A page break is inserted in your document; a new section has started.
When using Print Layout view, the section break looks like a page break. It works like one too: Text stops on the page before the section break and then starts at the top of the next page. Each page, however, is in a different document section.
After the section is created, you can modify the page layout and format of each section in your document.
Choose Continuous in Step 4 to place a more flexible form of section break into your document. Depending on which page formats are changed between sections, the Continuous section break may start a new page or it may not.
The Even Page and Odd Page section breaks work just like the Next Page section break, but they happen only on even pages or odd pages, respectively. These section breaks are designed for documents that use odd and even headers or sport unique margins for binding purposes.
When working with sections, place the Section item on the status bar: Right-click the status bar and choose Section from the menu. The Section item lists the current section by number as you work through your document.


