


You may see some Microsoft documentation that says that the features described in this article are available only to Office 365 subscribers, but that warning is outdated and doesn’t apply to Office 2019.
Morphing: Your Animation Simulator
Morph is a new transition option that helps designers create smooth transition effects between two slides that make it look like individual objects are animated. For example, you might grow or shrink objects between slides, or change their positions. The key to using this feature is to have two consecutive slides that are very similar to each other. The Morph transition makes the changes between the slides as if the differing items were moving or changing size due to an animation effect.To better understand this PowerPoint 2019 feature, try the following experiment:
- Start a new presentation.
- Set the slide layout to Blank (Home → Layout → Blank).
 Use a blank layout for this experiment to avoid the placeholders getting in your way.
 - Draw a shape in the bottom left corner of the slide (Insert → Shapes) using the Shapes tool.
Your choice of shape, size, and color.
 Select any shape. Here's a star has been chosen.
This image shows an example with a star shape.
 Place the shape in the lower-left corner of the slide.
 - In the navigation pane, right-click the slide and choose Duplicate Slide.
 Right-click the slide and choose Duplicate slide.
 - Select the copy in the navigation pane, and then drag the shape up to the upper-right corner of the slide.
- Drag a corner selection handle on the shape to resize it (larger or smaller, your choice).
 Resize the shape in the upper-right corner.
 - In the navigation pane, select Transitions → Morph.
 Apply the Morph transition to the second slide.
 - (Optional) Preview the presentation in Slide Show view (Slide Show → From Beginning).
PowerPoint 2013 and earlier can’t play Morph transitions; it substitutes a Fade transition instead. Some older versions of PowerPoint 2016 (Version 1511 and earlier) can only play Morph transitions, but they can’t create them. If you exchange files with people who use earlier PowerPoint versions, just keep that potential compatibility issue in mind.
Summarizing a Presentation Visually with Zoom
Not all presentations are linear, flowing from slide 1 to slide 2, to slide 3, and so on. Sometimes you might want a presentation that is more like a mall directory, where you tap on an area or image to zoom in on it. That’s the basic idea behind the Zoom feature. You can create a summary slide (most likely at the beginning) that contains thumbnail images of other slides. You can then click any of the thumbnails to jump to that slide.There are three kinds of zoom you can set up. Summary Zoom summarizes the entire presentation on a single summary slide. Slide Zoom includes only the slides selected before issuing the command. Section Zoom shows a single section only.
Try the following steps to experiment with the PowerPoint 2019 Zoom feature.
- Open a presentation that contains several slides.
- Choose Insert → Zoom → Summary Zoom.
The Insert Summary Zoom dialog box opens.
 Choose the Summary Zoom option from the Zoom button’s menu.
 - Click to mark the check box for each of the slides you want to include and then click Insert.
PowerPoint creates a Summary Section (as you can see in the navigation pane) and a summary slide. The title placeholder is empty; you can add your own title.
 The completed summary slide. Add a title if desired.
 - To try out the zoom effect, choose Slide Show → From Current Slide to display the summary slide in Slide Show view. Then click any thumbnail to see the Zoom effect take you to that slide.
A Text Highlighter
PowerPoint 2019 features the Text Highlight Color tool that Microsoft Word has had for several versions now. Find it on the Home tab, in the Font group. To highlight text, select the Highlighter tool and then drag across the text. To turn off the Highlighter, press Esc or click the arrow next to the Text Highlight Color button and choose No Color.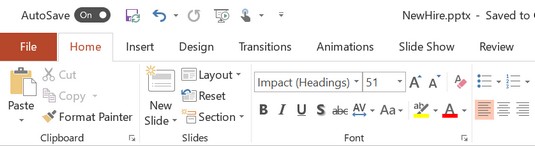 PowerPoint’s Font group on the Home tab now includes the Text Highlight Color button.
Better Background Removal
The Remove Background feature is working more intelligently than ever. It detects the background of an image automatically now. And the pencil for marking areas to remove or keep can now draw free-form, not just straight lines.Try it out with these steps:
- Insert a photo on a slide.
For best results, choose one where there is a foreground image, such as an animal, person, or object, and a background.
- Display the Picture Tools Format tab.
 Insert a photo, and then display the Picture Tools Format tab.
 - Select Picture Tools Format → Remove Background.
The Background Removal tab appears. If you’ve used the feature before, you might notice that the full background is automatically masked by default. There’s not that annoying bounding box that you used to have to drag to define the background area.
 Displaying the Background Removal tab performs an automatic background removal. Adjust it only if needed.
 - Select the Mark Areas to Keep button and then drag across a portion of the background.
Notice that it’s a freeform drawing tool now; you don’t have to try to outline a curved area with tiny straight lines anymore.
- When you’re done, select Keep Changes to see the results of your background removal.
A New, Optional Recording Tab
If you record a lot in PowerPoint, you may want to enable the new PowerPoint 2019 feature that is the Recording tab (File → Options → Customize Ribbon). From here you can capture a screenshot or a screen recording, record the slide show, insert audio and video for auto-play, or save the presentation as a show or a video. The Recording tab pulls together several types of recording in one convenient place.
A PowerPoint Show is just like a regular PowerPoint presentation except it opens in Slide Show view by default.


