


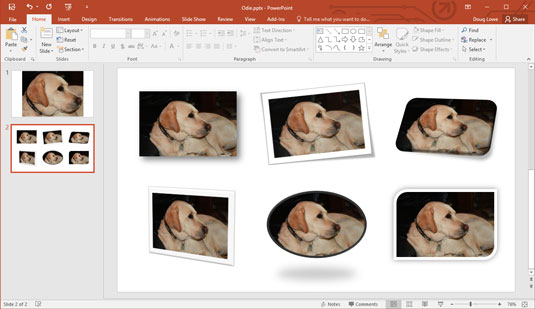
PowerPoint 2016 enables you to draw attention to your pictures by adding stylistic features such as borders, shadows, and reflections. The following figure shows a slide with several copies of a picture, each with a different style applied.
To add a style effect to a picture, select the picture and open the Picture Tools tab on the Ribbon. Then, simply select the picture style you want to apply.
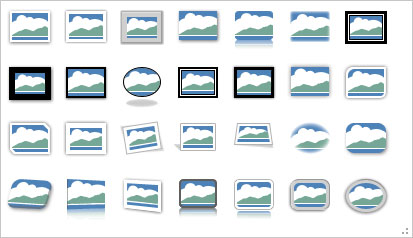
PowerPoint comes with 28 predefined picture styles, shown in the gallery pictured here. Each of these styles is simply a combination of three types of formatting you can apply to pictures: Shape, Border, and Effects. If you want, you can apply these formats individually.
Note that if you use one of these predefined picture styles, the picture will be updated automatically if you later change the presentation's theme. As a result, you should use one of the predefined styles whenever possible.
Applying a picture border
You can apply a border to a picture by opening the Picture Tools→Format tab and clicking Picture Border in the Picture Styles group. This reveals the Picture Border menu, which lets you choose the border color, weight (the width of the border lines), and the pattern of dashes you want to use.
Note that if you have applied a shape to the picture, the border is applied to the shape.
Applying picture effects
The Picture Effects button in the Picture Styles group (located on the Format tab) lets you apply several interesting types of effects to your pictures. When you click this button, a menu with the following effect options is displayed:
Shadow: Applies a shadow to the picture. You can select one of several predefined shadow effects or call up a dialog box that lets you customize the shadow.
Reflection: Creates a reflected image of the picture beneath the original picture.
Glow: Adds a glowing effect around the edges of the picture.
Soft Edges: Softens the edges of the picture.
Bevel: Creates a 3-D beveled look.
3-D Rotation: Rotates the picture in a way that creates a three-dimensional effect.
The best way to figure out how to use these effects is to experiment with them to see how they work. Have fun and go crazy . . . but remember that you don't need to share the results of your experiments!


