


If your Excel 2010 worksheet has become quite large, using the Sort dialog box to sort on multiple columns can make it easier to find the data you need. The Sort dialog box lets you tell Excel what column to sort on next if two cells in the main sort column contain the same value or data.
Although the most common sort is by rows, you can also sort by columns. In the Sort dialog box, click the Options button, choose Sort Left to Right, and click OK.
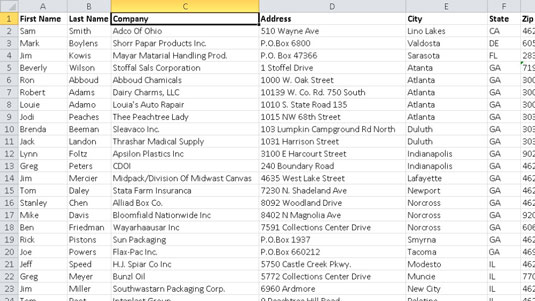
Select or click in the list of data you want to sort.
You can select only a single column of data if you want to sort that column independently of the rest of the data. However, in most cases you are likely to sort the entire list.
Click the Sort button in the Sort & Filter group on the Data tab.
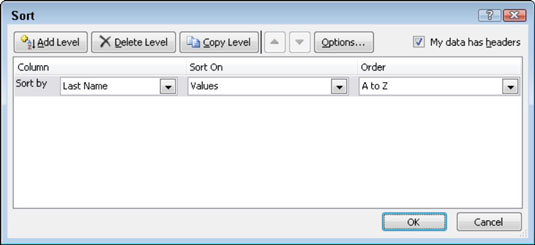
The Sort dialog box appears. If your data includes column headings, make sure the My Data Has Headers option is checked. Excel usually detects the correct setting automatically.
From the Sort By drop-down list, select the column by which you want to sort.
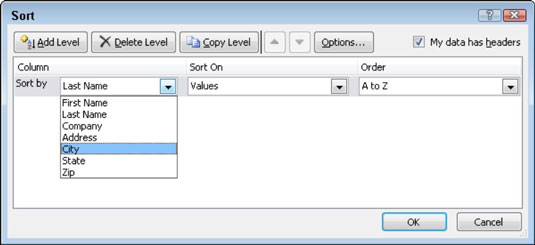
This drop-down list includes the column headings for each column in the list.
From the Sort On drop-down list, choose Values.
Notice that you also can perform the sort on Cell Color, Font Color, or Cell Icon. Typically, you will perform a sort based on values (rather than formatting).
From the Order drop-down list, select how you want to sort the data.
The options that appear in this list change based on the contents of the sort column. Choose A to Z or Z to A to sort text values, Smallest to Largest or Largest to Smallest to sort numeric data, or Oldest to Newest or Newest to Oldest to sort by dates.
Click the Add Level button.
Additional drop-down list boxes appear for the secondary sort column. This is the column Excel will sort by if two or more items are identical in the first Sort By option.
Repeat steps 3 through 5 for the new sorting level.
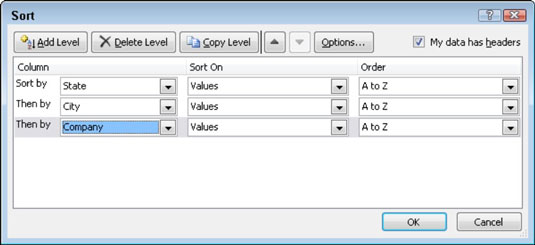
After you specify the options for the secondary sort column, you can add more sort columns as needed. Use the Move Up and Move Down buttons if you decide to change the order of the sort columns.
Click OK.
The dialog box closes and Excel performs the sort process.

