


To download an image into your Excel worksheet from any of these sources, you click the Online Pictures button in the Illustrations group on the Insert tab of the Ribbon (Alt+NF). Excel opens the Online Pictures dialog box. When you first open the Online Pictures dialog box, it contains a number of sample Bing searches arranged alphabetically by category with a sample image representing that category displayed.
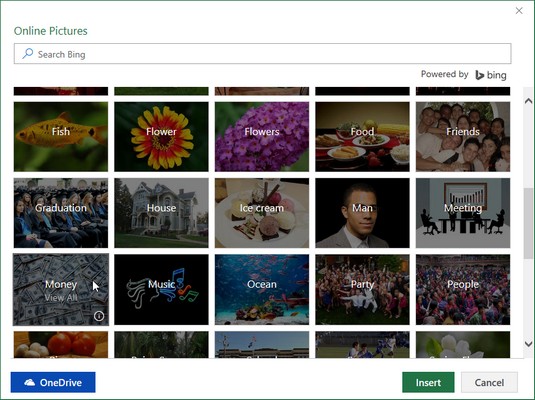 Opening the Online Pictures dialog box to insert a 2-D graphic into a worksheet.
To display the photos and line art available for a particular category, such as Books or Money, click the sample image in its category. If none of the pictures in that or any of the other available categories fit the bill, you can use the search text box in the Online Pictures dialog box to try to locate a more suitable image.
The search text box in the Online Pictures dialog box contains a drop-down button to the immediate left with the following search options:
- Bing (default) to use the Bing search engine to locate images on the web of a particular type that you want to add to your worksheet
- OneDrive to locate images saved on your SkyDrive to add to your ExcelWorksheet
 Selecting the thumbnail of a line art image of dollar signs in the Money category to download into the current worksheet.
Above the thumbnails, the Online Pictures dialog box displays a selected Creative Commons Only check box. When this check box is selected, Excel filters the thumbnail images shown to just those that are covered by Creative Commons licensing. Creative Commons licensing grants free distribution of what is otherwise copyrighted material under certain conditions (often noncommercial or educational use). Select the Creative Commons Only check box to remove its check mark only if you’re sure that you are comfortable using images in your worksheets not covered by Creative Commons licensing.
To the immediate left of the Creative Commons Only check box, the Online Pictures dialog box contains a Filter button. When you click the Filter button, Excel displays a pop-up menu that enables you to filter the thumbnails displayed below in the Online Pictures dialog box by the image’s size, type, layout, and/or color.
At the bottom of the dialog box below the area with the thumbnails, the Online Pictures dialog box displays the message, “You are responsible for respecting others’ rights, including copyright” followed by a Learn More Here hyperlink. Clicking this link opens a Microsoft Copyright web page in your default web browser that gives you basic information on copyright law, including information about what type of creative works are covered by copyright and the doctrine of fair use.
To insert one of the located images into the current Excel worksheet, click its thumbnail to select it (shown by the check mark in the box in the upper-left corner and then click the Insert button (or you can simply double-click the thumbnail). If you want to insert more than one of the displayed images into your worksheet, click their thumbnails to select them before you click the Insert button.
When you click the Insert button, Excel closes the Online Pictures dialog box and downloads into the active worksheet both the graphic image(s) you’ve selected along with a text box, containing a caption containing author credits for the downloaded picture(s). This caption text box contains two hyperlinks: the first takes you to a web page with more information about the picture and its author, and the second takes you to a web page with more specific information about the picture’s licensing.
Inserting 3-D images into your Excel sheet
Excel 2019 also supports the use of 3-D images downloaded from the Microsoft Remix 3D online community website using the From Online Sources option on drop-down menu of the 3D Models command button located in the Illustrations group on the Insert tab (Alt+NS3O). When you insert one of these 3-D images into your Excel sheet, you can rotate it so that it can be viewed from any angle you want.To insert a 3-D model, open the Online 3D Models dialog box and select a thumbnail of the model from one of its displayed categories or from a search you perform of the 3-D images uploaded to the Microsoft Remix 3D website. As soon as you click the Insert button, Excel downloads a copy of the 3-D model into the current worksheet with its selection and rotation handles displayed.
Inserting local images into your Excel sheet
If the 2-D image you want to use in a worksheet is saved on your computer in one of the local or network drives, you can insert it by selecting the Pictures command button on the Insert tab of the Ribbon (Alt+NP). Doing this opens the Insert Picture dialog box (which works just like opening an Excel workbook file in the Open dialog box) where you open the folder and select the local graphics file and then import it into the worksheet by clicking the Insert button.If you have an image of a 3-D model saved on a local or network drive, you can locate, select, and insert it in your worksheet from the Insert 3D Model dialog box opened by selecting the From a File option on the drop-down menu on the 3D Models command button located in the Illustrations group on the Insert tab (Alt+NS3F).
If you want to bring in a graphic image created in another graphics program that isn’t saved in its own file, select the graphic in that program and then copy it to the Clipboard (press Ctrl+C). When you get back to your Excel worksheet, place the cursor where you want the picture to appear and then paste the image (press Ctrl+V or click the Paste command button at the beginning of the Home tab; check out these other entry shortcuts).


