


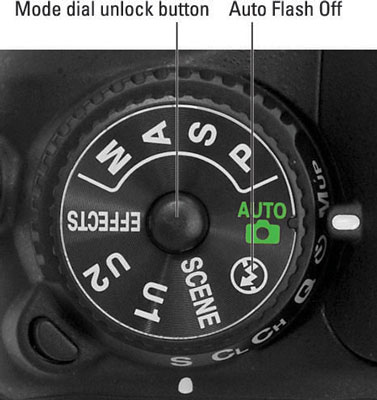
The first setting to consider when working with a Nikon D7100 is the exposure mode, which you select via the Mode dial. To rotate the dial, you must press and hold its center button, labeled in the figure as the “Mode dial unlock button.”
Your choice determines how much control you have over two critical exposure settings — aperture and shutter speed — as well as many other options, including those related to color and flash photography.
Your exposure mode choices break down as follows:
Fully automatic exposure modes: For people who haven't yet explored photography concepts such as aperture and shutter speed, the D7100 offers the following point-and-shoot modes:
Auto: The camera analyzes the scene and tries to select the most appropriate settings to capture the image. In dim lighting, the built-in flash may fire.
Auto Flash Off: This mode, represented by the icon labeled in the figure, works just like Auto but disables flash.
Scene modes: Set the Mode dial to Scene and then rotate the Main command dial to choose from automatic modes geared to capturing specific types of shots: portraits, landscapes, child photos, and such.
Effects modes: Set the Mode dial to this setting and rotate the Main command dial to select from seven special effects, such as Night Vision mode (which creates a grainy, black-and-white photo) and Color Sketch mode (which creates a picture that resembles a drawing produced with colored pencils).
Because these modes are designed to make picture-taking simple, they prevent you from accessing many of the camera's features. You can't use the White Balance control, for example, to tweak picture colors. Options that are off-limits appear dimmed in the camera menus.
Semi-automatic modes: To take more creative control but still get some exposure assistance from the camera, choose one of these modes:
P (programmed autoexposure): The camera selects the aperture and shutter speed necessary to ensure a good exposure. But you can choose from different combinations of the two to vary the creative results. For example, shutter speed affects whether moving objects appear blurry or sharp.
So you might use a fast shutter speed to freeze action, or you might go the other direction, choosing a shutter speed slow enough to blur the action, creating a heightened sense of motion. Because this mode gives you the option to choose different aperture/shutter speed combos, it's sometimes referred to as flexible programmed autoexposure.
S (shutter-priority autoexposure): You select the shutter speed, and the camera selects the aperture. This mode is ideal for capturing sports or other moving subjects because it gives you direct control over shutter speed.
A (aperture-priority autoexposure): In this mode, you choose the aperture, and the camera sets the shutter speed. Because aperture affects depth of field, or the distance over which objects in a scene appear sharply focused, this setting is great for portraits because you can select an aperture that results in a soft, blurry background, putting the emphasis on your subject.
For landscape shots, on the other hand, you might choose an aperture that produces a large depth of field so that both near and distant objects appear sharp and therefore have equal visual weight in the scene.
All three modes give you access to all the camera's features. So even if you're not ready to explore aperture and shutter speed, go ahead and set the mode dial to P if you need to access a setting that's off-limits in the fully automated modes. The camera then operates pretty much as it does in Auto mode but without limiting your ability to control picture settings if you need to do so.
Manual (M): In this mode, you select both the aperture and shutter speed. But the camera still offers an assist by displaying an exposure meter to help you dial in the right settings. You have control over all other picture settings, too.
U1 and U2: These two settings represent the pair of custom exposure modes that you can create. (The U stands for user.) They give you a quick way to immediately switch to all the picture settings you prefer for a specific type of shot. For example, you might store the options you like to use for indoor portraits as U1 and store settings for sports shots as U2.


