


- Deliver your presentation in the form of a handout, a printed version of the presentation with thumbnail slides.
- Create a self-running presentation.
- Create a user-run presentation with action buttons that others can click to get from slide to slide.
- Show your presentation over the Internet.
- Package your presentation on a CD or DVD.
- Make a video of your presentation.
Providing handouts for your audience to go with your PowerPoint presentation
Handouts are thumbnail versions of slides that you print and distribute to the audience. The image below shows examples of handouts. Handouts come in one, two, three, four, six, or nine slides per page. If you select three slides per page, the handout includes lines that your audience can take notes on; the other sizes don’t offer these lines.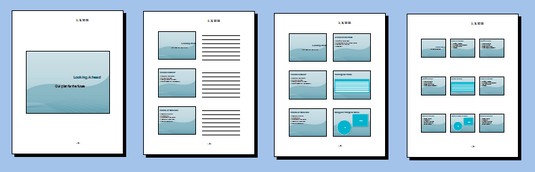 Examples of handouts (from left to right) at one, three, six, and nine slides per page.
To tell PowerPoint how to construct handouts, go to the View tab and click the Handout Master button. In Handout Master view, on the Handout Master tab, you can do a number of things to make your handouts more useful and attractive. As you make your choices, keep your eye on the sample handout page; it shows what your choices mean in real terms.
- Handout Orientation: Select Portrait or Landscape. In landscape mode, the page is turned on its side and is longer than it is tall.
- Slide Size: Select Standard or Widescreen.
- Slides-Per-Page: Open the drop-down list and choose how many slides appear on each page.
- Header: Select the Header check box and enter a header in the text frame to make a header appear in the upper-left corner of all handout pages. Candidates for headers include your name, your company name, and the location of a conference or seminar. The point is to help your audience identify the handout.
- Footer: Select the Footer check box and enter a footer in the text frame in the lower-left corner of handout pages. Candidates for footers are the same as candidates for headers.
- Date: Select this check box if you want the date you print the handout to appear on the handout pages.
- Page Number: Select this check box if you want page numbers to appear on the handout pages.
- Background Styles: Open the Background Styles drop-down list and select a gradient or color, if you’re so inclined. Make sure that the background doesn’t obscure the slide thumbnails or put too much of a burden on your printer.
Creating a self-running, kiosk-style presentation using PowerPoint 2019
A self-running, kiosk-style presentation is one that plays on its own. You can make it play from a kiosk or simply send it to coworkers so that they can play it. In a self-running presentation, slides appear onscreen one after the other without you or anyone else having to advance the presentation from slide to slide. When the presentation finishes, it starts all over again from Slide 1.Telling PowerPoint how long to keep slides onscreen
PowerPoint offers two ways to indicate how long you want each slide to stay onscreen:- Entering the time periods yourself: Switch to Slide Sorter view and go to the Transitions tab. Then deselect the On Mouse Click check box and select the After check box, as shown below. Next, tell PowerPoint to keep all slides onscreen the same amount of time or choose a different time period for each slide:
- All slides the same time: Enter a time period in the After text box and click the Apply to All button.
- Each slide a different time: One by one, select each slide and enter a time period in the After text box.
- Rehearsing the presentation: Rehearse the presentation and save the timings. Be sure to save the slide timings after you’re finished rehearsing. In Slide Sorter view, you can see how long each slide will stay onscreen.
 Enter how long you want each slide or all the slides to remain onscreen.
Telling PowerPoint that your presentation is self-running
Before you can ”self-run” a presentation, you have to tell PowerPoint that you want it to do that. Self-running presentations don’t have the control buttons in the lower-left corner. You can’t click the screen or press a key to move forward or backward to the next or previous slide. The only control you have over a self-running presentation is pressing the Esc key (pressing Esc ends the presentation).Follow these steps to make your PowerPoint a kiosk-style, self-running presentation:
- Go to the Slide Show tab.
- Click the Set Up Slide Show button.
You see the Set Up Slide Show dialog box.
- Under Show Type, choose the Browsed at a Kiosk (Full Screen) option.When you select this option, PowerPoint automatically selects the Loop Continuously Until ‘Esc’ check box.
- Click OK.That’s all there is to it.
Creating a user-run PowerPoint presentation
A user-run, or interactive, PowerPoint presentation is one that the viewer gets to control. The viewer decides which slide appears next and how long each slide remains onscreen. User-run presentations are similar to websites. Users can browse from slide to slide at their own speed. They can pick and choose what they want to investigate. They can backtrack and view slides they saw previously or return to the first slide and start anew.Self-run PowerPoint presentations are shown in Reading view (click the Reading View button on the status bar to see what self-run presentations look like). A taskbar appears along the bottom of the screen. On the right side of the taskbar, viewers can click the Previous button or Next button to go from slide to slide. They can also click the Menu button to open a pop-up menu with commands for navigating slides.
Another way to help readers get from slide to slide is to create action buttons. An action button is a button that you can click to go to another slide in your presentation or the previous slide you viewed, whatever that slide was. PowerPoint provides 12 action buttons in the Shapes gallery.
 Action buttons.
Drawing an action button
After you draw an action button from the Shapes gallery, the Action Settings dialog box appears so that you can tell PowerPoint which slide to go to when the button is clicked. Select the slide (or master slide) that needs action and follow these steps to adorn it with an action button:- On the Home or Insert tab, open the Shapes gallery and scroll to the Action Buttons category at the bottom.
- Click an action button to select it.Choose the button that best illustrates which slide will appear when the button is clicked.
- Draw the button on the slide.To do so, drag the pointer in a diagonal fashion. (As far as drawing them is concerned, action buttons work the same as all other shapes and other objects.) The Action Settings dialog box appears after you finish drawing your button.
- Go to the Mouse Over tab if you want users to activate the button by moving the mouse pointer over it, not clicking it.
- Select the Hyperlink To option button.
- On the Hyperlink To drop-down list, choose an action for the button.You can go to the next slide, the previous slide, the first or last slide in a presentation, the last slide you viewed, or a specific slide.
To make clicking the action button take users to a specific slide, choose Slide on the list. You see the Hyperlink to Slide dialog box, which lists each slide in your presentation. Select a slide and click OK.
- To play a sound when your action button is activated, select the Play Sound check box and select a sound on the drop-down list.
“Mouse-over” hyperlinks require sound accompaniment so that users understand when they’ve activated an action button.
- Click OK in the Actions Settings dialog box.
To test your button, you can right-click it and choose Open Link.
To change a button’s action, select it and then click the Action button on the Insert tab, or right-click your action button and choose Edit Link. In the Action Settings dialog box, choose a new action (or None) and click OK.
Making yours a user-run presentation
Follow these steps to declare yours a user-run presentation:- Go to the Slide Show tab.
- Click the Set Up Slide Show button.You see the Set Up Show dialog box.
- Select the Browsed by an Individual (Window) option button.
- Click OK.
Your presentation is no longer quite yours. It also belongs to all the people who view it in your absence.
Presenting a PowerPoint Presentation Online
Presenting online means to play a presentation on your computer for others who watch it over the Internet. As you go from slide to slide, audience members see the slides on their web browsers. Presenting online is an excellent way to show a presentation to others during a conference call or to others who don’t have PowerPoint.Presenting online is made possible by the Office Presentation Service, a free service for everyone who has Office software and an Office 365 account. The first time you attempt to show a presentation online, you are asked to provide your Office 365 username and password.
The Office Presentation service creates a temporary web address for you to show your presentation. Before showing it, you send audience members a link to this web address. Audience members, in turn, click the link to open and watch your presentation in their web browsers.
Before presenting online, make sure you know the email addresses of the people who will view your presentation. Make sure as well that they are available to view it. Online presentations are shown in real time. After you close a presentation, its link is broken and the audience can no longer watch it in their web browsers.
Follow these steps to show a PowerPoint presentation online:- On the Slide Show tab, click the Present Online button.The Present Online dialog box appears.
Select Enable Remote Viewers to Download the Presentation if you want audience members to have a copy of the presentation as well as view it.
- Click the Connect button.The Office Presentation Service generates a URL link for you to send to the people who will view your presentation.
 Others can click the URL link (top) to view an online presentation in a browser window (bottom).
 - Send the link to your audience.
You can send the link with Outlook or another email software.
- Copy and send the link by email: Click Copy Link to copy the link to the Clipboard. Then, in your email software, paste the link into invitations you send to audience members.
- Send the link with Outlook: Click the Send in Email link. An Outlook message window appears. Address and send the message.
- Make sure that audience members have received the email invitation and are ready to watch your presentation.
- Click the Start Presentation button.
Audience members see the presentation in their browsers.
- Give the presentation.Use the same techniques to advance or retreat from slide to slide as you use in any presentation.
When the presentation ends, you land in the Present Online tab.
- On the Present Online tab, click the End Online Presentation button; click End Online Presentation in the confirmation dialog box.Your audience sees this notice: “The presentation has ended.”
Packaging your PowerPoint presentation on a CD or DVD
The Package for CD command copies a presentation to a CD or DVD so that you can take a presentation on the road or distribute it to others. Follow these steps to copy your presentation and the PowerPoint Viewer to a CD, DVD, or a folder:- Open the presentation you want to package.
- On the File tab, choose Export.
- Choose Package Presentation for CD, and click the Package for CD button.You see the Package for CD dialog box.
 Packaging a CD to distribute to others.
 - Enter a name for the CD, DVD, or folder in the Name the CD text box.
The name you enter will appear as the name of the CD or DVD if you view it in File Explorer; if you’re copying your presentation to a folder, the name you enter will be given to the folder PowerPoint creates when it creates the packaged presentation file.
- Create the packaged presentation and copy it to a CD, DVD, or folder on your computer.Copy the presentation to a folder if you want to send the presentation by email.
- Copying to a CD or DVD: Click the Copy to CD button.
- Copying to a folder: Click the Copy to Folder button. In the Copy to Folder dialog box, click the Browse button, and in the Choose Location dialog box, select a folder for storing the folder where you will keep your packaged presentation. Then click the Select button and click OK in the Copy to Folder dialog box.
- Click Yes in the message box that asks if you want to include linked content in the presentation.
It can take PowerPoint several minutes to assemble the files and copy them to the CD, DVD, or folder.
Creating a PowerPoint presentation video
Yet another way to distribute a video is to record it in an MPEG-4 file and distribute the file on a CD or DVD, distribute it by email, or post it on the Internet. PowerPoint offers a command for creating an MPEG-4 version of a presentation. Every aspect of a PowerPoint presentation, including transitions, animations, sound, video itself, and voice narrations, is recorded in the presentation video.Here, you see s an MPEG-4 version of a PowerPoint presentation being played in Windows Media Player.
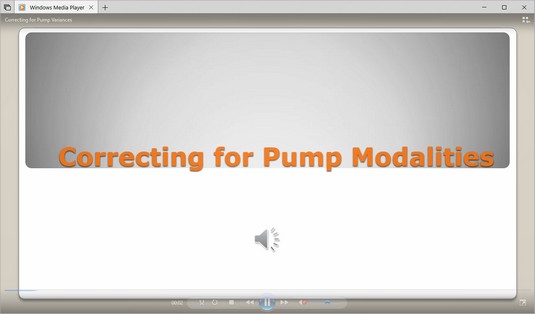 Viewing an MPEG-4 version of a PowerPoint presentation in Windows Media Player.
Before creating your presentation video, consider how long you want each slide to appear onscreen. You can make each slide appear for a specific length of time or make all slides appear for the same length of time. To decide for yourself how long each slide appears, switch to Slide Sorter view, go to the Transitions tab, and for each slide, select the After check box and enter a measurement in the After text box.
Follow these steps to create an MPEG-4 version of a PowerPoint presentation:- On the File tab, choose Export.
- Choose Create a Video.You see the Create a Video window.
- Open the first drop-down list and choose a display resolution for your video.
- Open the second drop-down list and choose whether to use recorded timings and narrations.Your choices are twofold. If you recorded a voice narration for your PowerPoint presentation, choose the second option if you want to preserve the voice narration in the video.
- Don’t Use Recorded Timings and Narrations: Each slide stays onscreen for the same amount of time. Enter a time period in the Seconds to Spend on Each Slide box to declare how long each slide stays onscreen.
- Use Recorded Timings and Narrations: Each slide stays onscreen for the time period listed on the Transition tab.
Your presentation video plays. How do you like it? This is what your video will look and sound like after you save it as a video file.
- Click the Create Video button.The Save As dialog box opens.
- Choose a folder for storing the MPEG-4 file, enter a name for the file, and click the Save button.The status bar along the bottom of the PowerPoint screen shows the progress of the video as it is being created. Creating a video can take several minutes, depending on how large your PowerPoint presentation is and how many fancy gizmos, such as sound and animation, it contains.
