Your first step when grabbing Excel data from one of these external sources, assuming that you want to later import the data, is to first use the other application program — such as an accounting program — to export the to-be-analyzed data to a file.
You have two basic approaches available for exporting data from another application: direct exporting and exporting to a text file.
Direct exporting
Direct exporting is available in many accounting programs because accountants love to use Excel to analyze data. For example, the most popular small business accounting program in the world is QuickBooks from Intuit. When you produce an accounting report in QuickBooks, the report document window includes a button labeled Excel or Export. Click this button, and QuickBooks displays the Send Report to Excel dialog box.

The Send Report to Excel dialog box provides radio buttons with which you indicate whether you want to send the report to a comma-separated-values file, to a new Excel spreadsheet, or to an existing Excel spreadsheet.
To send (export) the report to an existing Excel spreadsheet, you need to identify that workbook by entering the workbook pathname and filename into the text box provided. Or, click the Browse button and use the Open Microsoft Excel File dialog box that appears (not shown) to identify the folder and workbook file.
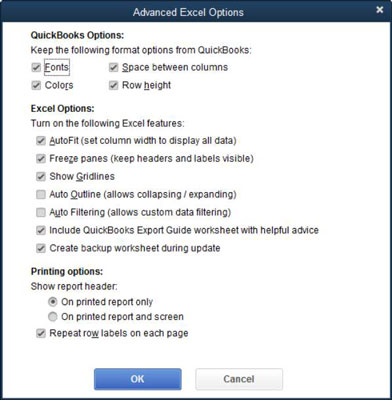
The Export Report dialog box also includes an Advanced button. Click this button, and QuickBooks displays the Advanced dialog box that you can use to control how the exported report looks. For example, you get to pick which fonts, colors, spacing, and row height that you want. You also get to turn on and turn off Excel features in the newly created workbook, including AutoFit, Gridlines, and so on.
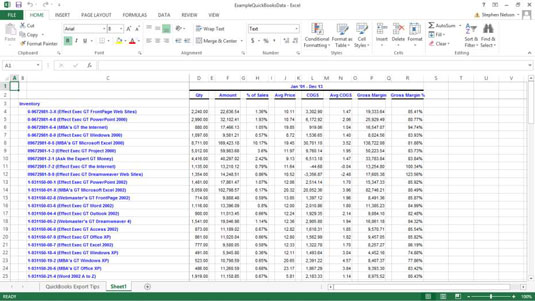
You can see how the QuickBooks report looks after it has been directly exported to Excel.
Okay, obviously, you might not want to export from QuickBooks. You can export data directly from a database program like Microsoft Access, for example.
But the key thing that you need to know is that applications that store and collect data often provide a convenient way for you to export information to Excel. Predictably, some application programs work differently, but usually, the process is little more than clicking a button labeled Excel or choosing a command labeled something like Export or Export to Excel.
Therefore, when exporting data from some other program, your first step is to do a little bit of digging and research to see whether there’s a way to easily and automatically export data to Excel. This fact-finding shouldn't take much time if you use the online Help system.
Versions of Microsoft Access up through and including Access 2003 include an Export command on the File menu, and Access 2007 and later versions include an Export command on its Microsoft Office menu. Choose the Export command to export an Access table, report, or query to Excel. Just choose the appropriate command and then use the dialog box that Access displays to specify where the exported information should be placed.
Exporting to a text file
When you need to export data first to a text file because the other application won't automatically export your data to an Excel workbook, you need to go to a little more effort. Fortunately, the process is still pretty darn straightforward.
When you work with applications that won’t automatically create an Excel workbook, you just create a text version of a report that shows the data that you want to analyze.
The trick is that you send the report to a text file rather than sending this report to a printer. This way, the report gets stored on disk as text rather than printed. Later, Excel can easily import these text files.
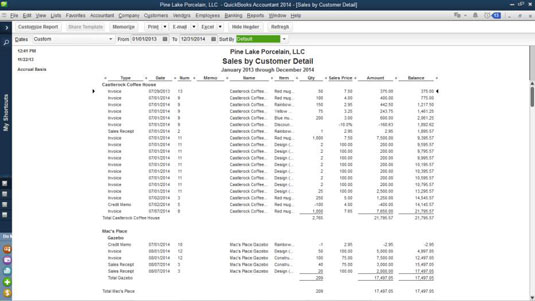
See how this works in more concrete terms by following how the process works in QuickBooks. Suppose that you really did want to print a list of items that you sell. The first step is to produce a report that shows this list. In QuickBooks, you produce this report by choosing the appropriate command from the Reports menu.
The next step is to print this report to a text file. In QuickBooks, you click the Print button or choose File→Print Report. Using either approach, QuickBooks displays the Print Reports dialog box.

Pay attention to the Print To radio buttons shown near the top of the Settings tab. QuickBooks, like many other programs, gives you the option of printing your report either to a printer or to a file.
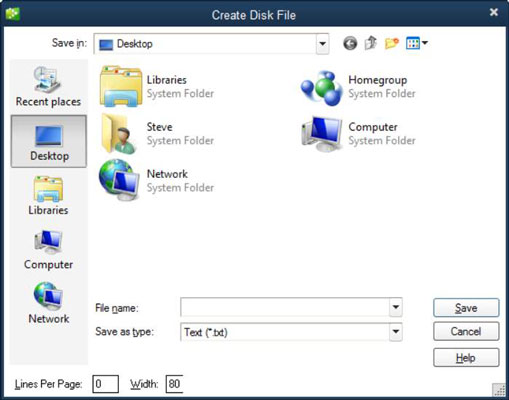
If you want to later import the information on the report, you should print the report to a file. In the case of QuickBooks, this means that you select the File radio button.
The other thing that you need to do — if you’re given a choice — is to use a delimiter. The File drop-down list shows as the type of file that QuickBooks will print. Often, though, applications let you print delimited text files.
Delimited text files use standard characters, called delimiters, to separate fields of information in the report. You can still import a straight ASCII text file, but importing a delimited text file is easier. Therefore, if your other program gives you the option of creating delimited text files, do so. In QuickBooks, you can create both comma-delimited files and tab-delimited files.
In QuickBooks, you indicate that you want a delimited text file by choosing Comma Delimited File or Tab Delimited File from the File drop-down list of the Print Reports dialog box.
To print the report as a file, you simply click the Print button of the Print Reports dialog box. Typically, the application prompts you for a pathname. The pathname includes both the drive and folder location of the text file as well as the name of the file. You provide this information, and then the application produces the text file.