 Main Menu
Book & Article Categories
- Main Menu
Book & Article Categories
- Main Menu
Collections
Explore all collections
Hobby Farming: Expert Guides and Resources
Oops! Something went wrong while submitting the form.
Articles & Books From Hobby Farming
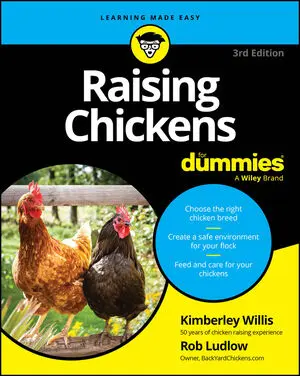
Raise healthy and happy chickens Raising Chickens For Dummies, 3rd Edition shows you exactly how to get started on your own or improve the way you already raise your flock. The book gives you down-to-earth and easy-to-implement suggestions for raising healthy chickens in a sustainable and environmentally friendly way.
Cheat Sheet / Updated 03-13-2026
In this cheat sheet, you'll learn what daily chores are needed to keep your chickens healthy, what to feed your chickens and how frequently, and how to care for your new chicks.Raising chickens can be fun and rewarding. Whether you’re raising birds for their eggs or for their cackling companionship, caring for your birds is an everyday project.
Article / Updated 03-13-2026
Oh, the things that are said about chickens! The very word chicken brings up the image of a coward, but chickens aren’t really cowards. Here’s a compilation of the most common myths and misconceptions about chickens and eggs that you may encounter as a chicken owner .Myth 1: You can’t raise chickens in the cityChickens aren’t just for country folk anymore.
Article / Updated 09-05-2023
What in the world did anyone do before cyberspace? Not even the most determined library search of years gone by would have turned up the plethora of bee-related resources that are only a click away on the web. Just enter the word "beekeeping" or "honey bees" into any of the search engines, and you'll come up with hundreds (even thousands) of finds.
Article / Updated 06-01-2023
When you extract honey from a hive, the wax cappings that you slice off represent your major wax harvest for the year. There's also the excess comb you remove during each routine inspection of a hive. Save all of this wax. You'll probably get 1 or 2 pounds of wax for every 100 pounds of honey that you harvest, plus whatever burr comb you remove.
Article / Updated 05-18-2023
In the autumn of 2006, a beekeeper in Florida filed the first report of a sudden and unexplained disappearance of his bees. They didn't die. They just packed up and left. More reports of heavy losses (mostly from commercial migratory beekeepers) quickly followed. In subsequent years, beekeepers have reported losing anywhere from 30 percent to 90 percent of their hives.
Article / Updated 04-27-2023
If you're new to raising goats in your effort to live sustainably, you may not know that rumination is a good indicator of your goat's health. Because rumination is an essential part of how goats digest food, you can use cud-chewing habits as an indicator of goat health.A ruminating goat is eating and generating heat and energy.
Cheat Sheet / Updated 09-01-2022
Goats make great pets. And as more and more people look for ways to live sustainably and grow their own food, goats are a wonderful option for raising meat and milk. You can harvest their fleece, as well. Whether you want to raise goats for food or as the smart, lovable pets they can be, you need to know what questions to ask.
Article / Updated 09-01-2022
Goats are mammals and are similar to other mammals in some ways. But they also have unique features that indicate whether they are healthy, tell you how old they are, and even give clues about their parents. © Milya Shaykh / Shutterstock.com Parts of the body You can own goats and not know the names of parts of their bodies.
Article / Updated 09-01-2022
The average length of time that a person owns goats is only around five years. One reason is that they have unrealistic expectations of what owning goats requires. So what exactly do you need to understand before becoming a goat owner, and what are some of the common missteps you can avoid? © lakov Filimonov / Shutterstock.
