


Replacing just a portion of a track is called punch recording. You play the track, punch in and record the new part, and then punch out when you’re done. It’s like punching the work clock for a bar or two. Play, punch in, punch out, and play again.
The first way to set up punch recording is to do it on-the-fly, as the track is playing, as follows:
Choose RecorAllow Quick Punch-In.
This is the default setting.
Choose Record→Record Button Options→Record/Record Toggle.
The settings of both the record icon and the record key command are updated so that clicking the record icon or using the key command toggles the record state on or off, while continuing to play.
Press the spacebar to play your project.
At the point where you want to begin recording (punch in), press R.
At the point where you want to stop recording (punch out), press R again.
Your project continues playing but no longer records.
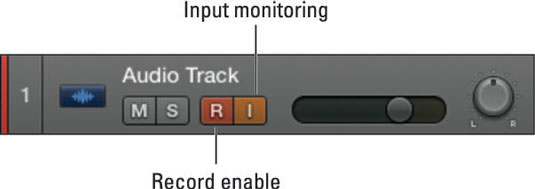
While your project is playing, you won’t be able to hear the input of the selected track until you begin recording. This setting is the default and is useful if you need to hear the recorded track to time the punch in. After you begin recording, you’ll be able to hear the input.
But if you want to listen to the input during playback as well as during recording, turn off Auto Input Monitoring on the Record menu.
If you want to listen to the input of tracks that are not record-enabled, click the track's input monitoring icon.
When you need more precision in your punch recording, you can preprogram the punch in and punch out points. This technique is called autopunch recording. To begin autopunch recording, follow these steps:
Click the autopunch icon in the control bar.

If you don't see the icon, customize the control bar. A second ruler is shown at the top of the tracks area.

Set the autopunch locators by dragging from left to right in the autopunch area of the ruler.
The autopunch area will be displayed by a red stripe.
Start recording before the punch-in point.
Recording begins automatically when the playhead reaches the left autopunch locator and ends when it reaches the right autopunch locator.
Stop recording after the punch-in point.
A take folder is created, and a new lane is added that includes your autopunch recording.

