


The Data Validation feature in Excel 2013 can be a real timesaver when you’re doing repetitive data entry, and can also go a long way in preventing incorrect entries in your spreadsheets. When you use Data Validation in a cell, you indicate what type of data entry is allowed in the cell.
As part of restricting a data entry to a number (which can be a whole number, decimal, date, or time), you also specify the permissible values for that type of number (a whole number between 10 and 100 or a date between January 1, 2012, and December 31, 2012, for example).
When you restrict the data entry to text, you can specify the range of the minimum and maximum text length (in characters) or, even better, a list of permissible text entries that you can select from a pop-up menu (opened by clicking a pop-up button that appears to the right of the cell whenever it contains the cell cursor).
When using Data Validation to restrict the type of data entry and its range of acceptable values in a cell, you can also specify an input message that is automatically displayed next to the cell when you select it and/or an error alert message that is displayed if you try to input the wrong type of entry or a number outside the permissible range.
To use the Data Validation feature, put the cell cursor in the cell where you want to restrict the type of data entry that you can make there, and then click the Data Validation button on the Data tab of the Ribbon (or press Alt+AVV). The Data Validation dialog box opens with the Settings tab selected.
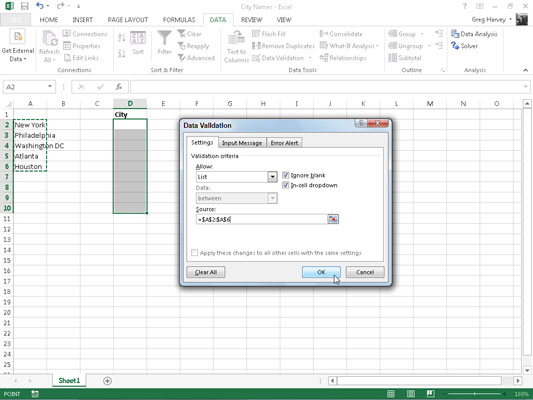
You then click the drop-down button attached to the Allow drop-down list box and select among the following items:
Any Value to remove any previous restrictions thereby canceling data validation and once again enabling the user to enter anything he wishes into the cell
Whole Number to restrict the entry to a whole number that falls within a certain range or adheres to particular parameters that you specify
Decimal to restrict the entry to a decimal number that falls within a certain range or adheres to particular parameters that you specify
List to restrict the entry to one of several text entries that you specify, which you can select from a pop-up menu that’s displayed by clicking a pop-up button that appears to the right of the cell whenever it contains the cell cursor
Date to restrict the entry to a date that falls within a certain range or on or before a particular date
Time to restrict the entry to a time that falls within a certain range or on or before a particular time of the day
Text Length to restrict a text entry so that its length in characters doesn’t fall below or go above a certain number or falls within a range that you specify
Custom to restrict the entry to the parameters specified by a particular formula entered in another cell of the worksheet
To specify an input message after selecting all the items on the Settings tab, click the Input Message tab of the Data Validation dialog box, where you enter a short title for the input message (such as List Entry) in the Title text box, and then enter the text of your message in the Input Message list box below.
To specify an alert message, click the Error Alert tab of the Data Validation dialog box, where you can select the kind of warning from the Style drop-down list: Stop (the default, which uses a red button with a cross in it), Warning (which uses a yellow triangle with an exclamation point in it), or Information (which uses a balloon with a blue I in it).
After selecting the type of alert, you then enter the title for its dialog box in its Title text box and enter the text of the alert message in the Error Message list box.
To apply the restriction you’re defining in the Data Validation dialog box to all the other cells that are formatted the same way as in a cell range formatted as a table, click the Apply These Changes to All Other Cells with the Same Settings check box before you click OK.
To copy the restriction to a range that is not formatted as a table, use the Data Validation feature to set up the type of entry and permitted range in the first cell and then use the Fill handle to copy that cell’s Data Validation settings to subsequent cells in the same column or row.
By far, the most popular use of the Data Validation feature is to create a drop-down menu from which you or someone who uses your spreadsheet can select the appropriate data entry.
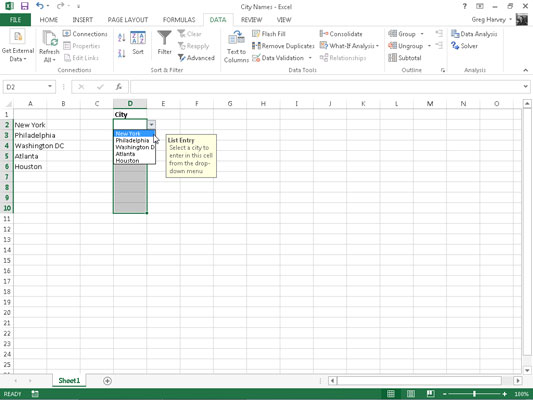
This figure shows you what happens in the spreadsheet after you close the Data Validation dialog box. Here, you see the pop-up menu (with a list of cities taken from the cell range A2:A6) as it appears when you click the cell’s new pop-up button.
In this figure, you can also see the input List Entry message box created for this cell by using the options on the Input Message tab of the Data Validation dialog box. Note that you can reposition this message box (officially known as a comment box) so that it’s close to the cell but doesn’t get in the way of selecting an entry — simply drag the comment box with the mouse pointer.
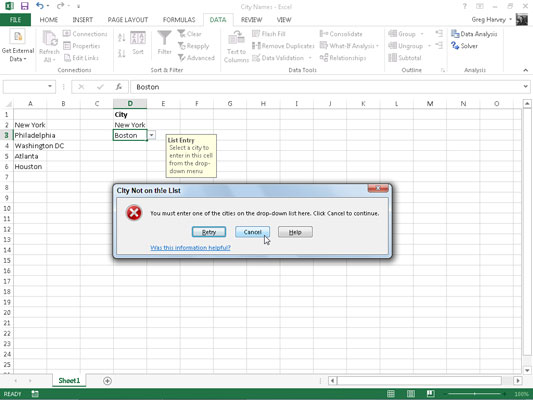
This figure demonstrates what happens if you try to input an entry that isn’t on the drop-down list.
To find cells to which Data Validation has been applied, open the Go To dialog box (Ctrl+G or F5), and then click the Special button and click the Data Validation option button in the Go To Special dialog box.
Click the Same option button under Data Validation to have Excel go to the next cell that uses the same Data Validation settings as the active cell. Leave the All option button under Data Validation selected to go to the next cell that uses any kind of Data Validation setting.
To get rid of Data Validation settings assigned to a particular cell or cell range, select the cell or range, open the Data Validation dialog box (Alt+AVV), and then click the Clear All button before you click OK.


