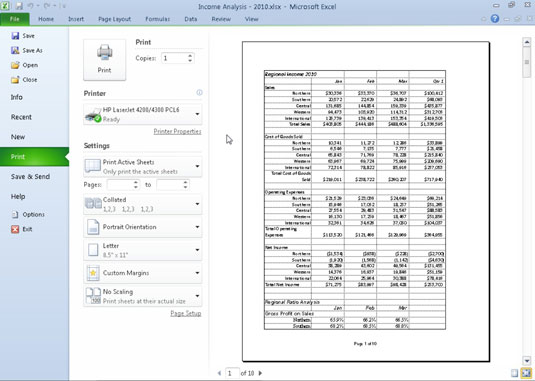
Windows allows you to install more than one printer for use with Microsoft applications. If you've installed multiple printers, the first one installed becomes the default printer, which is used by all Windows applications, including Excel 2010. If you get a new printer, you must first install it from the Windows Control Panel before you can select and use the printer in Excel.
To select a new printer to use with Excel, follow these steps:
Click the File tab and then click Print (or press Ctrl+P).

The Print panel displays in Backstage view. (Don’t click the Quick Print button on the Quick Access toolbar, because doing so immediately prints the worksheet without giving you an opportunity to change the printer!)
Click the name of the new printer that you want to use in the Printer drop-down list.
If the printer that you want to use isn’t listed, you can try to add the printer with the Add Printer link near the bottom of the list.
(Optional) Click the Printer Properties link below the Printer drop-down list; click OK after changing any settings.
Use the Properties dialog box (which varies depending on the selected printer) to change any printer-specific settings, if necessary.
Make any other required changes in the Print panel.
You can change the print area, pages, copies, orientation, margins, and scaling settings, among others.
Click the Print button near the top of the Print panel.
Excel 2010 prints your worksheet to the newly selected printer.


