


If you’re dealing with an Excel 2013 spreadsheet whose data is of a sensitive nature and should not be modified by anyone who’s authorized to open it, you need to set both a password for opening and a password for modifying the workbook file.
You assign either one or both of these types of passwords to a workbook file at the time you save it with the File→Save As command (Alt+FA).
When you choose this command (or click the Save button on the Quick Access toolbar or press Ctrl+S for a new file that’s never been saved before), Excel opens the Save As screen where you select the place where you want to save the file.
After you select the place to save the file on the Start screen, Excel opens the Save As dialog box where you can then set the password to open and/or the password to modify the file by taking these steps:
Click the Tools button in the Save As dialog box and then choose General Options from its drop-down menu.
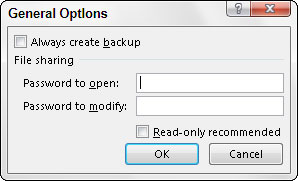
Doing this opens the General Options dialog box, where you can enter a password to open and/or a password to modify in the File Sharing section. Your password can be as long as 255 characters, consisting of a combination of letters and numbers with spaces.
When adding letters to your passwords, keep in mind that these passwords are case-sensitive. This means that opensesame and OpenSesame are not the same password because of the different use of upper- and lowercase letters.
(Optional) If you want to assign a password to open the file, type the password (up to 255 characters maximum) in the Password to Open text box.
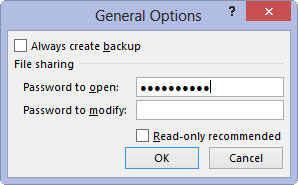
As you type the password, Excel masks the actual characters you type by rendering them as dots in the text box.
If you decide to assign a password for opening and modifying the workbook at the same time, proceed to Step 3. Otherwise, skip to Step 4.
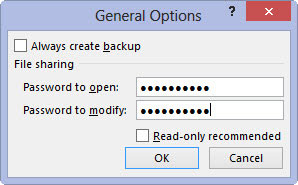
When entering the password for modifying the workbook, you want to assign a password that’s different from the one you just assigned for opening the file (if you did assign a password for opening the file in this step).
(Optional) If you want to assign a password for modifying the workbook, click the Password to Modify text box and then type the password for modifying the workbook there.
Before you can assign a password to open the file and/or to modify the file, you must confirm the password by reproducing it in a Confirm Password dialog box exactly as you originally entered it.
Click the OK button.
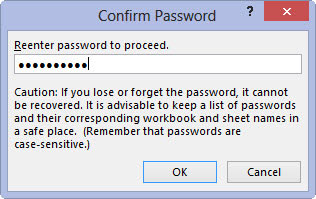
Doing this closes the General Options dialog box and opens a Confirm Password dialog box, where you need to exactly reproduce the password. If you just entered a password in the Password to Open text box, you need to reenter this password in the Confirm Password dialog box.
If you just entered a password in the Password to Modify text box, you need only to reproduce this password in the Confirm Password dialog box. However, if you entered a password in both the Password to Open text box and the Password to Modify text box, you must reproduce both passwords.
In the first Confirm Password dialog box, enter the password you entered in the Password to Open text box. Immediately after you click OK in the first Confirm Password dialog box, the second Confirm Password dialog box appears, where you reproduce the password you entered in the Password to Modify text box.
Type the password exactly as you entered it in the Password to Open text box (or Password to Modify text box, if you didn’t use the Password to Open text box) and then click OK.
If your password does not match exactly (in both characters and case) the one you originally entered, Excel displays an alert dialog box, indicating that the confirmation password is not identical. When you click OK in this alert dialog box, Excel returns you to the original General Options dialog box, where you can do one of two things:
Reenter the password in the original text box. Click the OK button to redisplay the Confirm Password dialog box, where you can try again to reproduce the original. (Make sure that you’ve not engaged the Caps Lock key by accident.)
If you assigned both a password to open the workbook and one to modify it, Excel displays a second Confirm Password dialog box as soon as you click OK in the first one and successfully reproduce the password to open the file. You then repeat Step 5, this time exactly reproducing the password to modify the workbook before you click OK.
When you finish confirming the original password(s), you are ready to save the workbook in the Save As dialog box.
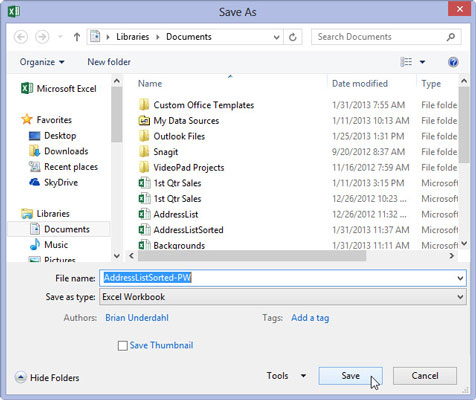
(Optional) If you want to save the password-protected version under a new filename or in a different folder, edit the name in the File Name text box.

Then select the new folder from the Save In drop-down list.
Click the Save button to save the workbook with the password to open and/or password to modify.
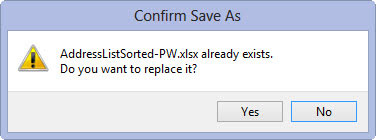
As soon as you do this, Excel saves the file if this is the first time you’ve saved it. If not, the program displays an alert dialog box indicating that the file you’re saving already exists and asking you whether you want to replace the existing file.
Click the Yes button if the alert dialog box that asks whether you want to replace the existing file appears.
Select the Read-Only Recommended check box in the General Options dialog box instead of assigning a password for editing the workbook in the Password to Modify text box when you never want the user to be able to make and save changes in the same workbook file. When Excel marks a file as read-only, the user must save any modifications in a different file using the Save As command.


