


- Press and hold the Shift key while dragging with the Rectangle or Ellipse tool to create a perfect square or circle. This trick is also helpful when you’re using the Polygon and Star tools — holding down the Shift key constrains them so that they’re straight.
- Create a shape from the center out by holding down the Alt (Windows) or Option (Mac) key while dragging. Hold down Alt+Shift (Windows) or Option+Shift (Mac) to pull a constrained shape out from the center.
- When creating a star or polygon shape by clicking and dragging, if you keep the mouse button down, you can then press the up- or down-arrow key to interactively add or subtract points or sides to your shape.
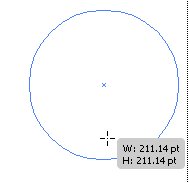 Use the Shift key to constrain a shape while you create it.
Creating advanced shapes
At times, it may be wise to use advanced tools in Illustrator to create unique shapes. The Pathfinder panel is an incredible tool you can use to combine, knock out (eliminate one shape from another), and even create shapes from other intersected shapes.You use the Pathfinder panel to combine objects into new shapes. To use the Pathfinder panel, choose Window→ Pathfinder.
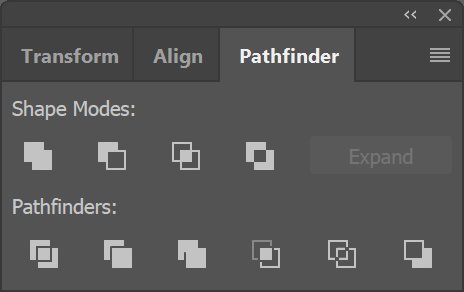 Combine objects into new shapes.
Across the top row of the Pathfinder panel are the Shape modes, which let you control the interaction between selected shapes. You can choose from the Shape modes listed in the table below.
| Mode | What You Can Do with It |
| Unite | Unite selected shapes into one shape. |
| Minus Front | Cut out the topmost shape from the underlying shape. |
| Intersect Shape Areas | Use the area of the topmost shape to clip the underlying shape as a mask would. |
| Exclude Overlapping Shape Areas | Use the area of the shape to invert the underlying shape, turning filled regions into holes and vice versa. |
If you like the result from using Exclude Overlapping Shapes mode, you can also create a similar effect by selecting several shapes and choosing Object→ Compound Path→ Make. This command “punches” the topmost shapes from the bottom shape.
The shapes remain separate so that you can still adjust them, which is helpful if you like to tweak your artwork (but it drives some people crazy). You can turn the result of using the Shape Mode buttons into one shape either by clicking the Expand button after selecting the Shape mode or by holding down the Alt key (Windows) or Option key (Mac) when clicking a Shape Mode button. Option on a Mac makes separate objects. Expand makes multiple objects from a compound path.
Using the Pathfinders
Pathfinders are the buttons at the bottom of the Pathfinder panel that let you create new shapes from overlapping objects. This table summarizes what each Pathfinder does.| Mode | What You Can Do with It |
| Divide | Divide all shapes into their own individual shapes. This tool is quite useful when you’re trying to create custom shapes. |
| Trim | Remove the part of a filled object that’s hidden. |
| Merge | Remove the part of a filled object that’s hidden. Also, remove any strokes and merge any adjoining or overlapping objects filled with the same color. |
| Crop | Delete all parts of the artwork that fall outside the boundary of the topmost object. You can also remove any strokes. If you want strokes to remain when using this feature, select them and choose Object→ Path→ Outline Stroke. |
| Outline | Divide an object into its shape’s line segments or edges. This tool is useful for preparing artwork that needs a trap for overprinting objects. |
| Minus Back | Delete an object that's behind the front-most object. |
Using the Shape Builder tool
Using the Shape Builder tool, you can intuitively combine, edit, and fill shapes on your artboard. Follow these steps to create your own unique shape using the Shape Builder tool:- Create several overlapping shapes.
- Select the shapes that you want to combine.
- Select the Shape Builder tool and then click and drag across the selected shapes.

The selected shapes are combined into one shape.
The Shape Builder tool also enables merging objects, breaking overlapping shapes, subtracting areas, and more.
- Create another shape that overlaps your new combined shape.
- Using the Selection tool, select both shapes.
- Select the Shape Builder tool again.
- Hold down the Alt (Windows) or Option (Mac) key and click and drag across the newly added shape.
 Use the Shape Builder tool to subtract from another shape.
It’s subtracted from the underlying shape.


