


The last part of the TI-Nspire Resources panel is only available when handhelds are connected via USB cables. The Belkin USB hubs come with the Connect-to-Class Teacher Software to connect up to seven handhelds to your computer at a time.
(Actually, you could successfully connect more handhelds at once, but it gets a little crowded when more than seven students are standing around a computer.) If you have a classroom set of handhelds, you might consider using the TI-Nspire Docking Station to connect up to 40 handhelds at one time (and avoid overcrowding issues altogether).
The transfer tool or the TI-Nspire Docking Station can be used to send a new OS to many handhelds all at once. That is a big time-saver!
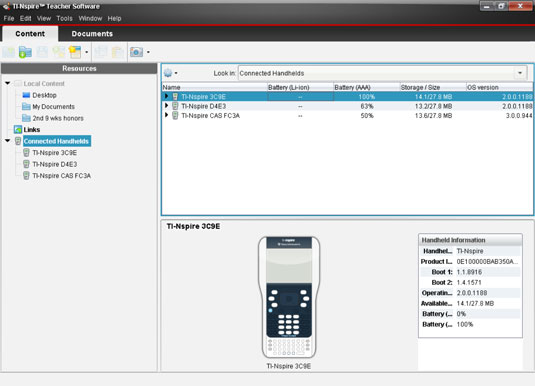
After your handhelds are connected, click the Connected Handhelds option in the Resources panel, and a list of all the connected handhelds appears in the upper-right panel. This list is very informative. You can see the percentage of battery remaining (both TI-Nspire Rechargeable and AAA batteries) for each of your handhelds.
In addition, the OS number and available storage are provided. This makes it easy to see whether a student needs to upgrade his or her OS.
Each handheld in the list is given a name. If you right-click the name of a handheld, one of the options is to rename the handhelds. You could rename the handhelds using student names so that you know when a student is connected.
After the handhelds are connected, you can quickly and easily transfer files from your computer to the connected handhelds. Follow these steps to transfer files:
Use the Resources panel to locate the file(s) or folder(s) that you would like to transfer.
Click a file/folder to highlight the file that you would like to transfer.
If you would like to transfer more than one file/folder, hold down Shift (to select multiple consecutive entries) or hold down Ctrl (to make multiple selective entries) to make your selections.

Click the icon shown here and choose Send to Selected Handhelds to open the Transfer tool window.
You can add even more files to the transfer list by clicking the Add to Transfer List button.
To activate the transfer, click the Start Transfer button.
After the transfer has been activated, the Transfer tool continues to send out files to any handheld that connects to it. Only after you press the Stop Transfer button will your computer stop sending out the files. Another way to activate the Transfer tool is to right-click a file and choose Send to Handhelds. Alternatively, press Ctrl+Shift+T to activate the Transfer tool.


