

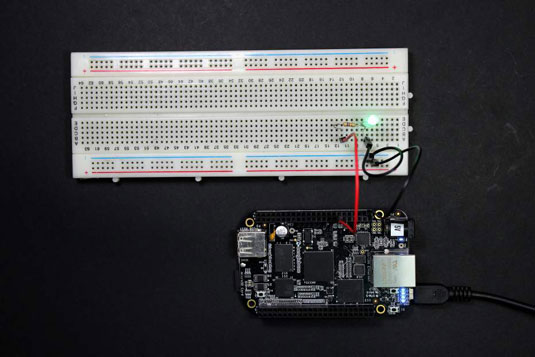
Often, the best way to get acquainted with a new working platform, such as the BeagleBone, is to light up and turn off an LED on command. To do so, you set a GPIO (general purpose input/output) as output; you want to control the state of a component.
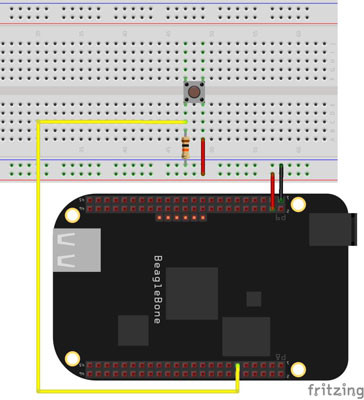
The procedure for setting a GPIO (general purpose input/output) pin as input is very similar to the technique setting a GPIO as an output. The key difference is that you read from the value file rather than writing in it. To verify this difference, you need to build the circuit shown here.
Grab a pushbutton and follow these steps:
Wiring the circuit for a pushbutton
To wire up a pushbutton to the BeagleBone, follow these steps and refer to the diagram for the circuit shown.
Turn off the BeagleBone.
Remove the power source and shut down the BeagleBoard through the command line.
Power up the breadboard, and set up the ground.
Using jumper wires, you can connect pin 1 or 2 of either header to the negative track — these pins provide ground — and connect pin 3 or 4 of header P9 to the positive track — these provide 3.3V.
The BeagleBone pins aren’t 5V tolerant! Be careful to connect pin 3 or 4 of header P9, not pins 5, 6, 7, and 8.
Connect a GPIO pin to the breadboard.
You can use any of the pins that are labeled as GPIOs. This example uses GPIO 45, which is pin 11 of header P8. Connect it to a vertical row on the breadboard through the use of a jumper.
Place your pushbutton on the breadboard.
If you’re using a pushbutton, you should place it at the center of the breadboard to separate the pairs of legs.
Connect one of the pushbutton’s legs to the positive rail.
Use a jumper to establish this connection.
Connect the other leg to the input pin.
Connect it to the jumper that comes from the BeagleBone pin of the GPIO that you are using — pin 11 of header P8 in this example.
Connect a pull-down resistor.
A pull-down resistor is a resistor used to prevent the existence of a short circuit when the pushbutton is closed. Connect it from the ground track to the leg of the pushbutton that connects to the input pin. A 10K resistor should do the job.
When the pushbutton is closed (which is the same as saying that the pushbutton is pressed), having a pull-down resistor makes the current — which follows the path of least resistance, according to Ohm’s Law — go to the input pin rather than to the ground. Thus, there is a voltage reading at the input pin.
Controlling the GPIO
When you’re done with the circuitry, you can move on to the command line. Start by exporting the pin that you use as an input by typing the following commands:
root@beaglebone:/sys/class/gpio# <b>echo 45 > export</b>
root@beaglebone:/sys/class/gpio# <b>ls</b>
export  gpio45  gpiochip0  gpiochip32  gpiochip64  gpiochip96  unexport
Then set the pin as input by writing into the direction file:
root@beaglebone:/sys/class/gpio# cd gpio45
root@beaglebone:/sys/class/gpio/gpio45# echo in > direction
If the button isn’t pressed, the 3.3V from the positive track of your breadboard has no way of reaching the GPIO pin, so if you read from the value file, you should get 0 because the pin is connected to ground:
root@beaglebone:/sys/class/gpio/gpio45# <b>cat value</b>
0
If you’re pressing the button, however, the value file should hold 1, indicating that the pin is in the HIGH state:
root@beaglebone:/sys/class/gpio/gpio45# <b>cat value</b>
1
Unexport the pin when you’re done:
root@beaglebone:/sys/class/gpio/gpio45# <b>cd ..</b>
root@beaglebone:/sys/class/gpio# <b>echo 45 > unexport</b>
root@beaglebone:/sys/class/gpio# <b>ls</b>
export  gpiochip0  gpiochip32  gpiochip64  gpiochip96  unexport
By itself, reading the state of a button (pressed or not pressed, HIGH or LOW) doesn’t sound very exciting. You can use input pins to control outputs. You instruct your BeagleBone to read from a pin and then follow directions such as “If it’s HIGH, do

