


Instead of displaying each Nikon D7100 photo or movie file one at a time, you can display 4 or 9 thumbnails, or even a whopping 72 thumbnails. (Movie files are indicated by little sprocket holes along the thumbnail edges.)
Here’s how things work in thumbnails view:
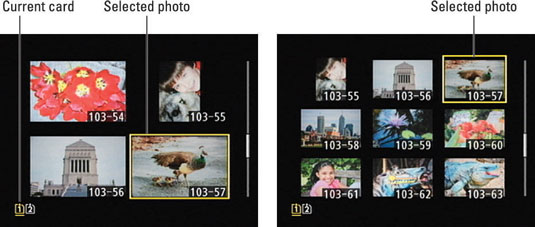
Display thumbnails. Press the ISO button, labeled “Zoom out,” to cycle from single-picture view to 4-thumbnail view, press again to shift to 9-picture view, and press once more to bring up those itty-bitty thumbnails featured in 72-image view.

Display fewer thumbnails. Pressing the Qual button takes you from Calendar view back to the standard thumbnails display or, if you’re already in that display, reduces the number of thumbnails so you can see each one at a larger size — hence the “Zoom in” label slapped on the button. Again, your first press takes you from 72 thumbnails to 9, your second press to 4 thumbnails, and your third press returns you to single-image view.

Notice the icons on these two buttons: The ISO button sports a magnifying glass with a minus sign, the universal symbol for zoom out. And the Qual button’s magnifying glass has a plus sign, reminding you that you use this button to zoom in.
Toggle between thumbnails display and full-frame view. Don’t waste time pressing the Qual button repeatedly to zoom back out to the full-frame view: Instead, just press OK. Press OK again to go back to the thumbnails display.
Scroll the display. Press the Multi Selector up and down to scroll to the next or previous screen of thumbnails. Remember that this trick is for thumbnails view only; in single-image view, pressing the Multi Selector up or down changes the data display style.
Select an image. To perform certain playback functions, such as deleting a photo, you first need to select an image. A yellow box surrounds the selected image. To select a different image, use the Multi Selector to move the highlight box over the image.
If you’re using dual memory cards, you can tell which card contains the selected photo by looking at the card icons. The icon for the current card is yellow.


