
A query is nothing more than a saved version of your Access sort or filter criteria. By saving the particular Access sort or filter criteria as a query, you can select that query by name later.
Creating a simple query in Access 2019
If your database table contains dozens of different fields, you may find it confusing to make sense of all your information. As an aid, a simple query strips away fields so you see only the fields containing data you want to see, such as a person’s name and phone number but not her hire date or employee number.To create a MS Access query, follow these steps:
- Click the Create tab.
- In the Queries group, click the Query Wizard icon.
The New Query dialog box appears.
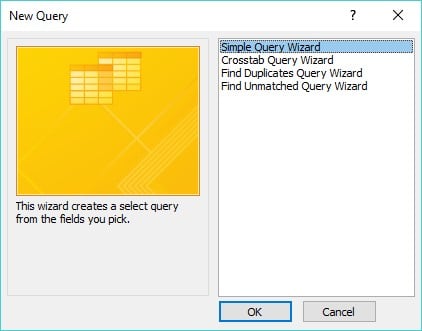 The New Query dialog box lets you choose a Query Wizard.
 - Click Simple Query Wizard and then click OK.
The Simple Query Wizard dialog box appears.
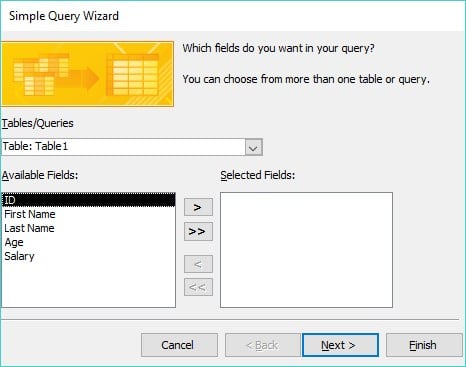 The Simple Query Wizard dialog box lets you pick the fields to use for your query.
 - In the Available Fields box, click a field name listed, and then click the > button.
Access displays your chosen field in the Selected Fields box.
- Repeat Step 4 for each field you want to use in your query.
- Click Next.
If any of your chosen fields contains numeric data, another dialog box appears. This dialog box asks whether you want to display your data in a Detail view (shows every record) or Summary view (shows numerical information such as the total number of records found, the average value, and the minimum/maximum value).
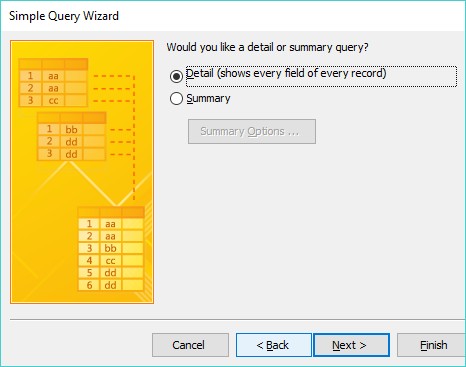 Choose between Detail or Summary view.
 - Select the Detail or Summary radio button and then click Next.
Another dialog box appears, asking you to type a descriptive name for your query.
- Click in the text box, type a descriptive name for your query, and then click Finish.
Access displays the results of your query as a separate tab. If you add information to or delete information from your database, you can click this query tab to get a quick look at the results of your query without defining everything all over again.
- To save your query, click the File tab, and then choose the Save icon.
Access saves your query in the All Access Objects pane under the Queries category. Any time you want to view that query, just double-click it.
Creating a crosstab query in Access 2019
A crosstab query lets you combine two or more fields to calculate and display a calculation based on a third field. For example, if your Access database contains the names of salespeople and the products they sold, you can use those two fields to create a crosstab that tells you how much each salesperson sold of each product.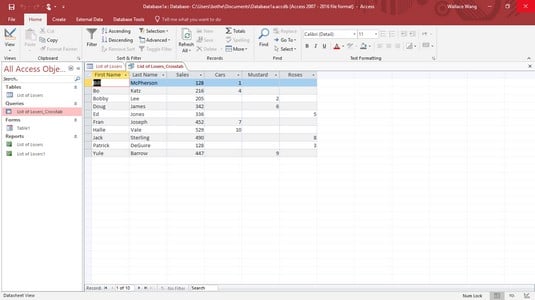 A crosstab query extracts information by cross-referencing two or more fields.
The Crosstab Query Wizard lets you define up to three fields in a crosstab query, but you can always add more fields manually in the Design view.
To create a crosstab query in Access, you need to identify three types of fields:- One to three fields to identify each record (such as the First Name and Last Name fields)
- A single field to display specific data from each record (such as the Product field, which displays the product names Purses, Unicorns, or Missiles)
- A crosstab field that displays a calculated result (such as Sales)
- Click the Create tab.
- In the Queries group, click the Query Wizard icon.
The New Query dialog box appears.
- Click the Crosstab Query Wizard and then click OK.
The Crosstab Query Wizard dialog box appears.
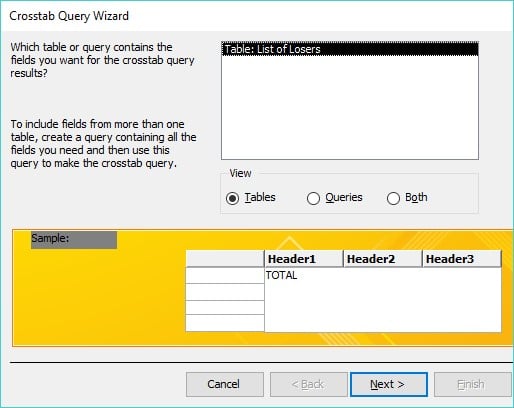 The Crosstab Query Wizard dialog box asks you to choose which database table to use.
 - Click a database table and then click Next.
Another Crosstab Query Wizard dialog box appears that asks for between one and three fields to identify each row (record).
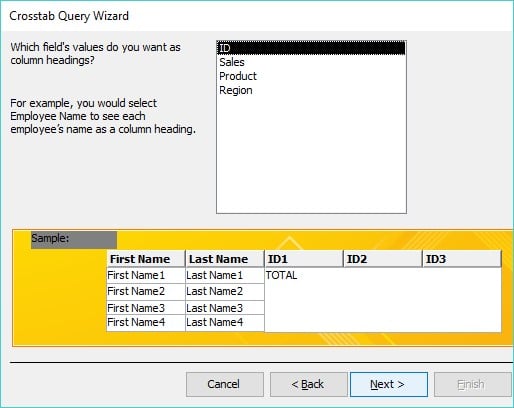
 The first step to creating a crosstab query is to choose up to three fields to identify each record.
 - In the Available Fields box, click a field and then click the > button to move your chosen field to the Selected Fields box.
- Repeat Step 5 for each additional field you want to include.
- Click Next.
Another dialog box appears, asking for a single field to use to cross-tabulate data with the fields you chose in Steps 5 and 6.
 To cross-tabulate your data, you need to choose another field.
 - Click a field name and then click Next.
Ideally, this field should consist of text information that lists different data, such as sales regions (East, West, North, or South) or products (Missiles, Unicorn, and so on). If you choose a field that contains numerical data, your crosstab query displays only those numbers in the column headings, which will seem meaningless. Another dialog box appears.
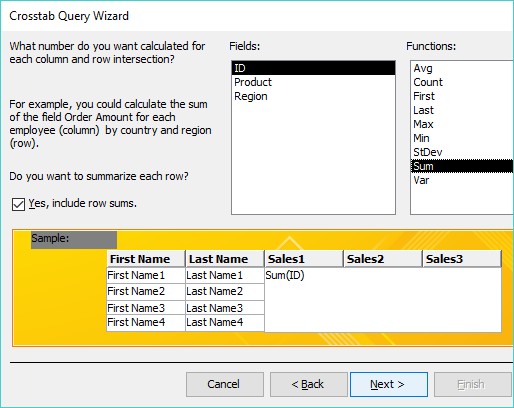 The Crosstab Query Wizard dialog box displays a list of mathematical functions you can choose from.
 - In the Fields box, click a field and then click a mathematical function that you want Access to calculate, such as Sum, Avg, or Count.
- Click Next.
Another dialog box appears, asking for a name for your query.
- In the text box at the top of the dialog box, type a descriptive name for your query and then click Finish.
Access displays your crosstab query.
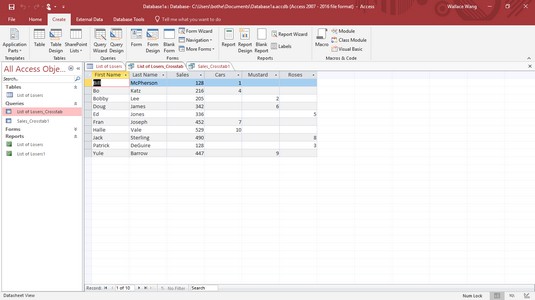 The Crosstab Query can display calculations on your database information.
 - To save your query, click the File tab and choose the Save icon.
Creating a query that finds duplicate field data
Suppose you sell a hundred different products. How can you tell which products customers are buying the most? To find the answer to this type of question, you can search your database manually to find a Products Sold field and then count how many times each product appears.As a simpler solution, you can create a MS Access query that finds and counts how many times duplicate data appears. To create a query to find duplicate field data in Access, follow these steps:
- Click the Create tab.
- In the Queries group, click the Query Wizard icon.
The New Query dialog box appears.
- Click Find Duplicates Query Wizard, and then click OK.
The Find Duplicates Query Wizard dialog box appears, asking you to choose the database table to search.
- Click a database table and then click Next.
Another dialog box appears, asking you to choose the fields to examine for duplicate data.
- Click a field name and then click the > button. Repeat this step for each additional field you want to search.
- Click Next.
Another dialog box appears, asking whether you want to display additional fields. If you choose to look for duplicate data in a Product field (Step 5) to see which products are most popular, you can display additional fields such as each salesperson’s name so you can also see who is responsible for selling the most products.
- Click a field and then click the > button. Repeat this step for each additional field you want to display.
- Click Next.
A dialog box appears, asking whether you want to give your query a descriptive name.
- In the top text box, type a descriptive name and then click Finish.
Access displays your query as a separate tab.
- To save your query, click the File tab and then choose the Save icon.
Creating an unmatched query in Access 2019
Access can store huge amounts of data, but the more data you store, the harder it can be to view it. To help you organize your data, you can divide it into separate tables. For example, one table might contain a list of customers, and a second table might contain a list of salespeople.When you store data in separate tables, each table may share one or more common fields. For example, a table containing customers may contain a SalesPerson field that shows which salesperson deals exclusively with which customer. A second table listing salespeople can contain the Customer field (along with additional information, such as each salesperson’s phone number, address, sales region, and so on).
An unmatched query examines two (or more) database tables to look for missing information. For example, you can use an unmatched query to find customers who haven’t ordered anything in the past six months, sales regions that haven’t ordered certain products, or salespeople who have not been assigned to a sales region. Basically, an unmatched query can help you find missing pieces or holes in your entire database file.
To create an unmatched query in Access, follow these steps:
- Click the Create tab.
- In the Queries group, click the Query Wizard icon.
The New Query dialog box appears.
- Click Find Unmatched Query Wizard, and then click OK.
The Find Unmatched Query Wizard dialog box appears, asking you to choose a database table that contains the unmatched records you want to find.
- Click a database table and then click Next.
Another dialog box appears, asking you to choose a database table that contains at least one field that also appears in the table you chose in Step 3.
- Click a second database table and then click Next.
Another dialog box appears, asking you to identify the field that both database tables have in common.
- Click the common field that both database tables share.
- Click the gray <=> button that appears between the two fields and then click Next.
A dialog box appears, asking you to identify the fields you want to display from the database table you chose in Step 4.
- Click a field and then click the > button. Repeat this step for each additional field you want to display.
- Click Next.
A dialog box appears, asking you to give your query a descriptive name.
- In the text box, type a descriptive name and then click Finish.
Access displays your query results, which show you only the data in fields you selected in Step 8.
- To save your query, click the File tab and choose the Save icon.
Viewing, renaming, closing, and deleting Access queries
Each time you create and save a query, Access stores it for future use. After you create and save a query, you can add or delete data from your tables and then apply your queries on the newly modified data.To view a query, just double-click the query name in the left pane. In case you need to rename your query to give it a better descriptive name, follow these steps:
- Right-click the query name in the left pane.
A pull-down menu appears.
- Choose Rename.
Access highlights the query name.
- Type a new name and then press Enter.
- Right-click the query name that appears in the tab.
A pull-down menu appears.
- Choose Close.
Access closes your chosen query and removes its tab from view.
- Right-click a query name and choose Delete from the pop-up menu that appears.
You won't be able to delete a query unless you close it first.
A dialog box appears, asking whether you really want to delete your query.
- Click Yes (or No).