

If you print tiny parts that have little layer surface area or turn out objects at such high speeds that each layer is completed in a matter of seconds, the layer of plastic just laid down doesn't have time to cool, so it's still a little molten when the next layer is laid down. With the radiated heat from the nozzle and more hot plastic being extruded, the model can end up being a messy blob instead of the object you intended. You can slow the speed, but you may not resolve the problem; you shouldn't have to wait even longer to print an object anyway. In this situation, a controlled cooling fan can make a massive difference.
The cooling fan is usually around 80mm wide and is controlled by the electronics. In your Slic3r-generated G-code, you can specify how fast a cooling fan runs and when the fan turns on and off. When your printer has a cooling fan fitted, Slic3r can run the print at full speed, even when printing fine details of a model. When your printer doesn't have a fan, Slic3r has to instruct the G-code to slow to allow natural cooling of the plastic before adding more. As you can imagine, fine structures can be tricky to print without a cooling fan.
A fan permits bridging of extruded material — an essential part of many 3D-printed objects. Bridging occurs when a model has to span a gap, essentially making a bridge in thin air. If you extrude plastic with nothing below it, the extruded material naturally sags and sometimes breaks. Although you can bridge filament without using a fan, you usually have some strings of snapped extruded filament hanging down, as well as a little sagging. When you use a fan to cool the plastic as it's extruded, you can make a tight bridge and get smart-looking results.
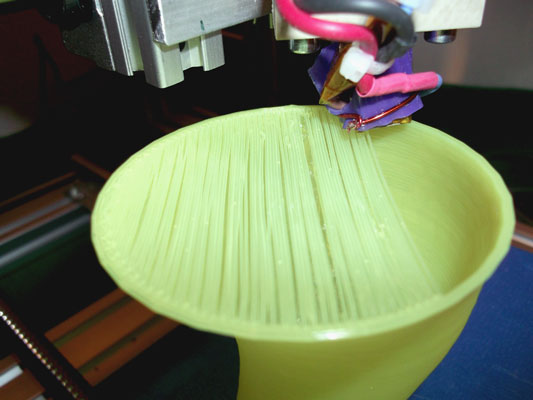 Bridging a filament. With good cooling and a few alternating layers, the spanned first layer becomes a solid surface that can be printed on after a second bridging layer in the opposite direction.
Mount the fan so that it cools the top layer of the part being printed. If you cool the heated bed, your part will pop off in the middle of the print. If you accidentally cool the hot-end, your extruder may jam. It's quite common for a cooling fan to have a 3D-printed duct that directs a stream of air across the printed object while it prints, to minimize unwanted cooling of the heated bed and hot-end.
 A printed duct cools the part being printed and doesn't accidentally cool the hot-end heater.
In almost all cases, it's not advisable to use a cooling fan when printing acrylonitrile butadiene styrene (ABS) material. The fan may cool the edges of the material too fast and cause them to curl; the next layer may be worse. Eventually, the part can be so deformed and warped that the print head may knock it off the build platform. By contrast, PLA likes a fan.
