


Voting is a special feature of Outlook email that adds buttons to an email message sent to a group of people. When they get the message and if they’re also using Outlook, recipients can click a button to indicate their response. Outlook automatically tallies the responses so you can see which way the wind is blowing in your office.
To add voting buttons to an email message you’re creating, follow these steps while creating your message:
1. From the Mail module, click New Email on the Home tab to start creating a new message.
A new Message form opens.
2. Click the Options tab on the Ribbon and then click the Use Voting Buttons button.A list of suggested voting buttons appears. The suggested choices include the following:
- Approve;Reject
- Yes;No
- Yes;No;Maybe
- Custom
If you choose Custom, the Properties dialog box opens. Type your own choices in the Use Voting Buttons text box. Follow the pattern of the suggested choices; just separate your options with a semicolon. If you want to ask people to vote on the lunch menu, for example, include a range of choices, such as Pizza;Burgers;Salad. Don’t use any spaces after the semicolons.
3. Click the set of voting buttons you want to use.The message You Have Added Voting Buttons to This Message now appears at the top of your message. If you’re adding your own custom choices, however, you’ll need to click the Close button in the Properties dialog box when you’re done to return to your message.
4. Click the Send button.And there you are! Democracy in action! Isn’t that inspiring? When your recipients get your message, they can click the button of their choice, as shown here, and zoom their preferences to you.
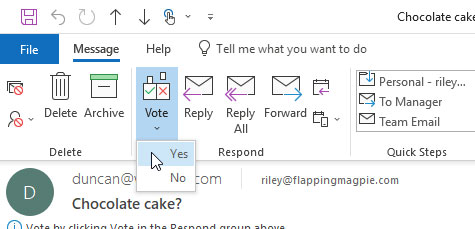 Cast your vote from the Vote button list.
When the replies arrive, you’ll see who chose what by looking at a reply’s Subject. Messages from people who chose Approve, for example, start with the word Approve; rejection messages start with the word Reject.
You can also get a full tally of your vote by checking the Tracking tab on the copy of the message in your Sent Items folder. To do so, follow these steps:
1. Click the Sent Items icon in the Folders list.
Your list of sent messages appears.
2. Double-click the message you sent for votes.The message you chose opens.
3. Click the Tracking button.You see the people you’ve asked for a vote and how they voted. A banner at the top of the Tracking page tallies the votes.


