


A main mail merge document in Word contains two important things: 1) the text that will remain the same between the personalized copies, and 2) the codes that tell Word what fields to insert at what points.
Follow these steps:
Start a new blank document. (Pressing Ctrl+N is a quick way.)
If you’re creating letters or email messages, it’s generally okay to use an existing document as the main document. Maybe you have a letter or message already written, for example, and you just need to personalize each copy. If you’re creating labels, envelopes, or a directory, however, you should start a new document.
On the Mailing tab, click Start Mail Merge.
Click the type of document you want to merge.
If you choose Letters, Email Messages, or Directory, your work is complete at this point. Move on to the next step in the process: selecting or creating a data list.
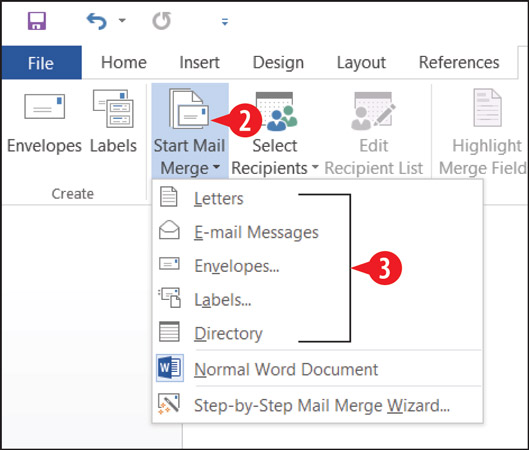
A directory is just like a letter mail merge except there is no page break between copies. So, for example, instead of each person’s copy being on its own page, a directory runs all the merged data together on a single page, like in a phonebook.
Extra steps for creating envelopes
If you select Envelopes in step 3, the Envelope Options dialog box appears after you complete the steps.
Choose the envelope size.
The standard business-size envelope in the USA is Size 10, the default.
Click OK.
 Choose an envelope size.
The document’s page size changes to reflect the envelope size you chose. An empty text box appears near the bottom of the document, ready to accept the merge codes for addressing the envelopes.
Extra steps for creating labels
If you select Labels in step 3, the Label Options dialog box opens.
Open the Label vendors list and choose the brand of label you have.
On the product number list, choose the label’s product number. It should be printed on the package.
The purpose of selecting a manufacturer and product number is to ensure the label size, the number of labels per sheet, and the spacing between labels is accurate in Word. If you don’t have the box the labels came in, you might have to enter the information manually. Find a ruler, so you can measure your labels. Then click New Label and fill out the dialog box that appears with your label sheet’s specifications.
Click OK.
 Choose a label manufacturer and product number.
If you are creating labels, Word creates a table with the dimensions appropriate to the label size and arrangement you indicated. By default the gridlines of this table do not appear. If you want to see them, Choose Table Tools Layout→View Gridlines.


