


Artboards are both coherent and discrete. Too philosophical? Okay, here’s the point: Artboards inherit and share many properties of the document they lie within, such as color mode or raster effect resolution. And that’s nice because it means you can work on different graphics, including differently sized graphics, with shared properties.
For example, you might have a project where you design a print poster, palm card, and plastic banner for an event. Although these will be different in size, they will likely use the same set of colors and maybe other features such as symbols.
Or you might use multiple artboards of the same size to prepare a prototype of a mobile app that shows different states of user interaction. Here, dozens of artboards might be helpful. Again, this project has common document properties that apply to all artboards, such as RGB color and pixels as the unit of measurement.
To help you get your money’s worth out of artboards, I first review some basic rules for creating and using them. Then I walk you through the two scenarios I just identified—print project and app prototype—to help you understand the efficacy of artboards and to expose you to key techniques for deploying artboards.
What are artboards?
You can have 1 to 1000 artboards per document. I’ve never used 1,000 artboards in a project, but it’s nice to know they’re there if I need them. As I explain in the beginning of this chapter, you can set the number of artboards for a document when you first create it, but you can also add and remove artboards after you begin work on a document.The Artboard tool is part of the Basic toolset. You create artboards in a document by selecting the Artboard tool and drawing interactively on the canvas, as shown.
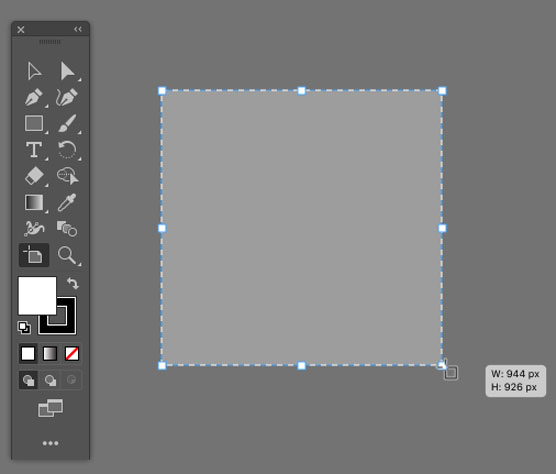 Drawing an artboard.
Or you can generate an artboard by clicking the New Artboard icon in the Artboard pane or the Control (or Properties) panel. The Artboard Options dialog shown here opens.
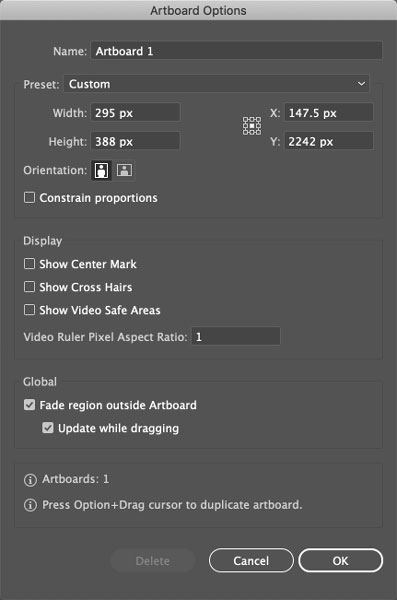 Generating an artboard with the Artboard Options dialog.
Generating an artboard allows you to name the artboard as you create it, along with defining the dimensions and location digitally.
You can manage artboards in many ways. The following shows you how to define and take advantage of the artboard options I think you’ll find helpful in organizing and sharing projects.
To change artboard sizes in Illustrator or move an artboard interactively, follow these steps:
1. With the Artboard tool, click once inside the artboard.
2. Drag to move the artboard, as shown.
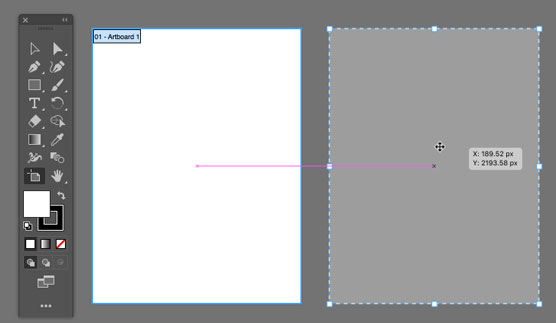 Moving an artboard.
3. Click and drag on a side or corner (square-shaped) bounding box to resize the artboard, as shown.
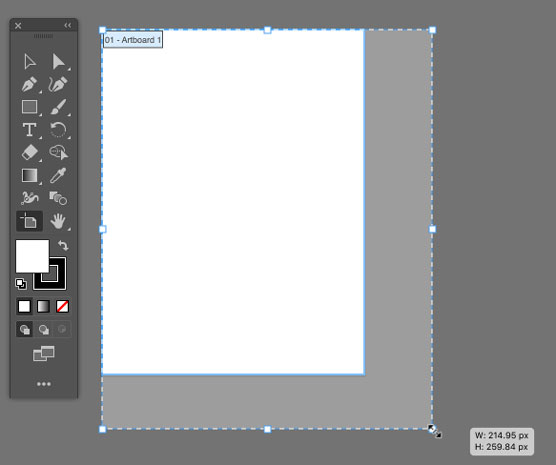 Resizing an artboard.
You can change any artboard property by using the Control or Properties panel:
- The Presets drop-down provides quick access to commonly used sizes. My favorite feature here is the Fit to Artwork Bounds option, which resizes the selected artboard to shrink in size to where it just fits around all the artwork within it. By sizing an artboard to an exact fit around its content, you avoid exporting or printing blank space in your graphic.
- The Name box is the easiest way to change the selected artboard name.
- The Move/Copy Artwork with Artboard option is on by default but can be turned off if you want to move an artboard while leaving the content where it is.
- The Artboard Options box opens a dialog with options that apply to all selected artboards in a document. I find the Show Center Mark useful when centering content in an artboard. You can use this dialog also to rename multiple selected artboards with sequential numbering. For example, if I rename a bunch of selected artboards DK, I end up with DK-1, DK-2, DK-3, and so on.
- The X value in the Control panel defines the vertical location; the Y value defines the horizontal location.
- The Width and Height values resize the artboard. Use the lock icon to lock the height-to-width aspect ratio while you resize.
- The Rearrange All icon opens up a panel with different options for arranging your artboards in an orderly way on the canvas.
- To hide all objects that are not within an artboard, choose View-->Trim.
- To delete an artboard, select it with the Artboard tool and click Delete.
Using artboards for a multidimensional project
Let me illustrate a basic but typical multi-artboard workflow: one where you create different versions of the same graphic but with different dimensions. In doing that, I share some techniques and approaches you can apply to your own particular needs.Suppose that you are tasked with designing an ad that will run in different social media platforms and in different orientations: square, horizontal (landscape), and portrait (vertical). The ad must have the same basic content but fit the following size specs:
- Square: 1080 pixels
- Vertical: 1080 pixels wide by 1350 pixels high
- Horizontal: 1200 pixels by 628 pixels
1. Create a new document with one 1080 px square artboard, as shown.
a. Choose File→New, and bypass the New Document dialog by clicking More Settings. The More Settings dialog appears.
b. Name the project Ads.
c. In the Profile drop-down, choose Web.
d. In the Number of Artboards box, enter 3.
e. Set the artboard arrangement to Arrange by Row (the third icon).
f. In the Height and Width boxes, enter 1080. The Units setting will default to Pixels, and the Color Mode to RGB. These and other defaults are fine.
g.Click Create New Document.
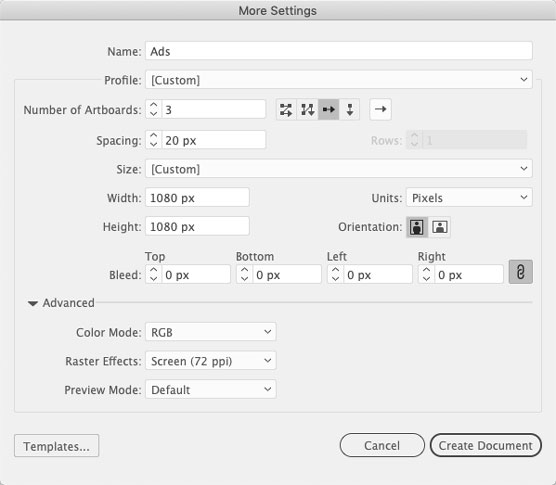 Defining a three-artboard document.
2. Name the three artboards Square, Vertical, and Horizontal:
a. If the Artboards panel is not displayed, choose Window→Artboards.
b. Double-click the name of Artboard 1 and type Square. In the same way, rename the second artboard Vertical and the third artboard Horizontal.
c. Choose View→Fit All In Window to see all three artboards, as shown.
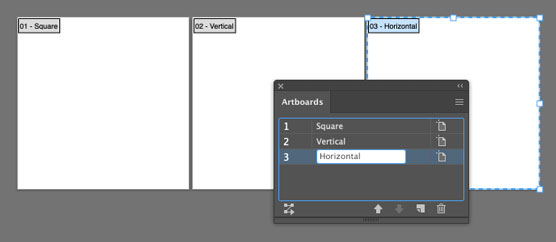 Naming artboards.
3. Resize the Vertical and Horizontal artboards:
a. In the Artboard panel, double-click the icon to the right of the artboard named Vertical. In the Control panel that appears, change the height to 1350 px and click OK.
b. In a similar way, change the dimensions of the Horizontal artboard to 1200 pixels wide by 628 pixels high.
4. Arrange the artboards to create a more coherent display:a. Click Rearrange All Artboards in the Control panel. The Rearrange All Artboards dialog opens.
b. Keep the Arrange by Row layout and the left-to-right Layout Order settings you defined when you created the document. Leave the spacing set to 20 pixels, and leave Move Artwork with Artboards selected, as shown, then click OK.
This step keeps the basic layout structure in place, but resets the spacing between the resized artboards so they don’t overlap.
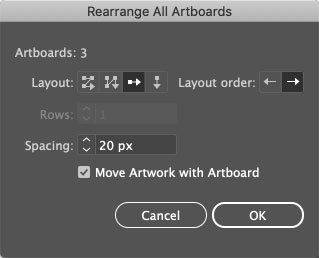 Arranging artboards.
5. Design your ad on one of the artboards.
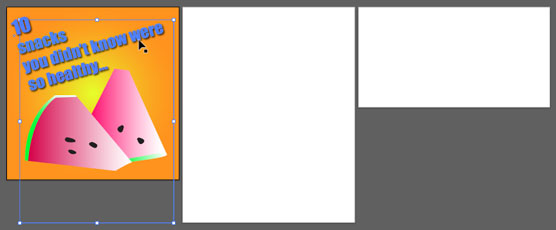 Designing a single artboard.
6. Copy the first ad content to the other artboards:
a. Use the Selection or Direct Selection tool to select all the content in the first artboard, the one with the content.
b. Choose Edit→Cut.
c. Choose Edit→Paste on All Artboards.
The Paste on All Artboards technique pays for itself when you're working with dozens or even hundreds of artboards! Of course, the pasted artwork doesn’t fit properly in differently sized artboards. Fixing that is the last step.
7. Edit the design of the horizontal and vertical artboards to make the square content fit, as shown.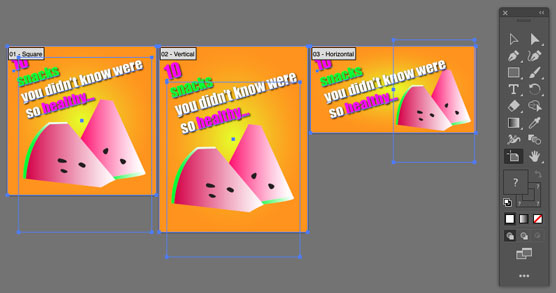 Customizing designs for different artboards.
What do you do with a set of artboards? They are automatically saved as part of your Illustrator document. After that, you can export one, some, or all of them for screen or print output.


