


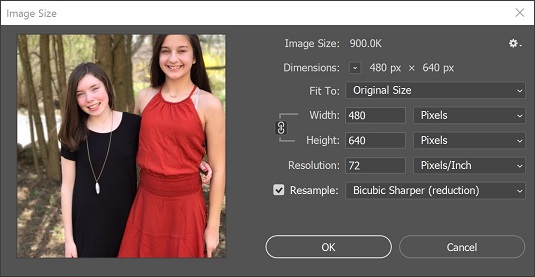
 The Image Size dialog box.
At the top of the Image Size dialog box, you see the pixel dimensions noted.
The Width and Height text fields are in inches in the English default; you can change the increments to pixels by selecting Pixels from the measurement unit drop-down menu. The Width and Height text fields can be used for onscreen resizing. By switching the measurement unit back to inches, you can determine the size at which the image will print. The Resolution text field determines the resolution of the printed image; a higher value means a smaller (more pixels crammed in each inch), which typically produces a more finely detailed printed image.Before you decide on a resolution, you should understand what some of the resolution jargon means:
- ppi (pixels per inch): The resolution of an image — how Photoshop measures resolution of images.
- dpi (dots per inch): The resolution of an image when printed.
- lpi (lines per inch): The varying dot pattern that printers and presses use to create images. This dot pattern is referred to as the lines per inch, even though it represents rows of dots. The higher the lpi, the finer the detail and the less dot pattern or line screen you see.
- Dot gain: The spread of ink as it’s applied to paper. Certain types of paper spread a dot of ink farther than others. For example, newsprint has a high dot gain and typically prints at 85 lpi; a coated stock paper has a lower dot gain and can be printed at 133–150 lpi and even higher.
 The dot pattern used to print images is referred to as lpi (lines per inch).
Deciding the resolution or dpi of an image requires backward planning. If you want to create the best possible image, you should know where it’ll print before deciding its resolution. Communicate with your printer service if the image is going to press. If you’re sending an image to a high-speed copier, you can estimate that it will handle 100 lpi; a desktop printer handles 85 lpi to 100 lpi.
The resolution formula
When creating an image for print, keep this formula in mind:2 × lpi = ppi (pixels per inch)
This formula means that if your image is going to press using 150 lpi, set your image at 300 ppi. To save space, many people in production use 1.5 ×lpi because it reduces the file size significantly and you get similar results; you can decide which one works best for you.
Changing the resolution
Using the Image Size dialog box is only one way that you can control the resolution in Photoshop. Even though you can increase the resolution, do so sparingly and avoid it, if you can. The exception is when you have an image that’s large in dimension size but low in resolution, like those you typically get from a digital camera. You may have a top-of-the-line digital camera that produces 72 ppi images, but at that resolution, the pictures are 28 x 21 inches (or larger)!To increase the resolution of an image without sacrificing quality, follow these steps:
- Choose Image → Image Size. The Image Size dialog box appears.
- Deselect the Resample Image checkbox. This way, Photoshop doesn’t add any pixels.
- Enter a resolution in the Resolution text field. Photoshop keeps the pixel size (the size of the image onscreen) the same, but the document size (the size of the image when printed) decreases when you enter a higher resolution.
- If the image isn’t the size you need, select the Resample Image checkbox and type the size in the Width and Height text fields.It’s best to reduce the size of a bitmap image, such as a digital photo, rather than increase it.
You can also deselect the Resample Image checkbox and essentially play a game of give-and-take to see what the resolution will be when you enter the intended size of your printed image in the Width and Height text fields.
Images can typically be scaled from 50 to 120 percent before looking jagged. (To scale by a percentage, select Percent from the drop-down lists beside the Width and Height text fields.) Keep these numbers in mind when placing and resizing images in a page layout application such as InDesign. - Click OK when you’re finished; double-click the Zoom tool in the Tools panel to see the image at its onscreen size.

- Choose Image → Image Size.
- When the Image Size dialog box appears, make sure that the Resample Image checkbox is selected.
- Enter the resolution you need in the Resolution text field, click OK, and then double-click the Zoom tool to see the image at its actual size.
Reset your Image Size dialog, or any dialog box in Photoshop by holding down the Alt or Option button. The Cancel button changes to Reset!


