
Working with styles in Jupyter Notebook
Here's one of the ways in which Jupyter Notebook excels over just about any other IDE that you’ll ever use: It helps you to create nice-looking output. Rather than have a screen full of a whole bunch of plain-old code, you can use Jupyter Notebook to create sections and add styles so that the output is nicely formatted. What you can end up with is a good-looking report that just happens to contain executable code. The reason for this improved output is the use of styles.When you type code into Jupyter Notebook, you place the code in a cell. Each section of code that you create goes into a separate cell. When you need to create a new cell, you click Insert Cell Below (the button with a plus sign) on the toolbar. Likewise, when you decide that you no longer need a cell, you select it and then click Cut Cell (the button with a scissors) to place the deleted cell on the Clipboard, or choose Edit → Delete Cell to remove it completely.
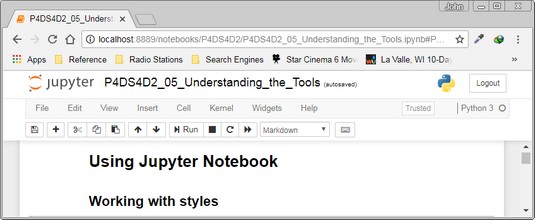
The default style for a cell is Code. However, when you click the down arrow next to the Code entry, you see a listing of styles.
 Jupyter Notebook makes adding styles to your work easy.
The various styles shown help you format content in various ways. The Markdown style is most definitely used to separate varies entries. To try it for yourself, choose Markdown from the drop-down list, type the heading # Using Jupyter Notebook, in the first cell; next, click Run. The content changes to a heading. The single hash (#) tells Notebook that this is a first-level heading. Notice that clicking Run automatically adds a new cell and places the cursor in it. To add a second-level heading, choose Markdown from the drop-down list, type ## Working with styles, and click Run. The image below shows that the two entries are indeed headings and that the second entry is smaller than the first.
 Adding headings makes separating content in your notebooks easy.
The Markdown style also lets you add HTML content, which can contain anything a web page contains with regard to standard HTML tags. Another way to create a first-level heading is to define the cell type as Markdown, type Using Jupyter Notebook
, and then click Run. In general, you use HTML to provide documentation and links to outside material. Relying on HTML tags makes it possible to include things like lists or even pictures. In short, you can actually include an HTML document fragment as part of your notebook, which makes Jupyter Notebook much more than a simple means of writing down code.
The use of the Raw NBConvert formatting option is outside the scope of what is discussed here. However, it provides you with the means for included information that shouldn’t be modified by the notebook converter (NBConvert). You can output notebooks in a variety of formats, and NBConvert performs this task for you. The goal of the Raw NBConvert style is to allow you to include special content, such as Lamport TeX (LaTeX) content. The LaTeX document system isn’t tied to a particular editor — it’s simply a means of encoding scientific documents.
Restarting the kernel in your Jupyter Notebook
Every time you perform a task in your Jupyter notebook, you create variables, import modules, and perform a wealth of other tasks that corrupt the environment. At some point, you can’t really be sure that something is working as it should. To overcome this problem, you click Restart Kernel (the button with an open circle with an arrow at one end) after saving your document by clicking Save and Checkpoint (the button containing a floppy disk symbol). You can then run your code again to ensure that it does work as you thought it would.Sometimes an error also causes the kernel to crash. Your document starts acting oddly, updates slowly, or shows other signs of corruption. Again, the answer is to restart the kernel to ensure that you have a clean environment and that the kernel is running as it should for optimal Python programming.
Whenever you click Restart Kernel, you see the warning message shown below. Make certain that you pay attention to the warning because you could lose temporary changes during a kernel restart. Always save your document before you restart the kernel.
 Save your Jupyter Notebook before restarting the kernel.
Restoring a checkpoint in Jupyter Notebook
At some point, you may find that you made a mistake. Jupyter Notebook is notably missing an Undo button: You won’t find one anywhere. Instead, you create checkpoints in Jupyter Notebook each time you finish a task. Creating checkpoints when your document is stable and working properly helps you recover faster from mistakes.To restore your setup to the condition contained in a checkpoint, choose File → Revert to Checkpoint. You see a listing of available checkpoints. Simply select the one you want to use. When you select the checkpoint, you see a warning message like the one shown here. When you click Revert, any old information is gone and the information found in the checkpoint becomes the current information.