


Your Pictures Library is easily the best place to store and view your digital images in Windows 7. When Windows 7 imports your digital camera’s photos, it automatically loads them into the Pictures Library to take advantage of that folder’s built-in viewing tools.
Located on the Start menu’s right side, the Pictures Library allows you to view and work with any of the pictures on your PC or network. When viewing the images in the Pictures Library, you'll see all the usual file-viewing tools along with a convenient row of buttons along the top for displaying, e-mailing, or printing your selected photos.
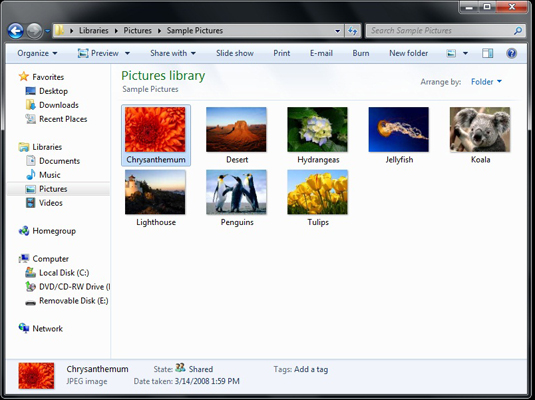
Use the following tips to help you view your pictures your way.
Click the View button to cycle quickly through different thumbnail sizes.
Click the Organize button, choose Layout, and select Preview Pane to view a single large image with thumbnails of the other images in the folder beneath it.
Drag the Details Pane’s top edge upward with your mouse, and the pane expands to show oodles of additional information about your photos.
Want to cover your entire desktop with a photo? Right-click the picture and choose Set As Background. Windows immediately splashes that photo across your desktop.
Hover your mouse pointer over any photo to see the date it was taken, its rating, size, and dimensions. (Essentially, you see the primary information that would appear in the Details Pane without having to lose your place.)
If you come across a picture that is rotated the wrong way, you can let Windows 7 know to fix that. Just right-click any photo that shows up sideways. Choose Rotate Clockwise or Rotate Counter Clockwise.
You can use the Pictures Library's Arrange By drop-down list to sort through all the photos in your library:
Folder: This shows your Pictures library, including any folders inside it. Double-click any folder to see inside; click the blue Back arrow in the top-left corner to return.
Month: Handy for viewing photos taken over the long term, this option stacks your photos into piles organized by the month and year you shot them.
Day: Click this when you want to see all the photos snapped on a particular day. They are grouped by day, with your most recent photos in the topmost group.
Rating: Rate your currently selected photo or photos by clicking any of the rating stars on the Details Pane. This is particularly useful when you want to create a slideshow of your best work.
Tag: The Pictures library stacks your photos according to their tags, letting you retrieve all the photos with a specific tag with just a click.
To add a tag on the fly, just select a photo (or several photos), click the Tag area in the Details Pane, and type an appropriate tag.


