


Docker architecture
Docker is architected to use a client–server model. The Docker client talks to the Docker server component, which is called a daemon. Your Docker client can be on the same server as the Docker daemon, or you can run the Docker client from your workstation.The Docker server
The Docker server is the brains of the operation. It manages much of what goes on in Docker, including the various objects that are created, and communications with the Docker application programming interface (API). The server component is referred to as a daemon.The Docker client
The Docker client is where you perform most of your work with containers. Whenever you run a Docker command, you’re running it from the Docker client.The Docker registry
Docker images are stored in the Docker registry.You may also hear this referred to as a repository. Registry is the official word in Docker documentation, but many developers are used to calling this type of construct a repository. Both words work— be aware that you may see them used interchangeably.
Docker objects
Docker objects is a term used to refer to a multitude of different components, like images, containers, and services.Basic Docker commands
Docker commands always start withdocker and include keywords that determine the action that you want to take. The table lists some of the more common commands that you should remember.
| Command | Description |
docker pull |
Pulls a container image from whichever registry you have configured to store your container images |
docker push |
Pushes your container image to whichever registry you have configured to store your container images |
docker run |
Pulls the container image if it is not available already and then creates the new container from the container image |
docker images |
Lists all the container images that are stored locally on the container host |
docker login |
Used to log in to a registry; not required for public registries, but required to access private registries |
docker stop <name> |
Stops the running container that was named |
docker ps |
Lists all the containers that are running at that time |
Introduction to Docker Hub
Docker Hub is a public registry owned by Docker that is available for storing container images in individual repositories. Businesses can use Docker Hub to create their own private repositories to store proprietary container images in as well. Many of the images that are available are from large open-source projects, but there are also plenty of container images from organizations that are not open source. For example, Microsoft has a public repository that has about 68 container images at the time of this writing.You may be asking, “How do I get to Docker Hub? It sounds pretty cool.” Access the Docker Hub online.
Finding public images
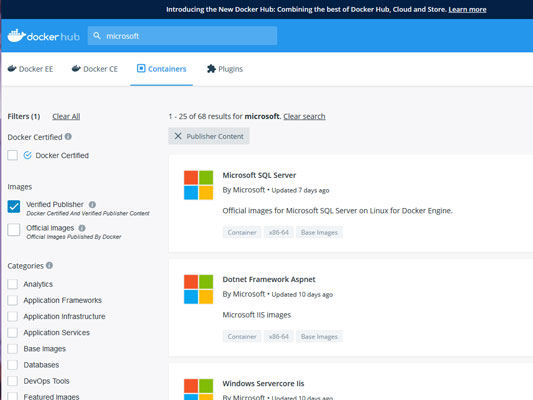
Public images are the easiest ones to find. You don't need an account to search for public images, nor do you need an account to do adocker pull on one.To find an image that you’re interested in, you can simply type your query into the search box at the top. For example, if you want to search for Server Core, just type Server Core and press Enter, as shown.
 The search box on Docker Hub makes it simple to find public container images from hundreds of organizations.
If only one container image matches your query, you’re taken to a page that is dedicated to that container image. If you type the name of an organization, or your search returns multiple results, you’re presented with search results. If you had searched for Microsoft, for example, you could have gotten any container image that has to do with Microsoft. Official Microsoft container images can be filtered on by selecting Verified Publisher from the filters on the left side of the screen, as shown.
 You can filter for just verified publishers in Docker Hub, which ensures that you’re getting an official container image.
One of the really great things about Docker Hub is that you can click a container image to learn more about it. The page that you click into is the same one you get if you search for a product and there is only one result. You’re presented with a description of the container image, which includes available tags and commands needed to use the container image. These commands are often used to accept licensing agreements. The Microsoft SQL Server container image, for example, tells you to run this command to start an MS SQL server instance running SQL Express:
docker run -e 'ACCEPT_EULA=Y' -e 'SA_PASSWORD=yourStrong(!)Password' -e 'MSSQL_PID=Express' -p 1433:1433 -d mcr.microsoft.com/mssql/server:2017-latest-ubuntu
The information on the container image will also cover software requirements and available environment variables, along with a full listing of tags. Tags allow you to choose different versions of a container image. If you don’t specify a tag, then by default you get the container image with the “latest” tag.
You’re also given the command to pull an image if you’re interested in it. For example, to pull this MS SQL container image into Docker, you would run the following:
docker pull mcr.microsoft.com/mssql/server
One last thing that is really helpful is that you can see how many times a container image has been pulled. This information is useful if you aren’t familiar with the organization that supplied the container image. Underneath the name next to a logo of a down arrow is a number that tells you how many times it has been pulled. Microsoft SQL Server, at the time of this writing, had been pulled over 10 million times, as shown here.
 You can see how many times a container image has been pulled.
Creating a private repository
Public repositories make acquiring container images convenient, but if you’re working on container images and you don’t want them to be publicly available, you’ll want to create a private repository. When pulling or pushing container images to your repository, you have to use thedocker login command to authenticate before you'll be allowed to work with the repository.By default, you get one free private repository in Docker Hub. If you need more private repositories than that, you can upgrade to a paid plan. At the time of this writing, you could pay $7 a month for five private repositories.
Creating an account
Creating an account on Docker Hub is simple and free. From the home page, click the Sign Up link in the upper-right corner. Choose a Docker ID, enter your email address and password, accept Docker’s terms, check the box on the CAPTCHA, and then click Sign Up, as shown here.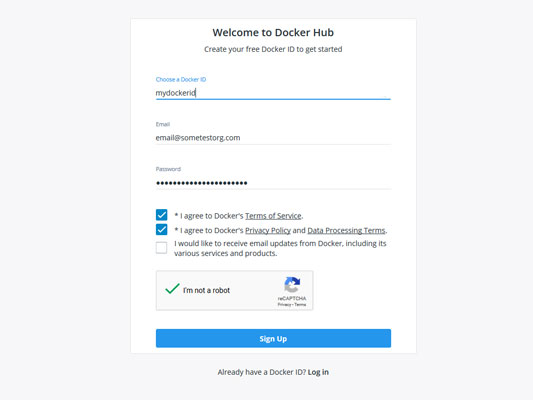 You can get started with Docker Hub with very minimal information — all you need is a Docker ID, an email address, and a password.
You’ll get an email to verify your email address. Click the link in the email to activate your account.
Creating your private repository
When you log in to Docker Hub after creating your account, you’re asked whether you want to create a repository or create an organization.- Click Create a Repository.
- Enter a name for your repository and a description.
- Change visibility to Private.
- Click Create.
You can choose to link your repository to your GitHub or Bitbucket accounts to do automated container image builds. This menu is located in the repository creation menu, though you can go back in later and set it if you need to.
After your repository is created, it will be blank, but it will give you a sample of the command you would need to run to push things to your repository, as shown.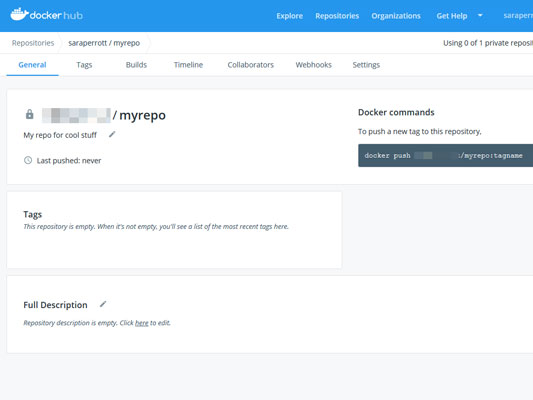 Your repository is empty when you first create it, but it contains the command to push container images to it.
Using a private repository
To use your private repository, you first have to log in to Docker; then you can push and pull container images as much as you want. To log in, enter the following command:docker login
To pull the standard Nano Server image from Microsoft’s repository. add the command that will let you push the container image to your repository. You would normally do this after you made changes to the image.
docker push <<em>mydockerid</em>>/myrepo:nano
The command uses my Docker ID, followed by the name of my repository, and then the tag used for my container image. In this case, a tag with a value of nano. You can see the command line part in the following figure.
 You can use the Docker commands to push images to your private repositories after you log in with the
 docker login command.After the container image has been pushed, it will show up in your repository in Docker Hub. All your tags that are pushed to Docker Hub show up in your portal. You can't alter the container images from inside of Docker Hub; in fact, the only thing you can do is delete them. To modify your container images, you need to pull them, make your changes, and then push them again. The following figure shows you what Docker Hub looks like after the tagged container image has been pushed.
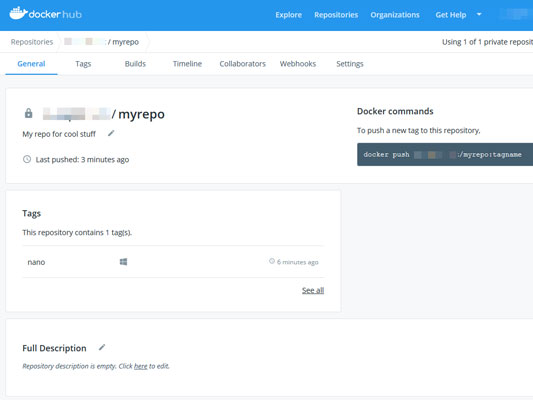 The tagged container image,
 nano, shows up in Docker Hub after it's pushed from the server.To pull the container image down to modify it, issue a very similar command to what you used to push the tagged image:
docker pull <<em>mydockerid</em>>/myrepo:nano
After you make the changes that you need to make (like updating the container image), you can push it back up to your private repository where it’s accessible to any system from which you can log in to your Docker repository.


