


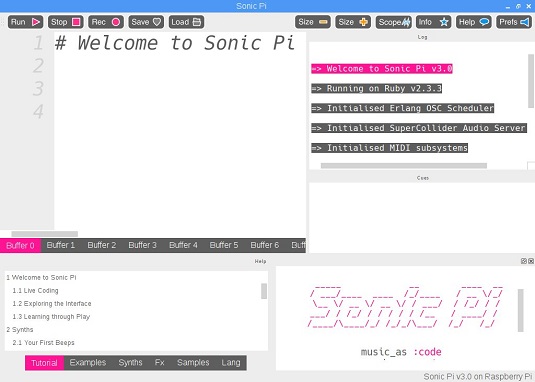
 The Sonic Pi screen layout.
Sonic Pi uses ten buffers, which you access by clicking the buttons at the bottom of the Editor. You can think of each buffer as like having a different file open for editing, but you can play music from different buffers at the same time.
This can be particularly useful for live performance: You might set up a loop in one buffer and then experiment with code to add notes on top in another buffer. When you exit Sonic Pi, the content of your buffers is saved for you, and it’s loaded when you come back again. You can also save the content of a buffer to a text file using the Save button in the menu bar at the top of the screen.
At the top of the screen are buttons to run your program (play your music) and stop it. They use symbols similar to any audio player: a triangle to play and a square to stop. There are also buttons to adjust the text size, show or hide the oscilloscope (which displays waveforms as your music plays), show the info window, and show or hide the Help pane at the bottom of the screen.
There is also a Preferences button to the right of the Help button. The Preferences window provides a volume control and enables you to force the audio output to go through headphones or through the HDMI cable. It also has options for adjusting the Editor display and checking for any updates. If you use other electronic instruments or music software, you can connect to Sonic Pi using the MIDI or OSC protocols, which are configured in the IO preferences.
You can adjust the size allocated to the panes by clicking and dragging the dividing lines between them.
If you are performing with Sonic Pi, you can use the dark mode for a color scheme based on a black background, which will be more comfortable to use in a club or concert venue with low lights. There's also a Pro icons setting, which replaces the buttons with stripped-back icons for a more streamlined interface. Find both settings in the Editor preferences.


