

Printing your MATLAB work is one of the tasks that most people use the GUI to perform, even the most ardent keyboard user. The issue is one of convenience. Yes, you can use the printopt() and print() functions to perform the task using the keyboard, but only if you’re willing to perform the task nearly blind.
The GUI actually shows you what the output will look like (or, at least, a close approximation). Using the commands is significantly harder in this case.
Configuring the output page
Before you print your document, you need to tell MATLAB how to print it. Choose File→Print Preview in the figure window to display the Print Preview dialog box.
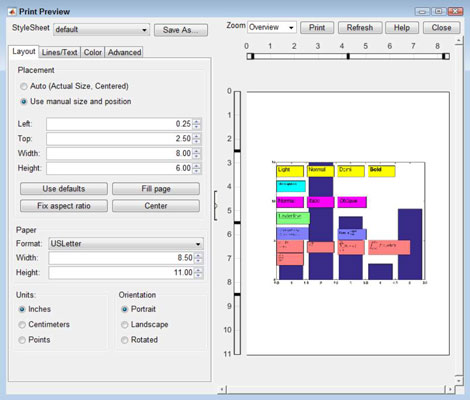
The right side of the dialog box shows an approximation of the changes you make on the left side. The settings are presented on four tabs with the following functions:
Layout: Defines how the plot or other document will appear on the page. You specify the margins, size of the paper, and presentation of the information itself. The best way to work through the layout process is simply to try the settings and see how they affect the image shown in the right side of the dialog box.
Lines/Text: Specifies the line widths and types of text used to print the documentation. In some cases, you find that using a different line weight or font for printing improves the output appearance of the document. Some of these settings are printer specific. For example, a built-in font is likely to provide a more pleasing appearance than a software font provided as part of the system.
Color: Fixes the color changes between the display and the printer. What you see onscreen is unlikely to be what you get from the printer. The reasons for the difference are complex, but from an overview perspective, printers use subtractive color mixing, while displays use additive color mixing. The two kinds of color presentation don’t always work in sync with each other.
Advanced: Provides access to features such as recomputing the links and ticks before printing. You won’t generally need these settings unless you notice a problem during the printing process.
Printing the data
After you create an output configuration, you can print the document. To perform this task, choose File→Print. You see the Print dialog box, in which you can choose a printer, configure it if necessary by clicking the Properties button, and then click OK to print the document.
You don’t have to have direct access to the printer you want to use. The Print to File option in the Print dialog box lets you output the printed material to a file on disk. You can then send this file to the printer when you do have access to it. As an alternative, you can also send the file to someone else who needs the printed output.


