


Although the if statement is commonly used for simple choices in JavaScript, the switch statement is used to handle a range of choices. A switch provides an elegant way to handle variable data. There are two forms of switch statement.
The first provides the means for working with a predefined range of choices, and the second provides the means for working with data that could contain unexpected information. This second form makes the switch statement particularly useful because users are unpredictable, and this second form can take such users into account.
How to create a basic switch in JavaScript
Many developers prefer switch statements over nested if statements because the switch statements are easier to understand. A switch statement also requires less typing to obtain the same result.
function CheckChoice(option)
{
  // Verify that the input is a number.
  if (typeof(option) != "number")
  {
   // Display an error dialog.
   alert("Please provide numeric input!");
   // Return without doing anything more.
   return;
  }
  // Ensure that option is actually an integer.
  var Select = Math.round(option);
  // Verify that the input is in range.
  if ((Select < 1) || (Select > 3))
  {
   // Display an error dialog.
   alert("The value supplied is out of range!");
   // Return without doing anything more.
   return;
  }
  // Make a selection.
  switch (Select)
  {
   case 1:
     document.getElementById("Result").innerHTML =
      "You chose Item A.";
     break;
   case 2:
     document.getElementById("Result").innerHTML =
      "You chose Item B.";
     break;
   case 3:
     document.getElementById("Result").innerHTML =
      "You chose Item C.";
     break;
  }
}
Whether you use a switch statement or nested if statement, you need to provide logic to ensure that the input is correct, or else your application most likely will fail. In this case, failure equates to the application doing nothing at all, but the concept of failure is the same. Always check your inputs for correct values.
Some people have a hard time understanding where the truth value lies in the switch statement. The switch statement requires a variable, which is Select in this case. Each case clause performs a comparison against the variable. Consequently, you could see the first case clause as saying, case Select == 1.
When working with switch statements, you must also include a break statement at the end of each processing segment. The break statement simply says that the case has been evaluated and handled.
If you leave the break statement out, the code continues with the next executable statement in the next case. This condition is known as fall-through, and some developers use it as a programming technique to combine tasks and reduce the amount of code required. Using this technique is dangerous because other developers may not realize that the fall-through is required and therefore may add a break statement for you.
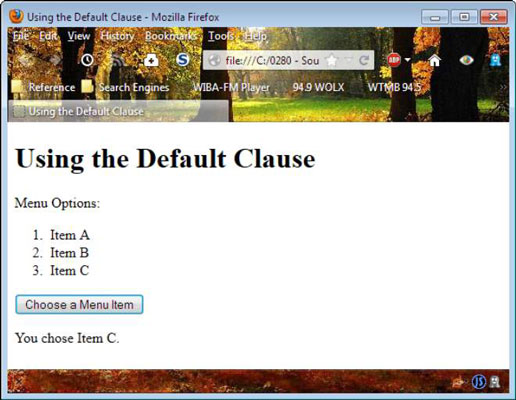
How to use JavaScript’s default option
The switch statement includes another clause, the default clause. The default clause is like the else clause for the if statement. When none of the case clauses are true, the code executes the code in the default clause. The following example uses the default clause to modify the way in which the example works.
function MakeAChoice()
{
  // Ask the user to provide input.
  var Selection = prompt("Type a menu option.");
  // Convert the string to a number.
  var IntSelect = parseInt(Selection);
  // Verify the user has provided a number.
  if (isNaN(IntSelect))
  {
   // Display an error dialog.
   alert("Please provide numeric input!");
   // Return without doing anything more.
   return;
  }
  // Call the selection function.
  CheckChoice(IntSelect);
}
Instead of providing myriad buttons, this example relies on the prompt() dialog box to obtain input from the user. The result is the cleaner interface. When the user clicks Choose a Menu Item, the application displays a prompt() dialog box, where the user can enter a value.
You might think that this is a recipe for disaster, but the application performs the same checks for input validity as before, but it uses a different technique.
In this case, the application uses partInt() to verify that the input is a number and to convert the number to an integer value. When the input is incorrect, IntSelect is set to Not a Number (NaN). The example detects this issue by using the isNaN() function. When a user does provide a numeric input, the application calls CheckChoice(), which is shown in the following code:
function CheckChoice(option)
{
  // Make a selection.
  switch (option)
  {
   case 1:
     document.getElementById("Result").innerHTML =
      "You chose Item A.";
     break;
   case 2:
     document.getElementById("Result").innerHTML =
      "You chose Item B.";
     break;
   case 3:
     document.getElementById("Result").innerHTML =
      "You chose Item C.";
     break;
   default:
     // Display an error dialog.
     alert("The value supplied is out of range!");
     break;
  }
}
You may be wondering where the rest of the code is, but this is all you need. The switch statement checks for values of 1, 2, or 3. When the values are outside that range, the code uses the default clause, which contains the out-of-range error message. As you can see, these two functions make the tasks of working with the menu a lot simpler for both developer and user.


