- Go to MIT App Inventor and click Create Apps in the top-right corner of the webpage.
- Sign in with your Google account.
- Give permission for Google to share your email address with App Inventor.
 Allow Google to share your email address with MIT App Inventor.
 - Accept the Terms and Services for App Inventor and click Continue when you’re ready.
- Dismiss the survey and other items that pop up so that you can get started!
You now see a view where all your projects are listed.
 The view of all your projects in App Inventor after you log in.
Community and support within MIT App Inventor
App Inventor was first released in 2010, and the community of coders and educators has grown. Make sure you’re signed in and then click Gallery. The image below shows the gallery where you find projects and tutorials that other coders have made and published. You and your coder can contribute to these too!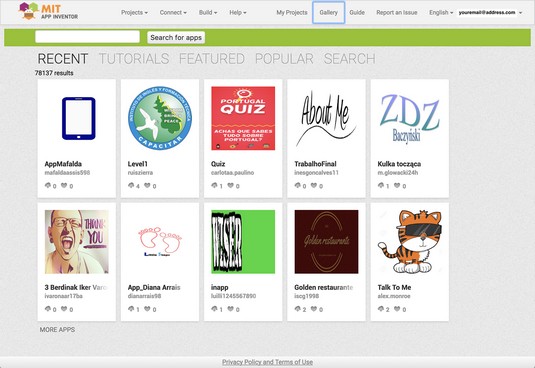 The view of the App Inventor gallery.
In addition to the community gallery, MIT has created a number of resources for individuals and classrooms. For example, you’ll find over 30 tutorials divided by difficulty level and an option to filter by topic (such as game).
There are also a ton of resources about using App Inventor, setting everything up, troubleshooting, and documentation. All this can be found in the MIT App Inventor library. Although this page is a bit less user-friendly — basically a list of links — it can be a great place to start if you have a question or experience any trouble.
The community isn’t just created by MIT; there are also a number of books that you can find on App Inventor and forums where you can ask questions and get very specific answers on the App Inventor website under Resources. There are also specific resources for educators. Be sure to explore all the resources when getting your young coder acquainted with the software.
The layout of MIT App Inventor
Before you get started on your first mobile game, take the time to get acquainted with the programming environment. There are two areas your coder will spend time in: Design View and Code View.To get to Design View, click Start New Project in the top left of the programming environment. Name your project “myFirstApp.” The Design View opens.
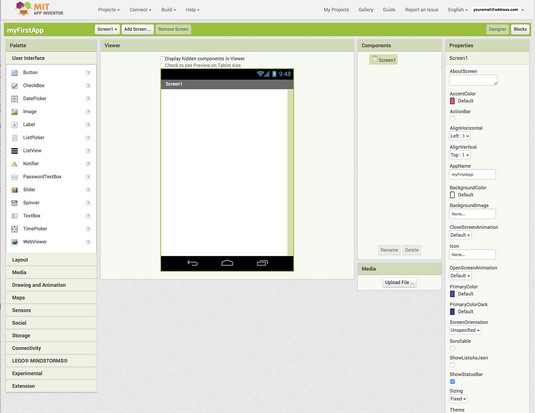 The Design View of the App Inventor programming environment.
Note these six areas:
- Menu Bar: The menu bar across the top has the title of your app, options for multiple screens, and a toggle button for Designer and Blocks.
- Palette: On the left is a list of options for things to add to your app.
- Viewer: The viewer is basically what you see on your mobile device after you test your app. This is where you organize all the components to add to your app.
- Components: The components list shows all the elements in your app. Sometimes components are invisible, so this is an important view to know everything in your screen.
- Media: Under the Components view is a Media view where any sounds or images that you have uploaded to your app appear.
- Properties: If you click a component in the Components view, then the properties for that component is listed in this view. You can also change properties in this view, too.
- Menu Bar: Just like in the Design View, the menu bar allows you to switch screens or go back to the Design View.
- Blocks: This view has all the coding blocks (also referred to as tiles). There are generic blocks, but if you have a component in your design, there also are blocks specifically for that component.
- Media: This view has all the sounds and images that you have uploaded to your app.
- Coding Area: The coding area is where you drag the coding blocks to actually make your app respond to your users.
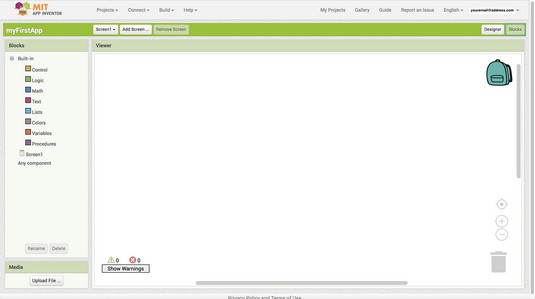 The Code View of the App Inventor programming environment.