


If you want to enter the world of blogging with WordPress, you will first need to make sure you have an account. To create your WordPress user account, follow these steps:
On the page that appears, click the Get Started button shown.
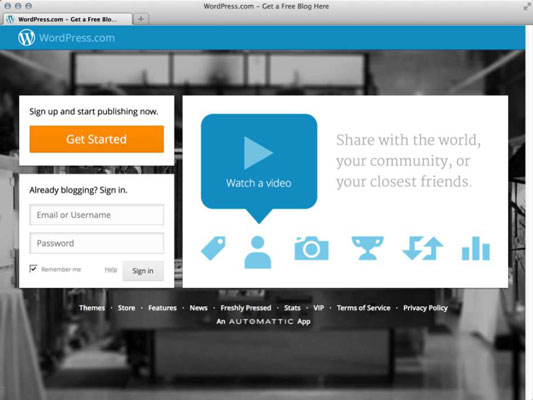
You’re taken to the WordPress signup page at http://signup.wordpress.com/signup.
Type your e-mail address in the E-Mail Address text box.
This address isn’t made public on your blog; rather, it’s used for communication between you and WordPress. You can change this address later in the Options section on your WordPress.com Dashboard.
In the Username text box, enter the name you want to use to log in to your blog from now until forever.
Your username must be at least four characters with letters and numbers only. WordPress automatically fills in the Blog Address box with the same username you entered in the Username box; however, you don’t have to use that one and can choose to type in a unique name in the Blog Address field.
For security purposes, choose a username that’s different from your blog address because that makes it more difficult for anyone to guess.
You can change the username on the blog you’re creating right after you log in and have access to the Dashboard.
Type a password of your choice, first in the Password text box and then again in the Confirm box.
You use this password to log in to your new WordPress account. Choose and then type a password that you’ll remember but that won’t be easy for anyone to guess. Your password must be at least four characters. WordPress gives you a visual indicator of the strength of your password choice, with strength meaning how easy or difficult it is for someone to guess what your password is.
In the Blog Address text box, type the word you’ve chosen as your blog address.
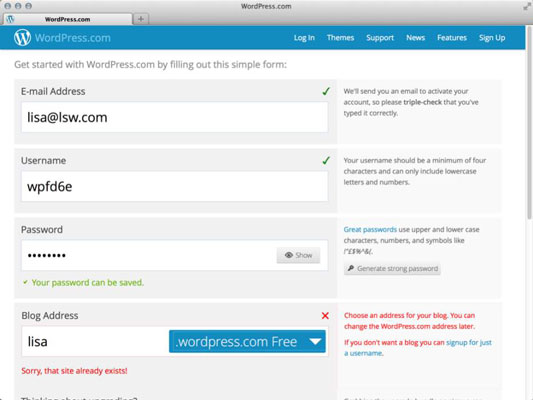
Whatever you enter here becomes the URL address of your blog. It must be at least four characters (letters and numbers only), and don’t worry about choosing the perfect thing; you can change this later. You can use any blog address you want; however, if you choose a blog address that doesn’t follow certain rules, WordPress displays a message.
If you see this message, you need to pick a new one because WordPress doesn’t allow duplicate blog addresses. Keep in mind that search engines catalog your content based on your chosen URL, so use a domain name that relates well to your site’s content.
Select the suffix for your blog address.
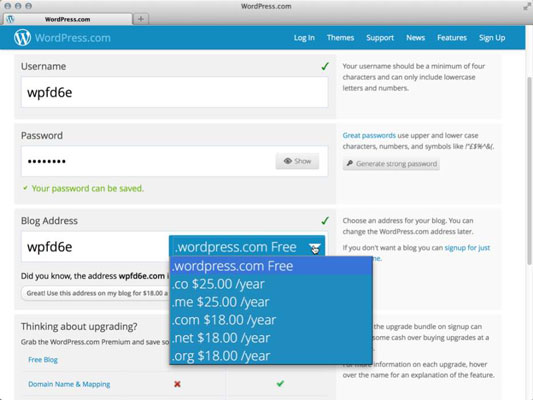
In the drop-down list to the right of the Blog Address text box, you have several options. One is free, and the others cost you $18 to $25/year. For now, select the free suffix; you can always upgrade to a paid domain later if you want.
Review upgrade options.
WordPress has several upgrade options such as domain names, space upgrades, and custom design. During the signup process, WordPress offers a Premium upgrade that provides you with upgraded features for $99, which you can add to your blog by clicking the Upgrade button in this step.
Click the Create Blog button.
This step completes the signup process, and a new page opens with a message that WordPress has sent you an e-mail containing a link to activate your account. As you wait for that e-mail to arrive, take a moment to fill out the Update Your Profile! form on this page. Enter your first name, last name, and a few sentences about yourself. Then click the Save Profile button.
Later, you can choose to display your profile information on your blog. By clicking the Create Blog button, you also indicate that you fully agree to, and understand, the WordPress Terms of Service. If you’d like to read the fine print, check out the Terms of Service.
Choose a theme and start blogging.

The final signup step is to choose one of several themes that WordPress provides for your blog. Don’t worry about your choice here because you can come back and change your theme anytime. For now, find the Twenty Eleven theme and select it for your blog by clicking its thumbnail.
Check your e-mail and click the Activate Blog link in the e-mail message from WordPress to activate your new WordPress blog.
The Dashboard for your WordPress account loads in your browser window with a message welcoming you to WordPress. The Dashboard also displays a few helpful items to help you get started, including
A video entitled Welcome to WordPress.com that gives you a quick tutorial of the WordPress.com services
A link to the WordPress Zero-to-Hero guide that gives you an introduction to WordPress.
A link to the WordPress 24/7 support documentation: http://support.wordpress.com
If you don’t want to see the Welcome box at the top of your Dashboard page, click the Hide This Screen link in the bottom-right corner of the Welcome to WordPress.com box.

Your new blog is yours to use for the life of your blogging career on WordPress.com. You can log in to your blog anytime by going to and clicking the Log In button in the top-right corner of the WordPress website.

