


Someone in your organization may have already created a Zoom account for you. That is, management may have already subscribed to one of Zoom’s premium plans and registered you. In this case, you don’t need to create a new account; you’ll just log in with your existing email address and password. If you’re not sure, just check with your employer’s IT department.
To create a new Zoom account, follow these steps:1. Go to the Zoom web portal.
2. In the upper-right corner of the website, click the orange Sign Up, It’s Free button.
From here, Zoom provides you with three signup options via
-
- An email address
If you select the second or third option, Zoom makes you authenticate your new account through that service. At a high level, you’re granting Zoom permission to access some of the data that you’ve provided to Facebook or Google.
Admittedly, this practice is quite common. For example, for years Spotify has allowed people to sign up for new accounts with Facebook. When they do, new users don’t need to provide Spotify with their names, dates of birth, email addresses, and the like. Facebook already stores this information about its users — and plenty more, depending on how much they share on the social network.
If that thought terrifies you or you don’t use those popular services, simply select the first option and continue.
The following instructions assume that you’re signing up for Zoom with your email address, and not via Facebook or Google.
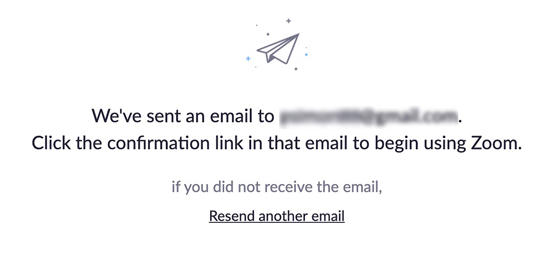
3. Enter your email address and click the Sign-Up button.Zoom informs you that an email confirmation is on its way.
 The Zoom browser message.
To minimize spam and the impact of bad actors, Zoom blocks certain domains from registering new accounts. For example, Zoom rejected [email protected] because people often use that domain to create disposable email addresses.
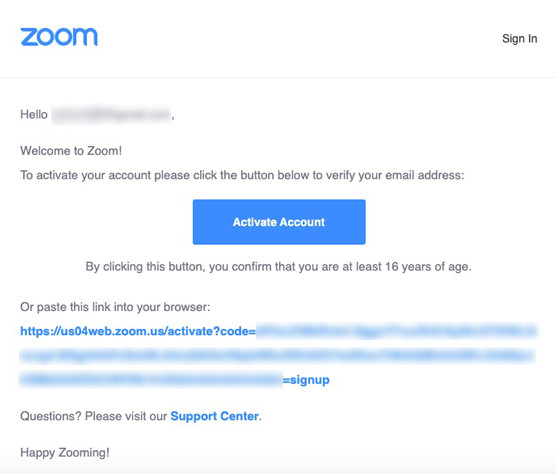
4. Check your inbox and open the Zoom authentication email.The message resembles the following figure.
A Zoom email requesting account authentication.
5. Open the email and click the blue Activate Account button.
Zoom takes you to a new window or tab in your default web browser.
 Completing your Zoom account.
6. Complete your Zoom account by entering the required information.
Zoom requires you to enter your first and last name. You’ll also need to create and confirm your password. When you click the password field, Zoom prompts you with guidelines about what your password can and cannot contain. For example, setting your password as starwars won’t fly. Try again, young Skywalker.
7. Click the orange Continue button.The Don’t Zoom Alone screen appears.
8. (Optional) Invite your friends, family, and/or colleagues by entering their email addresses.You can skip this step by clicking the button in the lower-left corner of the page. Zoom ultimately directs you to a page that lists your personal Zoom web page or URL, such as the one shown.
 The Zoom page with a personal meeting URL.
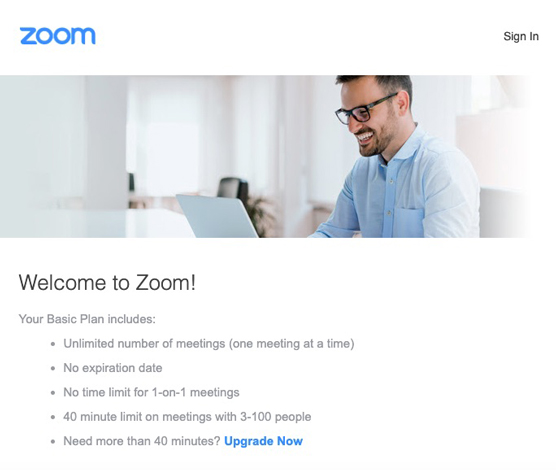
9. Check your inbox again.
Zoom sends you an email confirming your account and listing the features of your current plan.
 A Zoom email confirming a new account.
Congratulations! Your Zoom account is now active.
You’re halfway home. To take advantage of the powerful features in Meetings & Chat, you’ll want to install the Zoom desktop client.
Just as with many services today, you can create Zoom different accounts with different email addresses. In fact, you may want to create a personal Zoom account independent of your work account to separate church and state.
Download and install the Zoom desktop client
To be sure, Zoom users and customers can participate in meetings no matter where they are as long as they can connect to the Internet. Again, Meetings & Chat runs on anything: smartphone, tablet, laptop, and desktop.Still, to take advantage of all of Zoom’s robust functionality, you’ll want to install the Zoom desktop client. Fortunately, if your computer runs macOS, Windows, or even Ubuntu/Linux, Zoom has you covered.
A desktop client is an application running on a desktop computer. Although purists will probably furrow their brows, the terms desktop client and computer app are used interchangeably. By the way, you can run that desktop client on your laptop.
To install the Zoom desktop client on your computer, follow these steps:1. In the Zoom web portal, hover over the word Resources in the upper-right corner.
A drop-down list appears.
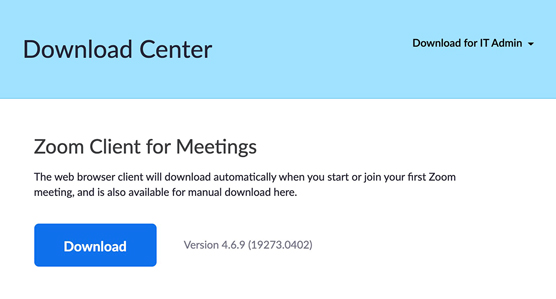
2. Select Download Zoom Client from the drop-down list.Zoom takes you to its Download Center.
 The Zoom Download Center.
3. Click the Download button.
Depending on your browser and how you’ve configured its settings, you may receive a warning that you’re about to download a file. If you do, proceed.
4. Save this file to your computer.The specific location is generally a matter of personal preference, but it’s wise to follow these common conventions:
-
- For PC/Windows users: C:\Program Files
- For Mac users: Hard-drive name\Applications
Remember where you save this file.
5. When the download completes, locate the file.The specific type of file hinges upon your computer’s operating system. As of this writing, here are the filenames and extensions:
-
- For PC/Windows users: An executable file with an .exe extension, named exe
- For Mac users: An installer package archive file with a .pkg extension, named pkg.
Remember where you saved this file. You’re going to need it for the next step.
6. Double-click the file to launch Zoom’s installation wizard.The exact steps that you follow depend upon your computer’s operating system. If you’ve ever installed a new program on your computer before, you’ll recognize the steps required.
7. Complete the steps in the wizard.When you do, the Zoom desktop client is installed. You can easily host audioconferencing and videoconferencing calls with people on any device across the globe.
If you want to access Zoom directly via your web browser of choice, you’re in luck. Download and installthe extension for Chrome, Firefox, or another browser. Note, however, that using Zoom via a web browser means that you won’t be able to do everything that you can on the desktop client.


