Since the last version of Photoshop CC was released, new features and improvements (so-called “bug fixes”) have been introduced regularly. Many of them you’ll never even notice, but some of them add significant and powerful capabilities to Photoshop. Here is a look at some big and little changes since the introduction of Photoshop CC:
- Learn Panel and Rich Tooltips: Okay, newbie, Adobe has made it much simpler to figure out which feature does what. In the default Essentials workspace, you’ll find a new panel named Learn. (In other workspaces or custom workspaces, you can make Learn visible through Photoshop’s Window menu.) Click one of the subjects and you’ll find a number of videos on the subject. When you park the cursor over a tool, not only do you get the tool’s name, you’ll get a short explanation of what it does and, in many cases, you’ll also see a video and even a “Learn More” link. (If you find Rich Tooltips to be annoying, disable them in the Tools pane of Photoshop’s Preferences.)
- Perspective Warp: Using grids, this feature enables you to do a couple of tasks that are very difficult to do manually in Photoshop. You can align a grid to straighten a building or other subject in an image and you can also use Edit→ Perspective Warp to change the vantage point in the image, effectively altering the position from which the image was shot, without distorting or stretching anything in the image. You can also use multiple grids in an image to make multiple changes.

Perspective Warp easily straightens and squares images taken at an angle.
- Motion blurs: The Blur Gallery now includes Spin Blur and Path Blur to simulate circular blurs and blurs that could be created using a slower shutter speed while moving the camera. You’ll also find that the Blur Gallery now allows you to add monochromatic or color noise to better match the original image.
- Content-Aware improvements: You find a new command in the Edit menu: Content-Aware Fill. The Content-Aware option for the Fill command remains, but this new command includes something special. You find a brush with which you can designate areas to be used for the content of your fill. It can also be used to designate areas that you don’t want used for the fill. Overall, Content-Aware features now do a much better job with gradients and areas of similar color, such as skies. The improvements are across the board, including the content-aware modes for the Patch and Move tools. Content-Aware is available in the Crop tool’s Options bar for situations in which you need to rotate or increase the canvas size. It uses adjacent pixels to fill in what would be transparent areas of the canvas.
- Select and Mask: This is much more robust than the Refine Edge it replaces. (The Refine Edge brush is included among the tools to the left in the Preview pane.) It gives you much more control over the edges of your selections. See its Properties panel here.
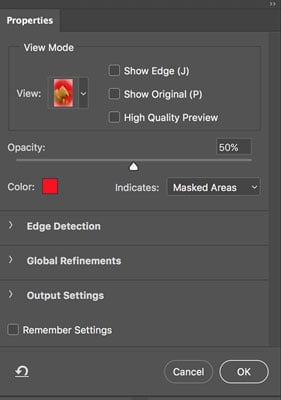
Click the arrows to the left of three lower sections for even more control.
- Select → Focus Area: This new feature enables you to make selections based on what areas of an image are sharpest. The dialog box includes sliders to adjust the amount of “in focus” you want to include and noise control, as well as a button that will take you directly to the Select and Mask feature. You can elect to output the result to a selection, mask, new layer (with or without a mask), and even to a new document.
- Typekit Marketplace: Typekit can now access some of the major font suppliers and uses its font sync and web to access your Marketplace fonts anywhere you need them.
- Linked Smart Objects: Rather than embedding a placed file into your working document, this feature allows you to embed only a link to the placed image file. This can be great at keeping file sizes small and saving space on your hard drive, but keep in mind that if you move the linked file, the link is broken and the master document won’t be able to find the image automatically. Also keep in mind that if you send the master document to someone else, you’ll need to include the linked file (and re-do the links), so embedding the placed image often makes more sense and prevents potential problems and wasted time.
- If/Then in Actions: While recording an Action, you can select Conditional Action from the Action panel’s menu. You can select from among two dozen situations to determine what steps should follow in the Action. The conditionals include various document attributes, such as color mode, bit depth, layers, and alpha channels. There are also layer-related conditions, such as what type of layer is active (background, adjustment, shape layer, and so on).
- Smart Object improvements: You can now apply Liquify and Blur Gallery effects non-destructively by using Smart Objects.
- Face-Aware Liquify: Liquify can now (most of the time) identify faces in a photo. It’s not perfect (yet), but it can be very helpful. It can even allow you to adjust each eye independently.
- Smart Sharpen changes: An all new Smart Sharpen algorithm puts the older version to shame. If you avoided Smart Sharpen in the past, relying instead on Unsharp Mask, give the new version a spin — you’ll find it does a much better job of minimizing halos and noise, while maximizing clarity.
- The Glyphs panel: This panel, shown here, like those in Illustrator CC and InDesign CC, permits you to view all available glyphs for a particular font. (Not all fonts have additional glyphs.) As you can see, you can also select a character on the page and see all of its possible variations.
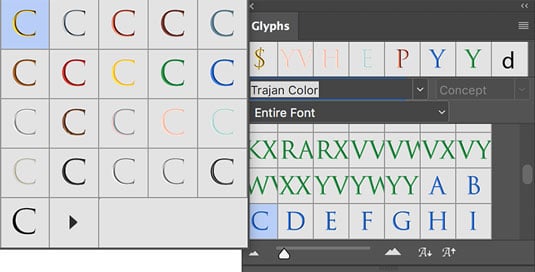
Many fonts include alternate versions of various characters and symbols.
- Match Font: Using an existing image or photo, Photoshop can now help you identify and match fonts. (Latin fonts only at this time.)
- Share: Found in the File menu and as a button in the upper-right corner of the workspace, Share enables you to easily add your images to various social media platforms.
- Artboards: Useful for multiscreen designs, Artboards let you create a single document and have multiple layouts for different devices and sizes. You can copy items among various Artboards. Each layout can be exported individually or several at a time.
- Search: Using the command Edit→Search or the keyboard shortcut Command /Ctrl+F you can open the new Search dialog box. (Yes, that shortcut no longer applies the previous filter. You’ll need to add the Option/Alt key for that. If it becomes frustrating, change ‘em up in Edit → Keyboard Shortcuts.) You can search for tools, panels, menu commands, document presets, open documents, recent documents, and more.
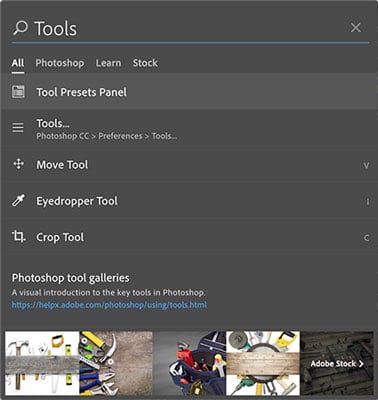
You can select All, or limit your search to Photoshop, Learn videos, or Adobe Stock.
- Adjustable path appearance: Another “Why has this taken so long?” feature, Photoshop now allows you to change the width and color of paths. Select a path creating tool, click the Gear in the Options box, customize the path appearance as desired. (Remember that paths don’t print; they just appear in the Photoshop window.)
- Preserve Details 2.0: Activated by default in the Technology Previews section of Photoshop’s Preferences, this option is available to you when using the Image Size command to enlarge your artwork.