


Following is an overview of a typical installation of the network operating system (NOS) Windows Server 2008 and configuration of your server. Although the details vary, the overall process for other NOS is similar.
Installing a Network Operating System
In most cases, the best way to install Windows Server 2008 is to perform a new install directly from the DVD installation media. Although upgrade installs are possible, your server will be more stable if you perform a new install. (For this reason, most network administrators avoid upgrading to Windows Server 2008 until it’s time to replace the server hardware.)
To begin the installation, insert the DVD distribution media in the server’s DVD drive and then restart the server. This causes the server to boot directly from the distribution media, which initiates the setup program.
As the setup program proceeds, it leads you through two distinct installation phases: Collecting Information and Installing Windows. The following sections describe these installation phases in greater detail.
Phase 1: Collecting Information
In the first installation phase, the setup program asks for the preliminary information that it needs to begin the installation. A setup wizard prompts you for the following information:
Language: Select your language, time-zone, and keyboard type.
Product Key: Enter the 25-character product key that came with the installation media. If setup says you entered an invalid product key, double-check it carefully. You probably just typed the key incorrectly.
Operating System Type: The setup program lets you select Windows Server 2008 Standard Edition or Core. Choose Standard Edition to install the full server operating system; choose Core if you want to install the new text-only version.
License Agreement: The official license agreement is displayed. You have to agree to its terms in order to proceed.
Install Type: Choose an Upgrade or Clean Install type.
Disk Location: Choose the partition in which you want to install Windows.
Upgrade to NTFS: If you want to upgrade a FAT32 system to NTFS, you’ll need to say so now.
Phase 2: Installing Windows
In this phase, Windows setup begins the actual process of installing Windows. The following steps are performed in sequence:
Copying Files: Compressed versions of the installation files are copied to the server computer.
Expanding Files: The compressed installation files are expanded.
Installing Features: Windows server features are installed.
Installing Updates: The setup program checks Microsoft’s website and downloads any critical updates to the operating system.
Completing Installation: When the updates are installed, the setup program reboots so it can complete the installation.
Configuring Your Server
After you’ve installed Windows Server 2008, the computer automatically reboots, and you're presented with the Initial Configuration Tasks Wizard. This wizard guides you through the most important initial tasks for configuring your new server.
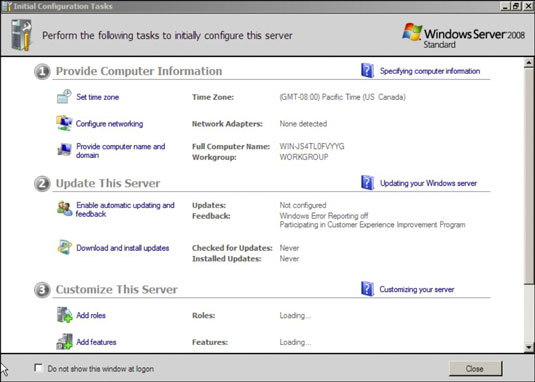
The following list describes the server configuration settings available from this wizard:
Set the Administrator Password: The very first thing you should do after installing Windows is set a secure administrator password.
Set the Time Zone: This is necessary only if the indicated time zone is incorrect.
Configure Networking: The default network settings are usually appropriate, but you can use this option to change the defaults if you wish.
Provide Computer Name and Domain: This option lets you change the server’s computer name and join a domain.
Enable Automatic Updating: Use this option if you want to let the server automatically check for operating system updates.
Download and Install Updates: Use this option to check for critical operating system updates.
Add Roles: This option launches the Add Roles Wizard, which lets you configure important roles for your server.
Add Features: This option lets you add more operating system features.
Enable Remote Desktop: Use this option to enable the Remote Desktop feature, which lets you administer this server from another computer.
Configure Windows Firewall: If you want to use the built-in Windows firewall, this option lets you configure it.
