


While automation is being written, it appears in your track as breakpoints with lines (ramps) between these points. The breakpoints are placed in the track’s automation playlist: that is, the playlist section of the track when you have the Tracks view set to one of the Automation views via the Track View drop-down menu. The number of breakpoints that appear is determined by the complexity of the changes to the automation levels and also by your setting in the Degree of Thinning drop-down menu on the Mixing tab of the Preferences dialog box.
When the Smooth and Thin Data After Pass check box is enabled, choosing None from the Degree of Thinning drop-down menu creates lots of breakpoints — you might not even notice any lines between them. Comparatively, selecting Most from the drop-down menu creates many fewer breakpoints, with longer, more pronounced lines between them. Pro Tools places lines between these breakpoints to connect them. These lines follow the level from one breakpoint to another, going up, down, or staying the same. The combination of breakpoints and connecting lines represent the automation curves for your track.
To keep from accidentally erasing or overwriting automation data, suspend the writing of automation for the parameter by using one of the methods of suspending automation.
Writing automation on a track
To write automation on a track, follow these steps:- Show automation for your song session. For example, in Logic Pro X, you choose Mix→Show Automation (or press A). In Pro Tools, you choose Window→Automation from the main menu. In Pro Tools, the automation window opens where you can choose the parameters you want to automate. In Logic Pro X, you need to click the Show/Hide automation button in the Tracks area menu to see the automation parameters for your tracks.
- Select the tracks and automation parameters you want to write automation data to in the Automation window by clicking the buttons of the parameters you want to enable.
- Choose the Automation mode you want to use by clicking the Automation selector (Pro Tools) or pop-up menu (Logic Pro X).
- Click Play in the Transport Window or press the spacebar to start your session.
- Move the control for the parameters you want to automate. For example, move the track’s fader (located in the Channel strip of the Mix window) up and down to record changes in the volume level of your track.
- Click Stop in the Transport window or press the spacebar to stop the session. Your automation shows up as a line with breakpoints (little dots) in the track’s playlist — that is, as long as you have the automation view visible. If this view isn’t visible, click the Track View selector in the Track Controls section of the Edit window to open the Track View drop-down menu and then select the automation parameter — Volume, Pan, Mute, Send Level, Send Mute — you want to view.
Writing plug-in automation
Here’s how to write automation data for plug-in parameters in Pro Tools:- In the Mix window, click the name of the plug-in in the Insert section of the track’s channel strip. The particular Plug-In window appears.
- Click the Auto button below the word “Auto” in the Plug-in window. The Plug-In Automation dialog box appears, as shown.
- Select the parameters you want to automate by clicking them in the column on the left and then clicking Add. The selected parameters are added to the column on the right.
- Click OK. The dialog box closes.
- Click Play in the Transport Window (or press the spacebar) to start your session.
- Carefully move the control for the parameters you want to automate.
- Click Stop in the Transport window (or press the spacebar) to stop the session. Your automation shows up as a line with breakpoints (little dots) in the track’s playlist as long as you have the automation view visible. If it’s not visible, click the Track View selector in the Track Controls section of the Edit window to open the Track View drop-down menu and select the automation parameter — Volume, Pan, Mute, Send Level, Send Mute — you want to view.
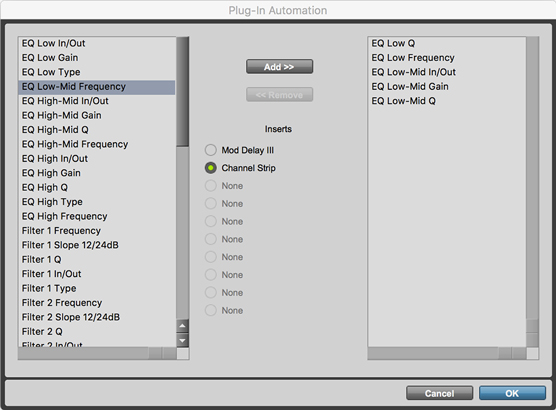 Use the Plug-In Automation dialog box to choose the parameters to automate.
After you finish writing the automation for the plug-in, click the Safe button in the upper-right part of the Plug-In window to make sure that you don’t accidentally record over the plug-in automation.
Writing send automation
To write automation in Pro Tools data for Send Level, Mute, and Pan settings, follow these steps:- Choose Window→Automation from the main menu. The Automation window appears.
- In the Automation window, click the buttons of the Send parameters that you want to enable.
- Choose View→Mix Window→Sends from the main menu. Doing so displays the Send controls for the track(s) you want to automate.
- Select the Auto Write (choose Auto Touch or Auto Latch for subsequent times) in each track you want to write to by clicking the Automation selector. You can find the Automation Mode selector in the Edit window.
- Click Play in the Transport Window (or press the spacebar) to start your session.
- Carefully move the control for the parameters you want to automate.
- Click Stop in the Transport window (or press the spacebar) to stop the session. Your automation shows up as a line with breakpoints (little dots) in the track’s playlist, as long as you have the automation view visible. If it’s not visible, click the Track View selector in the Track Controls section of the Edit window to open the Track View drop-down menu and then select the automation parameter — Volume, Pan, Mute, Send Level, Send Mute — you want to view.

