The Normal margin settings that Excel 2013 applies to a new report use standard top and bottom margins of 0.75 inch (3/4 inch) and left and right margins of 0.7 inch with just over a 1/4 inch separating the header and footer from the top and bottom margins, respectively.
In addition to the Normal margin settings, the program enables you to choose two other standard margins from the Margins button’s drop-down menu in the Print screen (Ctrl+P):
Wide margins with 1-inch top, bottom, left, and right margins and 1/2 inch separating the header and footer from the top and bottom margins, respectively.
Narrow margins with top and bottom margins of 3/4 inch, and left and right margins of 1/4 inch with slightly more than 1/4 inch separating the header and footer from the top and bottom margins, respectively.
Frequently, you find yourself with a report that takes up a full printed page and then just enough to spill over onto a second, mostly empty, page. To squeeze the last column or the last few rows of the worksheet data onto Page 1, try choosing Narrow from the Margins button’s drop-down menu.
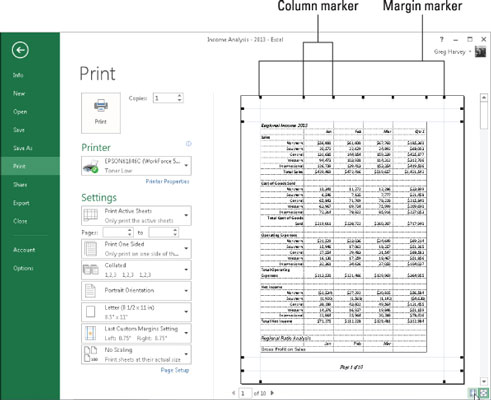
If that doesn’t do it, you can try manually adjusting the margins for the report either from the Margins tab of the Page Setup dialog box or by dragging the margin markers in the print preview area on the Print screen in the Excel Backstage view.
To get more columns on a page, try reducing the left and right margins. To get more rows on a page, try reducing the top and bottom margins.
To open the Margins tab of the Page Setup dialog box, open the Page Setup dialog box (Alt+PSP) and then click the Margins tab. There, enter the new settings in the Top, Bottom, Left, and Right text boxes — or select the new margin settings with their respective spinner buttons.
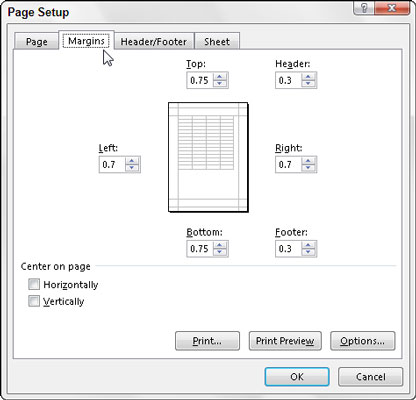
Select one or both Center on Page options in the Margins tab of the Page Setup dialog box to center a selection of data (that takes up less than a full page) between the current margin settings. In the Center on Page section, select the Horizontally check box to center the data between the left and right margins. Select the Vertically check box to center the data between the top and bottom margins.
If you select the Show Margins check box at the bottom of the Print screen in the Excel Backstage view (Ctrl+P) to change the margin settings, you can modify the column widths as well as the margins.
To change one of the margins, position the mouse pointer on the desired margin marker (the pointer shape changes to a double-headed arrow) and drag the marker with your mouse in the appropriate direction. When you release the mouse button, Excel redraws the page, using the new margin setting. You may gain or lose columns or rows, depending on what kind of adjustment you make.
Changing the column width is the same story: Drag the column marker to the left or right to decrease or increase the width of a particular column.