

How to sign up for a Fitbit account
When you first open the Fitbit app (or Fitbit Connect), you’re prompted to sign up for a Fitbit account (or to log in with your Fitbit credentials, if you already have an account). The following figure shows the initial screen that appears for the Fitbit app on an iPhone.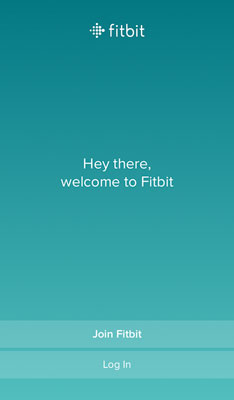 The iPhone version of the Fitbit app’s initial screen.
Follow these steps to join Fitbit:
1. Select Join Fitbit.
If you already have a Fitbit account, select Log In instead, enter your account email and password, and then select Log In again. You’re done here, so feel free to merrily skip over the rest of these steps.
The app displays a list of Fitbit devices.
2. Select the type of Fitbit device you’re setting up.In some cases, you see a second screen that displays a list of device subtypes. If you see such a screen, select the subtype of the device you’re setting up.
3. Select a button to continue:- Android: Select Set Up Your Fitbit Device, where Device is the name of the device you selected in Step 2. The Fitbit app displays the Let’s Get Started screen, which is similar to the screen shown in Figure 3-2 except that it doesn’t include the First Name and Last Name fields.
- iOS: Select Set Up. The Fitbit app displays the Enter Your Account Details screen, as shown in Figure 3-2.
- Windows 10: Select Set Up Your Device, where Device is the name of the device you selected in Step 2. The Let’s Get Started screen appears, which is similar to the screen shown here, without the First Name and Last Name fields.
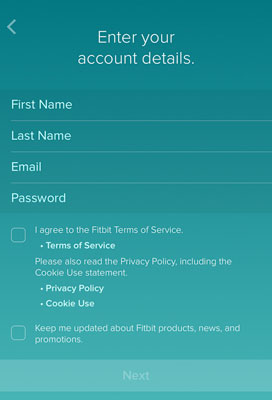 The Enter Your Account Details screen as it appears on an iPhone.
4. Enter the email address and password you want to use for your Fitbit account.
If you’re running the Fitbit app on an iOS device, enter your first and last names, as well.
5. Select the I Agree to the Fitbit Terms of Service check box.6. (Optional) If you want to receive the latest Fitbit announcements and special offers, select the Keep Me Updated about Fitbit Products, News and Promotions check box.
7. Select Next.
If you’re using the Windows 10 version of the Fitbit app, select Create Account, instead.
If you’re using the iOS version of the app, on the next screen tap Let’s Go.
The Fitbit app prompts you to enter some info about yourself, such as your birthday, height, weight, and sex. How you enter this data depends on the version of the app. In the iOS version, you run through a series of screens. In the Android and Windows 10 version, you see the About You screen. The following figure shows the About You screen that appears in the Windows 10 version of the Fitbit app.
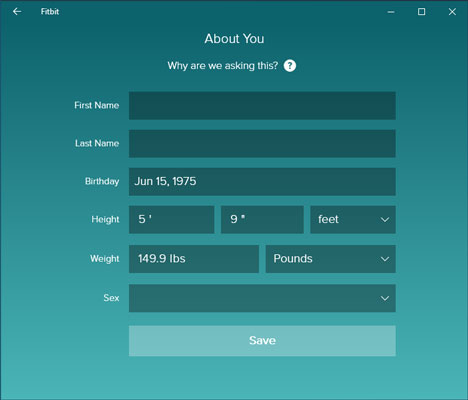 Windows 10 users see this version of the About You screen.
Why does Fitbit want to know such intimate details about your life? It’s all in the service of enabling you to better track your health and fitness. Knowing your age, height, weight, and sex means Fitbit can generate more accurate statistics such as how far you walk or run each day and the number calories you burn during this activity. You might be tempted to fudge the data a bit, but you’ll get more out of your Fitbit investment if you enter accurate data.
8. Enter your personal data, then select Create Account (iOS), Create an Account (Android), or Save (Windows 10).If you see an alert asking you to turn on Bluetooth, go ahead and select OK.
The app displays the Fitbit terms and policies.
9. Pretend to read the legalese and then tap I Agree.The Fitbit app now starts the process of configuring the device you selected way back in Step 2.
How to configure (connect) tour Fitbit device
Now it’s time to look at configuring your device.If you’re setting up a Fitbit Ace for a child, you don’t set up the device directly as described. Instead, you need to create a family account and then add your child’s Ace from there.
First, you need to check the following:- Make sure your Fitbit device is charging.
- For most Fitbit devices, make sure the device that’s running the Fitbit app has Bluetooth enabled.
- For some Fitbit devices — particularly the Ionic and Versa watches and the Aria 2 smart scale — make sure the device that’s running the Fitbit app is connected to Wi-Fi.
Wait, what if the device that’s running the Fitbit app doesn’t have Bluetooth? That’s a drag, but you’re not out of luck. You need to purchase Fitbit’s wireless sync dongle.
There are two ways to get started:- If you’re setting up your first Fitbit device, you should have completed the first part of the setup process.
- If you’re configuring another Fitbit device, note that you can connect to only one Bluetooth-based device at a time, so connecting to a second device will replace the original device in your account. If that’s cool with you, use the Fitbit app to launch the setup process by selecting the Dashboard tab, selecting the Account icon in the top-right corner of the app window, and then selecting Set Up a Device. In the device list displayed by the Fitbit app, select the device you’re setting up and then select a device subtype, if asked. Select Set Up (or Set Up Your Device) or, if you’re setting up a second device that will replace the original, select Switch to Device. Select I Agree when the terms and policies show up.
1. For most Fitbit devices, you first see one or more screens that explain the basic device components and charging instructions. Select Next on each screen.
After the introductory formalities, the Fitbit app uses Bluetooth to look for your Fitbit device. Make sure your Fitbit device and your app device are within 33 feet of each other. When the app locates your Fitbit device, the app displays a four-digit number of the device screen.
2. In the Fitbit app, enter the four-digit code that you see on the Fitbit device display.The Fitbit app device asks whether you want to allow the device to connect to — that is, pair with — the Fitbit app.
3. Select Pair (iOS) or Allow (Windows 10).4. For Fitbit devices that use Wi-Fi, select Next to display a list of nearby Wi-Fi networks. Select your Wi-Fi network, enter the network password, and then select Connect (iOS) or OK (Android).
At this point, the Fitbit app checks to see if your Fitbit device is using the latest software. If not, the app will prompt you to update the device:
-
- For devices connected to Wi-Fi, the update occurs over the Wi-Fi network’s internet connection.
- For all other devices, the update occurs over the Internet connection of the device running the Fitbit app. This process requires a Bluetooth connection between the devices, so make sure the devices are close to each other.
After the update is complete, the rest of the setup process consists of one or more screens that introduce you to your new Fitbit.
6. Select Next on each screen to run through introduction.

