

How to connect Fire TV Stick to your TV
Your Fire TV Stick connects to your TV’s HDMI port, which on most TVs is labeled HDMI. If your TV has multiple HDMI ports (as most modern TVs do), then the ports are usually labeled HDMI 1, HDMI 2, and so on, as shown. Newer TVs usually have all their HDMI ports on one side of the TV’s back panel, while on older TVs it’s common to have one HDMI port on the bottom of the TV’s back panel and a second HDMI port on the side of the back panel.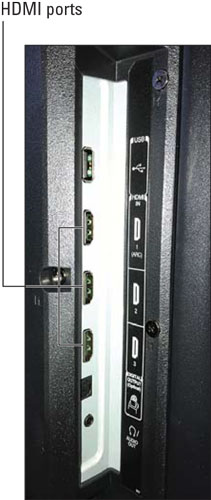 Modern TVs have all their HDMI ports together on the back panel.
The location of the HDMI port is important because the length of the Fire TV Stick (especially the longer Fire TV Stick 4K) often means that there isn’t room between a bottom HDMI port and whatever surface the TV is sitting on for the Fire TV Stick to fit. If that’s the case for you, then you have three possible solutions:
- Plug the Fire TV Stick into a side HDMI port, if you have one available.
- Mount the TV on the wall (which gives the Fire TV Stick plenty of room because there’s no longer a surface immediately under the TV).
- Use the HDMI extender cable that came with your Fire TV Stick. In this case, insert the smaller end of the extender cable into the HDMI port on your TV; then connect your Fire TV Stick to the larger end of the extender cable.
Turn on your TV and change the input source to your Fire TV Stick’s HDMI connection.
How to set up Fire TV Stick
Your Fire TV Stick comes with an Alexa Voice Remote that you use to navigate the Fire TV interface (either by pressing buttons or by using voice commands). Before proceeding with the Fire TV Stick configuration, remove the back cover of the Alexa Voice Remote, insert the two batteries that came with Fire TV Stick, and then reattach the back cover.When you tune to the Fire TV Stick HDMI port on your TV, the Fire TV Stick starts up for the first time and takes you through the following setup process:
1. When you see the Searching for Your Remote message, press the Home button on the Alexa Voice Remote.
Pressing the Home button enables the Fire TV Stick and the Alexa Voice Remote to connect (or pair) with each other.
If nothing happens when you press the Home button, you can force the Alexa Voice Remote into pairing mode by pressing and holding the Home button for ten seconds, or until you see the Alexa Voice Remote’s LED rapidly flashing amber.
2. On the Alexa Voice Remote, press the Play/Pause button.Fire TV Stick asks you to choose your language.
3. Use the Alexa Voice Remote to choose the language you want to use.For now, you use the Alexa Voice Remote to “choose” something by using the navigation ring to press Down (the bottom part of the ring), Up (the top part of the ring), Left (the left part of the ring), or Right (the right part of the ring) to highlight the item you want; then press Select (the circular area in the middle of the navigation ring).
After a few moments, Fire TV Stick displays a list of nearby Wi-Fi networks.
4. Choose your Wi-Fi network.Fire TV Stick prompts you to enter the network password.
5. Use the Alexa Voice Remote’s navigation ring to enter each character in your network password, and then choose Connect (or press Play/Pause on the remote).If your network password requires one or more uppercase letters, you can switch to uppercase characters by choosing the aA button or by pressing Menu on the Alexa Voice Remote.
Fire TV Stick connects to your network and then checks to see if there is an available update to Fire OS, the operating system that runs Fire TV Stick. If an update is available, Fire TV Stick downloads and installs the software, which can take a few minutes. Note that Fire TV Stick may restart during this process.
Eventually, Fire TV Stick asks you to sign in to your Amazon account.
6. Choose I Already Have an Amazon Account.Fire TV Stick displays the Enter Your Amazon Login ID screen.
What if you don’t have an Amazon account? No problem. Choose I Am New to Amazon; then use the Create Account screen to set up your account.
7. In the Email Address field, use the Alexa Voice Remote’s navigation ring to type your Amazon account’s email address, and then choose Next.Fire TV Stick displays the Enter Your Amazon Account Password screen.
8. In the Password field, use the Alexa Voice Remote’s navigation ring to type your Amazon account’s password (see Figure 3-7), and then choose Sign In.By default, Fire TV Stick hides the password by displaying each character as a dot. If you want to make sure you entered the password correctly, choose the Show Password button.
If you’ve enabled two-factor authentication on your Amazon account, Fire TV Stick will prompt you to enter a code to verify the sign-in. Type the code that was sent to you, and then choose the Next button.
Fire TV Stick confirms your Amazon credentials, signs in to your account, and then registers your Fire TV Stick. Fire TV Stick then asks which Amazon account you want to use.
9. Choose Continue.Fire TV Stick asks if you want to save your Wi-Fi password to Amazon. This is part of a feature that Amazon calls Wi-Fi Simple Setup, which enables other Amazon devices you own (such as Echo smart speakers) to automatically connect to your network. This feature really makes setting up those devices easier, so it’s a good idea to let Amazon save your password.
10. Choose Yes.Fire TV Stick now prompts you to enable parental controls.
11. Choose No Parental Controls.Fire TV Stick next makes sure the volume buttons on the Alexa Voice Remote are working properly. Before continuing, make sure your TV’s volume is turned up.
12. Choose Next.Fire TV Stick plays some music so that you can test the Alexa Voice Remote’s volume buttons.
13. On the Alexa Voice Remote, press the Volume Up (+) and Volume Down (–) buttons.Fire TV Stick asks if the music volume changed when you pressed the Alexa Voice Remote’s volume buttons.
If the volume didn’t change, double-check that the TV volume is turned up loud enough that you can hear the music. Also, make sure you point the Alexa Voice Remote at your TV and that the TV’s output device (if any) is turned on and connected properly.
14. Choose Yes.Fire TV Stick tells you that the Alexa Voice Remote is configured.
15. Choose OK.Fire TV Stick asks if you want to set up your streaming services.
16. Choose No Thanks.If you do want to set up your services now, choose Get Started, and then follow the onscreen prompts.
Congratulations! Your Fire TV Stick is ready for action.


